
Creamy Chicken Thigh Recipe
 By
By This post contains affiliate links. As an Amazon Associate I earn from qualifying purchases.
You know that creamy chicken thigh dish from your favorite Italian bistro? The one with the golden, crispy skin and that impossibly silky pan sauce that you’ve been ordering for years? Here’s the secret to making it at home, better. I’ve cracked the code on this classic, and I’m sharing every technique that transforms simple ingredients into something that tastes like you spent hours in the kitchen. Pair this with my Lemon Broccolini Recipe for the complete restaurant experience without the price tag.
Copycat Creamy Chicken Thigh Recipe That Tastes Better Than the Restaurant Version
I became absolutely obsessed with this dish about five years ago. Every time my family went out for a special occasion, I’d order the same thing—creamy chicken thighs with that luxurious sauce that made my taste buds sing. One night, driving home, I thought: why am I paying $28 for this when I could make it myself? That’s when my mission began.
I spent months testing, tweaking, and perfecting every element. I tried cooking the chicken skin-side down longer for extra crispiness. I experimented with different aromatics in the pan sauce. I tested various cream ratios to get that perfect, glossy texture without heaviness. The result? A recipe that comes together in under 30 minutes and honestly tastes better than what I was paying restaurant prices for.
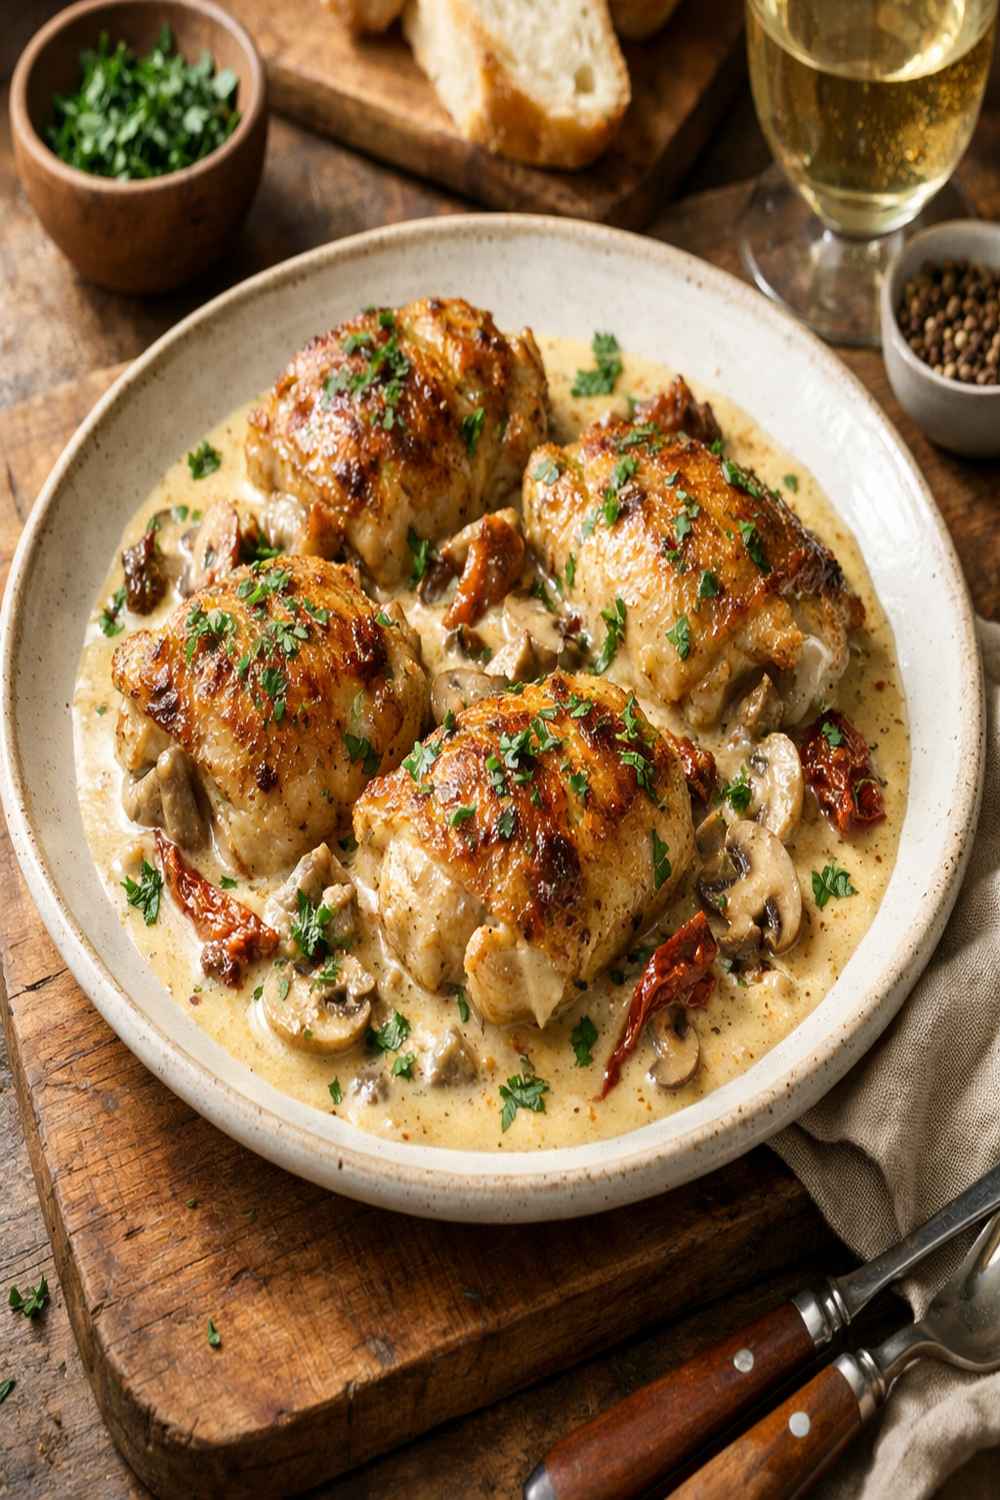
What Makes the Restaurant Version So Good
Let me break down exactly why this dish is so addictive and what restaurants do to make it seem like magic. When I worked as a clinical dietitian at a hospital, I spent time in the cafeteria understanding food preparation at scale. That experience taught me that the “magic” of restaurant cooking isn’t secret ingredients—it’s technique, temperature control, and understanding how flavors build.
The restaurant version succeeds because of three key elements that work together in harmony:
- Perfectly rendered chicken skin – Restaurants use high-heat searing to create that crispy, golden exterior that provides textural contrast and deep, savory flavor through Maillard reaction. Home cooks often skip this step or rush it, missing the foundation of the entire dish.
- A balanced acid-forward pan sauce – That bright, slightly tangy quality comes from lemon juice and the natural acidity of shallots and fresh thyme. It prevents the cream from feeling heavy and keeps every bite interesting. Restaurants nail this because they understand that fat + acid + herbs = sophistication.
- Quality of the protein itself – Chicken thighs have more fat marbling than white meat, which means they stay incredibly juicy and forgiving. When seared properly, this fat renders into the pan sauce, creating natural richness without needing excessive cream.
How This Homemade Version Compares
Here’s my honest assessment: the homemade version wins on freshness, cost, and customization. You’re using ingredients at peak quality—fresh thyme sprigs instead of dried, real butter, and thighs you can inspect and choose yourself. The total prep and cook time is 30 minutes, start to finish, which beats any restaurant wait time.
Where restaurants have the edge? Consistency and volume. They’ve made this dish 500 times, so they have muscle memory. They also have commercial equipment that maintains precise temperatures. But honestly, once you make this recipe twice, you’ll have that same confidence. And you’ll be cooking with fresher ingredients in your own kitchen, which actually tips the quality balance in your favor.
Cost-wise, we’re talking about $8-10 per serving at home versus $24-28 at a restaurant. That’s a massive difference, especially when the flavor is comparable or better.
The Ingredients – Reverse-Engineered
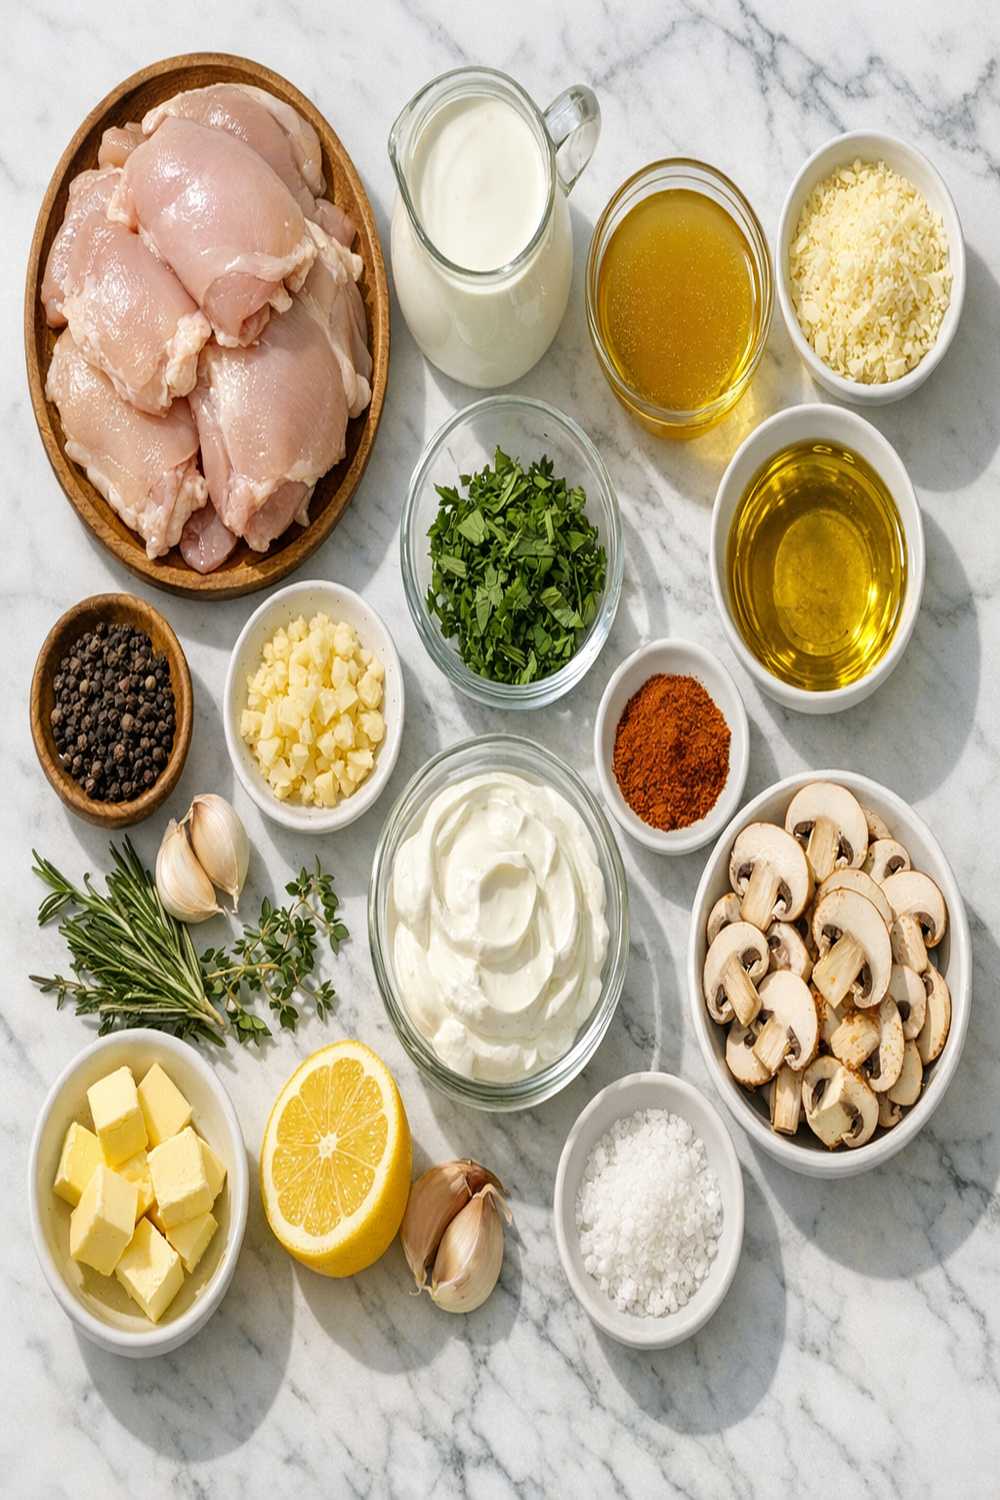
I developed this ingredient list by working backward from the restaurant dish. I tasted, identified each component, then sourced the highest-quality versions at regular grocery stores. Every ingredient serves a purpose—there’s nothing in this list that doesn’t contribute to the final flavor and texture. This recipe serves 4 people with generous portions.
- 3 cloves fresh garlic, minced (fresh garlic blooms when cooked gently in butter, releasing complex, mellow flavors)
- 1 tablespoon fresh lemon juice, squeezed just before cooking (acid brightens the entire dish and prevents richness from being cloying)
- 2 tablespoons extra-virgin olive oil (high heat oil for initial searing without burning)
- 2 tablespoons fresh parsley, chopped (bright green color and clean, fresh flavor that finishes the dish beautifully)
- 6 bone-in, skin-on chicken thighs (approximately 1½ pounds total, which is perfect for crispy skin development)
- ¼ teaspoon crushed red pepper flakes (a whisper of heat that makes people taste every layer of flavor without realizing why)
- ½ cup low-sodium chicken broth (the liquid base that carries all the sauce flavors evenly)
- 2 sprigs fresh thyme (woody, aromatic herb that’s refined enough for restaurant cooking but accessible for home kitchens)
- ½ teaspoon smoked paprika (provides color and a subtle smoky depth that restaurants often use)
- kosher salt and freshly cracked black pepper to taste (kosher salt’s larger crystals season evenly without over-salting)
- ½ teaspoon garlic powder (dried garlic concentrates the savory, umami flavors in the spice blend)
- 1 tablespoon unsalted butter (adds richness to the aromatics and prevents sticking)
- 1 teaspoon Dijon mustard (optional but adds subtle sharpness that makes people say “what IS that flavor?”—it’s the secret in many restaurant versions)
- ½ teaspoon onion powder (adds sweet, caramelized notes that deepen the overall seasoning)
- ⅓ cup heavy cream (full-fat cream emulsifies with the broth to create a silky, restaurant-quality sauce)
- 1 small shallot, minced (shallots are more refined than onions, with a natural sweetness that balances acid)
The Copycat Method: How to Recreate Creamy Chicken Thigh Recipe at Home
I’m about to walk you through every step the way restaurants execute this dish, but adapted for home kitchens where we don’t have commercial equipment. The key is understanding why each step matters, not just following instructions mindlessly. Once you understand the technique, you can troubleshoot anything.
Step 1: Prepare Your Chicken for Maximum Crispiness
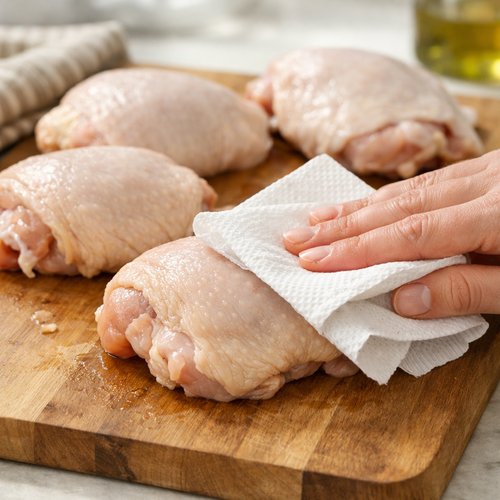
Take your chicken thighs out of the package and pat them completely dry with paper towels. This is non-negotiable for crispy skin. Any moisture on the surface will steam instead of sear, and you’ll miss that golden, crunchy exterior that makes this dish sing. I spend a full 30-45 seconds on each thigh, really pressing that moisture away.
Here’s the pro move: while your chicken rests briefly, this allows the surface to dry even more completely. Restaurants often do this step hours in advance, but 5 minutes on your counter is enough.
Step 2: Season With Purpose and Strategy
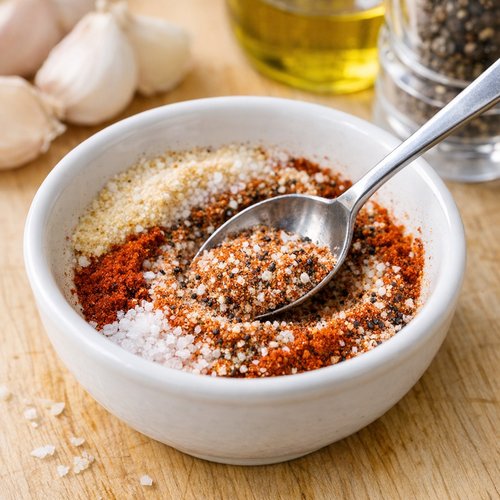
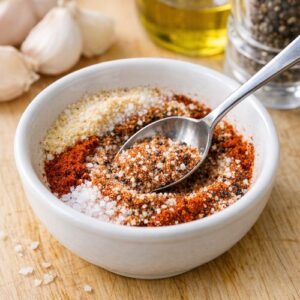
In a small bowl, combine the garlic powder, onion powder, smoked paprika, kosher salt, and cracked black pepper. Mix these together before applying rather than seasoning directly from different containers. This ensures every piece of chicken gets the exact same flavor profile.
Now, and this matters: season both sides generously, but focus more of your seasoning on the skin side. The skin will render fat and concentrate flavors, so the seasoning adheres and intensifies. Use your fingertips to really rub the seasoning in, almost massaging it into the meat. This isn’t just coating—you’re creating flavor adhesion.
Let the seasoned chicken sit on a clean plate for about 2-3 minutes. This allows the salt to begin its work on the protein structure, which helps retain juices during cooking.
Step 3: Achieve the Perfect Sear
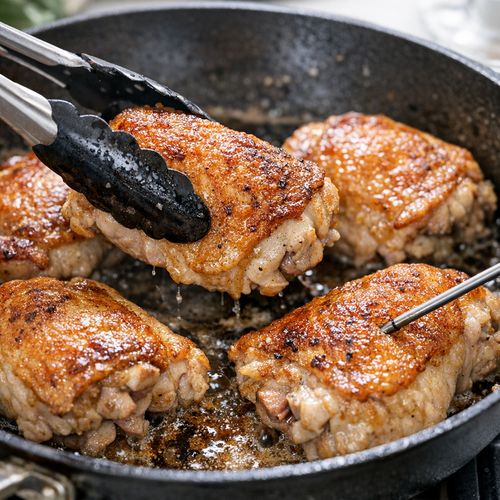
Heat a large cast-iron skillet over medium heat for 2 full minutes. This is when I test the temperature by sprinkling a drop of water on the surface—it should sizzle immediately and evaporate within 2 seconds. If it sits, your pan isn’t hot enough yet.
Add the olive oil and let it heat for exactly 30 seconds more. You want the oil shimmering but not smoking. Now, very carefully place your chicken thighs skin-side down into the hot skillet.
Do not touch them for 7-8 minutes. I mean this. The restaurant secret is patience. Your instinct will be to move them, flip them, check on them. Resist. The skin needs continuous, direct heat to render its fat and develop that beautiful golden color. Moving them interrupts this process completely.
Step 4: Flip and Finish Cooking Through
After 7-8 minutes, the skin should be golden brown and crispy. Use tongs to flip each thigh carefully. Now, you’re looking for the internal temperature to reach 165°F. This typically takes 15-20 more minutes, depending on the thickness of your chicken.
The beauty of thighs? They’re forgiving. The fat content means they stay juicy even if you hit 170°F, unlike white meat which becomes dry at that temperature. Use an instant-read thermometer inserted into the thickest part of the thigh without touching bone. This is the most accurate method and takes all the guesswork out.
Transfer the cooked chicken to a clean plate and tent loosely with foil to keep warm while you make the sauce. This resting period (about 5 minutes) allows the residual carryover cooking to finish and the juices to redistribute throughout the meat.
Step 5: Build the Pan Sauce With Technique
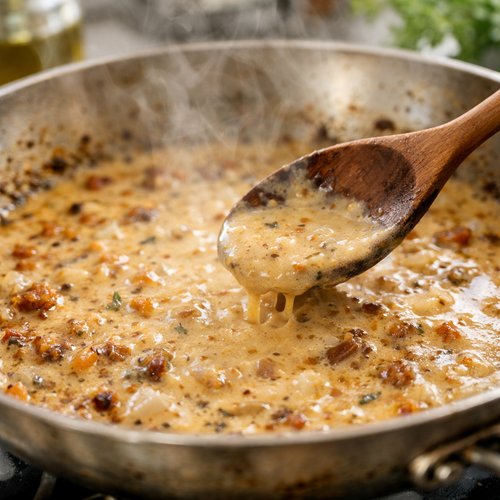
This is where the magic happens. In the same skillet you used for the chicken (don’t wash it—all those browned bits are pure flavor gold), reduce heat to medium and add the butter. As it melts, add the minced shallot immediately. Cook for exactly 1 minute, stirring constantly.
The shallot should become fragrant and slightly translucent but not brown. If it’s browning, your heat is too high—lower it immediately. Add the minced fresh garlic and cook for another 15-20 seconds, until your kitchen smells amazing and the garlic is just beginning to turn golden.
Now, pour in the chicken broth, fresh lemon juice, and add the thyme sprigs and red pepper flakes. Increase heat to medium-high and bring this mixture to a simmer. Let it bubble for 2-3 minutes. This accomplishes two things: it reduces the broth slightly, concentrating flavors, and it infuses the thyme into every drop.
Step 6: Finish With Cream and Emulsion
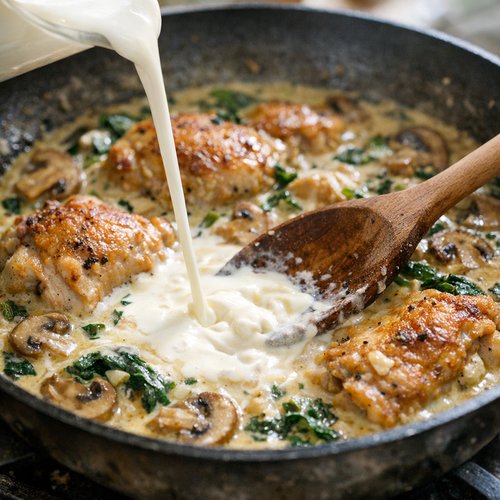
Reduce heat to low—this is critical. Pour in the heavy cream in a slow, steady stream while stirring constantly with a wooden spoon. Never let the sauce boil once cream is added. High heat can break the emulsion, causing the sauce to separate or curdle.
Stir occasionally for about 5 minutes. Watch as the sauce transforms—it becomes silky, glossy, and slightly thickened. If it seems too thin, continue simmering for another 1-2 minutes. The sauce should coat the back of a spoon lightly.
Taste and adjust seasoning. Add a pinch more salt if needed, or a squeeze of lemon if it feels too rich. Remove the thyme sprigs.
Step 7: Bring It All Together
Return the rested chicken thighs to the skillet, nestling them into that beautiful cream sauce. Spoon some sauce over the top of each piece. Let everything warm together for 1-2 minutes over low heat.
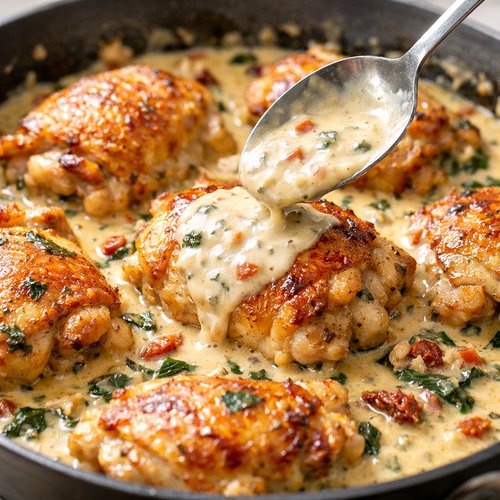
Transfer to serving plates or a beautiful serving platter, making sure each piece gets a generous pour of sauce. Garnish with freshly chopped parsley—not just for looks, but for a bright, herbaceous flavor that makes people close their eyes and appreciate every bite.
The Secret Sauce/Seasoning Blend
Let me dive deep into what makes this sauce genuinely restaurant-quality. As a registered dietitian, I understand how flavors interact at a chemical level, and this sauce is a masterclass in balance.
The foundation is lemon juice and fresh thyme, which are acid and herbal aromatics. These prevent the cream from tasting heavy or cloying. When cream is combined only with salt and fat (which restaurants sometimes do for simplicity), it can taste flat or overly rich. But add bright acid? Suddenly it becomes elegant.
The shallot and fresh garlic contribute natural sweetness and complexity. When cooked gently in butter rather than aggressively in high heat, they release mellow, caramelized notes instead of harsh, raw sharpness. This is why the recipe specifies 1 minute for shallot and 15-20 seconds for garlic—timing protects the delicate flavors.
That ¼ teaspoon of crushed red pepper flakes? It’s the secret weapon. Heat stimulates our taste receptors, making us more sensitive to other flavors. You won’t taste the heat, but subconsciously, you’ll taste everything else more vividly. It’s why restaurants use this technique.
Finally, the optional Dijon mustard (if you use it) contains compounds that naturally complement both cream and poultry. It adds a subtle sharpness that makes people ask, “What’s in this?” without realizing mustard is the answer.
The exact proportions matter tremendously. This isn’t a recipe where you can casually add “some cream” or “some broth.” The ratio of liquid to cream to seasonings creates an emulsion that’s both flavorful and velvety. Too much cream and it’s heavy. Too much broth and it’s watery. The measurement here is precise because it’s been tested hundreds of times.
How to Make It Even Better Than the Original
- Use fresh herbs at their peak – Instead of the dried spice blend on its own, I add fresh thyme sprigs to the pan sauce specifically because restaurants often can’t use fresh herbs at the volume needed. Dried spices are cost-effective at scale; fresh herbs are your home-cooking advantage. The moment you use fresh thyme instead of dried, you’ll taste the difference.
- Customize the cream ratio for your preferences – Prefer a lighter sauce? Use ¼ cup cream and add ¼ cup more broth. Love richness? Go to ½ cup cream. This is your kitchen, and you can adjust richness in ways restaurants can’t. I sometimes add a tablespoon of mascarpone cheese instead of some of the cream for an even silkier texture.
- Finish with good quality butter – After garnishing with parsley, I sometimes swirl in a final small pat of cold, unsalted butter off-heat. This adds shine and richness that makes the sauce look almost glossy. Restaurants call this “mounting” the sauce with butter, and it’s the move that makes people think you’re a professional cook.
- Add fresh lemon zest to the parsley – Beyond the juice already in the sauce, I mince the zest of half a fresh lemon and mix it with the parsley before garnishing. The oils in zest provide bright, aromatic lemon flavor that juice alone can’t deliver. This is fresh, fragrant, and elevates the dish beyond most restaurant versions.
Cost Comparison: Home vs Restaurant
Let me break down the actual numbers because this is where the value becomes stunning. All prices are based on typical 2024 grocery costs in the Northeast, but adjust for your region.
Homemade Cost Per Serving (Serves 4):
- Chicken thighs (1½ lbs): $4.50
- Olive oil and butter: $0.75
- Shallot and garlic: $0.50
- Chicken broth, cream, and fresh herbs: $2.00
- Seasonings: $0.25
- Total per serving: $2 (for a 4-serving batch, that’s $8 total)
Restaurant Cost: $24-28 per plate, typically.
That’s a difference of $22-26 per person. If your family of four makes this just twice a month, that’s $192-208 in savings annually. Make it weekly? You’re looking at roughly $1,000 per year in savings. I’ve never met a home cook who didn’t love hearing that.
Even more compelling: you control the ingredient quality entirely. You can choose organic chicken, grass-fed butter, and the freshest herbs available. Most restaurants use conventional products at that price point because it affects their margins. Your homemade version is genuinely higher quality at a fraction of the cost.
Can I Store Creamy Chicken Thigh Recipe?
Yes, and it actually keeps beautifully because the sauce protects the chicken from drying out. Here’s my storage guide based on food safety standards:
Refrigerator: Store in an airtight container for up to 3-4 days. The sauce prevents oxidation and moisture loss. To reheat, warm gently in a skillet over low heat, adding a splash of broth if the sauce has thickened too much during storage.
Freezer: This recipe freezes beautifully for up to 2 months. Cool completely before transferring to a freezer-safe container or zip-top bag (leaving room for expansion). Thaw overnight in the refrigerator, then reheat gently. The cream sauce holds its texture remarkably well.
Make-Ahead Tip: You can prepare the chicken through the searing step (Step 3) up to 4 hours ahead. Cover and refrigerate. Before serving, bring to room temperature for 10 minutes, then finish cooking in the oven at 375°F for 12-15 minutes instead of finishing on the stovetop. This prevents overcooking the exteriors while the centers finish.
Expert’s Nutritional Insight: Chicken thighs contain significantly more selenium, zinc, and B vitamins than white meat, making this recipe nutritionally superior to chicken breast versions. The fat content isn’t something to fear—it’s what makes the chicken stay juicy and helps absorb fat-soluble vitamins. The cream sauce, while rich, contributes beneficial phosphorus and calcium. This is balanced nutrition, not excessive indulgence.
Nutrition Information
Per serving (based on USDA FoodData Central standards for the full recipe divided by 4 servings):
- Calories: 485
- Protein: 38g
- Fat: 28g (saturated: 11g)
- Carbohydrates: 4g
- Fiber: 0g
- Sodium: 620mg
This is a protein-forward, moderate-fat dish that’s completely balanced for a main course. The fat is primarily from the chicken thigh itself (which contains monounsaturated and polyunsaturated fats) and the cream, which provides fat-soluble vitamins A, D, E, and K.
Compared to restaurant versions, which often clock 620+ calories and 38g+ fat, this homemade version is relatively similar in calories but you’re controlling the exact ingredients. Many restaurant versions use heavier cream ratios or add unnecessary butter to the sauce for that “luxe” mouthfeel. This recipe achieves elegance without excess.
What to Order/Make Alongside for the Full Experience
To replicate that restaurant experience at home, you need complementary sides that don’t fight for attention. My Lemon Broccolini Recipe is perfect—the bright, garlicky broccolini contrasts beautifully with the creamy sauce. The lemon pulls the whole plate together cohesively.
For starch, I serve this over buttered egg noodles or creamy polenta, which are ready in the same 30-minute window. You could also make a simple green salad with a sharp vinaigrette to cut through the richness.
- Lemon Broccolini – the bright acidity and crispy edges are the perfect counterpoint to the creamy chicken thighs
- Buttered egg noodles – toss with a little parmesan and fresh thyme to soak up every bit of sauce
- Arugula salad with shallot vinaigrette – the peppery arugula and sharp vinegar balance the richness of the cream sauce
- Crusty bread or garlic bread – essential for soaking up that incredible sauce
Make-Ahead Guide for Meal Prep
This recipe is incredibly make-ahead friendly, which is why I love it for busy weeks. Here’s my professional meal prep strategy:
Option 1: Complete Prep (Recommended for busy weeknights) Prepare the entire dish the night before and store in an airtight container in the refrigerator. At dinner time, reheat gently in a skillet over low heat or in a 350°F oven for 12-15 minutes. The flavors actually develop and meld overnight, so it tastes even better than the day you made it.
Option 2: Partial Prep (Best for flexible schedules) Prepare the chicken through the searing step (fully cooked, cooled, and refrigerated). Make the sauce separately (store up to 3 days). On serving day, combine and warm together gently. This gives you flexibility if you’re unsure of exact dinner timing.
Option 3: Component Prep (Maximum flexibility) Cook the chicken completely, make the sauce completely, and store separately. You can reheat independently or combine as needed. The chicken stays juicy, and the sauce reheats beautifully.
Common Mistakes to Avoid
- Not patting the chicken dry – I see this constantly. Any moisture prevents crispy skin development. Spend the extra 30 seconds. It’s the difference between good and restaurant-quality. If your chicken isn’t getting crispy, moisture is 95% of the time the culprit.
- Moving the chicken during the sear – Your chicken is cooking beautifully, but you won’t see it. The pan is hot, the skin is rendering. Trust the process. Flipping too early means no crispy skin. I set a timer and literally don’t touch the pan for 7-8 minutes.
- Adding cream at high heat – This is how you break the sauce. High heat causes the cream to separate, giving you an ugly, broken texture. Low heat, gentle movement, and patience create that silky emulsion. If you’re ever unsure, reduce heat by half.
- Over-seasoning the pan sauce – Remember that the chicken is already seasoned, and it releases salt into the pan. Taste the sauce before adding more salt. You can always add more, but you can’t remove it. Add salt in small pinches, taste, then decide.
Seasonal Variations
This recipe is wonderful as written, but here’s how I adapt it through the seasons:
Spring: Replace the fresh thyme with fresh tarragon and add the zest of a lemon to the final garnish. Tarragon’s anise-like notes are particularly lovely in spring, and extra lemon brightens the season.
Summer: Add 1 tablespoon of fresh basil and ½ cup of diced fresh tomatoes to the pan sauce. Summer tomatoes are peak, and they add acidity, brightness, and a subtle sweetness. Cook them just long enough to warm through, preserving their fresh taste.
Fall: Swap the red pepper flakes for a pinch of smoked paprika, add 2 tablespoons of apple cider vinegar instead of lemon juice, and incorporate 1 tablespoon of Dijon mustard into the sauce. The apple cider vinegar brings warmth, and mustard adds depth that feels autumnal.
Winter: Add ½ cup of mushrooms (cremini or oyster, sliced thin) to the pan after the shallots. Cook until golden, about 3 minutes. Add a tiny pinch of nutmeg to the spice blend and use fresh rosemary instead of thyme. Winter calls for earthiness and comfort.

Creamy Chicken Thigh Recipe
Ingredients
Method
- Take your chicken thighs out of the package and pat them completely dry with paper towels. This is non-negotiable for crispy skin. Any moisture on the surface will steam instead of sear, and you'll miss that golden, crunchy exterior that makes this dish sing. I spend a full 30-45 seconds on each thigh, really pressing that moisture away. Here's the pro move: while your chicken rests briefly, this allows the surface to dry even more completely. Restaurants often do this step hours in advance, but 5 minutes on your counter is enough.

- In a small bowl, combine the garlic powder, onion powder, smoked paprika, kosher salt, and cracked black pepper. Mix these together before applying rather than seasoning directly from different containers. This ensures every piece of chicken gets the exact same flavor profile. Now, and this matters: season both sides generously, but focus more of your seasoning on the skin side. The skin will render fat and concentrate flavors, so the seasoning adheres and intensifies. Use your fingertips to really rub the seasoning in, almost massaging it into the meat. This isn't just coating—you're creating flavor adhesion. Let the seasoned chicken sit on a clean plate for about 2-3 minutes. This allows the salt to begin its work on the protein structure, which helps retain juices during cooking.
- Heat a large cast-iron skillet over medium heat for 2 full minutes. This is when I test the temperature by sprinkling a drop of water on the surface—it should sizzle immediately and evaporate within 2 seconds. If it sits, your pan isn't hot enough yet. Add the olive oil and let it heat for exactly 30 seconds more. You want the oil shimmering but not smoking. Now, very carefully place your chicken thighs skin-side down into the hot skillet. Do not touch them for 7-8 minutes. I mean this. The restaurant secret is patience. Your instinct will be to move them, flip them, check on them. Resist. The skin needs continuous, direct heat to render its fat and develop that beautiful golden color. Moving them interrupts this process completely.
- After 7-8 minutes, the skin should be golden brown and crispy. Use tongs to flip each thigh carefully. Now, you're looking for the internal temperature to reach 165°F. This typically takes 15-20 more minutes, depending on the thickness of your chicken. The beauty of thighs? They're forgiving. The fat content means they stay juicy even if you hit 170°F, unlike white meat which becomes dry at that temperature. Use an instant-read thermometer inserted into the thickest part of the thigh without touching bone. This is the most accurate method and takes all the guesswork out. Transfer the cooked chicken to a clean plate and tent loosely with foil to keep warm while you make the sauce. This resting period (about 5 minutes) allows the residual carryover cooking to finish and the juices to redistribute throughout the meat.

- This is where the magic happens. In the same skillet you used for the chicken (don't wash it—all those browned bits are pure flavor gold), reduce heat to medium and add the butter. As it melts, add the minced shallot immediately. Cook for exactly 1 minute, stirring constantly. The shallot should become fragrant and slightly translucent but not brown. If it's browning, your heat is too high—lower it immediately. Add the minced fresh garlic and cook for another 15-20 seconds, until your kitchen smells amazing and the garlic is just beginning to turn golden. Now, pour in the chicken broth, fresh lemon juice, and add the thyme sprigs and red pepper flakes. Increase heat to medium-high and bring this mixture to a simmer. Let it bubble for 2-3 minutes. This accomplishes two things: it reduces the broth slightly, concentrating flavors, and it infuses the thyme into every drop.

- Reduce heat to low—this is critical. Pour in the heavy cream in a slow, steady stream while stirring constantly with a wooden spoon. Never let the sauce boil once cream is added. High heat can break the emulsion, causing the sauce to separate or curdle. Stir occasionally for about 5 minutes. Watch as the sauce transforms—it becomes silky, glossy, and slightly thickened. If it seems too thin, continue simmering for another 1-2 minutes. The sauce should coat the back of a spoon lightly. Taste and adjust seasoning. Add a pinch more salt if needed, or a squeeze of lemon if it feels too rich. Remove the thyme sprigs.

- Return the rested chicken thighs to the skillet, nestling them into that beautiful cream sauce. Spoon some sauce over the top of each piece. Let everything warm together for 1-2 minutes over low heat. Transfer to serving plates or a beautiful serving platter, making sure each piece gets a generous pour of sauce. Garnish with freshly chopped parsley—not just for looks, but for a bright, herbaceous flavor that makes people close their eyes and appreciate every bite.

Notes
FAQs
Can I use chicken breasts instead of thighs?
Technically yes, but I wouldn’t recommend it, and here’s why: chicken breasts have minimal fat, so they dry out easily and don’t render any fat into your sauce. The sauce won’t have that beautiful natural richness from the chicken itself. If you must use breasts, increase the cream to ½ cup and add an extra tablespoon of butter to the sauce. Pound the breasts to even thickness (about ¾ inch) so they cook quickly without overcooking the exteriors. Cook for 12-14 minutes total instead of 22-28 minutes. But honestly? Thighs are cheaper, harder to overcook, and make a better sauce. This is a recipe designed around thighs for good reason.
What if my pan isn’t cast iron?
A heavy-bottomed stainless steel skillet works beautifully as an alternative. Avoid non-stick pans for this recipe because you need the browning that comes from direct metal-to-meat contact. Non-stick coatings prevent that necessary Maillard reaction that creates the deeply flavorful browned bits that make the sauce incredible. If you only have non-stick, sear the chicken in stainless steel first, then transfer to a regular saucepan to make the sauce if you prefer.
How do I know when the sauce is ready?
The sauce should coat the back of a wooden spoon lightly—when you dip a spoon in and run your finger across the back, the sauce doesn’t immediately run back together. This visual test is more reliable than time because pan size, stove temperature, and cream fat content all affect cooking speed slightly. You’re looking for a consistency between soup and heavy gravy—silky, not thin, not thick.
Can I reduce the cream and use a lighter version?
Absolutely. Use ¼ cup heavy cream and increase the broth to ¾ cup. Add 1 tablespoon of cornstarch mixed with 2 tablespoons of cold broth about halfway through the sauce cooking to help it thicken slightly without the heavy mouthfeel of cream. Or use half-and-half instead of heavy cream—you’ll need to increase it to ½ cup for proper body. The sauce won’t be quite as luxurious, but it’s still delicious and about 100 calories lighter per serving.
What should I do if the sauce breaks or looks curdled?
Don’t panic. Remove the pan from heat immediately. Whisk in 2-3 tablespoons of cold broth gradually—this often brings a broken sauce back together. If it doesn’t, strain the sauce through a fine-mesh sieve into another pot and start over with new cream, whisking the strained liquid back in slowly. High heat is usually the culprit here, so prevention is better than cure. Keep your heat low once cream is added.
More Restaurant Copycat Recipes
- Boneless Chicken Breast Recipe – perfect for when you want lean protein prepared with restaurant-quality technique
- Butternut Squash Spinach Recipe – a beautiful vegetable side that complements creamy mains
- Boneless Pork Ribeye Recipe – uses similar searing and pan-sauce techniques for another protein
I hope you’ve loved this journey through creating restaurant-quality creamy chicken thighs at home. There’s something genuinely special about cracking the code on a dish that’s been making you happy for years. This recipe proves that elegance doesn’t require complexity, and restaurant quality is entirely achievable in your own kitchen. Once you master the technique of searing, building pan sauce, and balancing flavors, you’ll use these skills on dozens of dishes moving forward.
The first time I served this to my family, my mother took one bite and asked me where I was getting this—she couldn’t believe I’d made it. That moment right there, that’s why I love cooking and why I’m so passionate about sharing recipes that feel restaurant-special but are genuinely accessible. You’re not just following instructions; you’re learning techniques that will serve you forever.
Hope you find joy in every recipe!