

Ingredients
Method
Step 1: Whip Your Cream to Stiff Peaks (The Foundation)
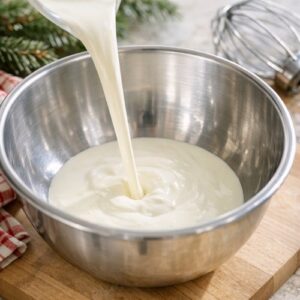
- Pour your cold heavy cream into a clean mixing bowl. This matters more than you might think—any residual fat or moisture in the bowl will interfere with whipping. Start beating on medium speed with an electric mixer. You'll see the cream transform from liquid to soft, billowing clouds. After about 1-2 minutes of beating, you'll reach soft peaks—the cream holds its shape briefly but then collapses. Keep going. Don't stop here. Continue beating on medium speed for another 1-2 minutes until you reach stiff peaks. At this point, when you lift your whisk, the cream stands straight up like little mountains. The texture is thick, almost like clouds you could touch. This is your target. Why does this matter? Stiff peaks mean maximum air incorporation, which means your tiramisu will have the light, pillowy texture that makes it special. You can also use a stand mixer—just keep an eye on it because over-whipping creates butter, and nobody wants butter tiramisu.
Step 2: Add Sugar and Vanilla While Whipping
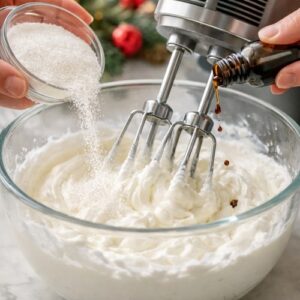
- While the mixer is still running, slowly add your sugar to the whipped cream. Don't dump it all at once. A slow, steady stream lets the sugar dissolve completely without deflating the cream. Add your vanilla extract at the same time. The granules dissolve into the aerated liquid, creating sweetness without any grittiness. Continue beating for another 30 seconds until the sugar is fully incorporated and the mixture is glossy and smooth. You should see the texture change slightly—it becomes more stable and less likely to weep liquid over time. This is stabilized whipped cream, and it's the workhorse of elegant desserts.
Step 3: Room Temperature Mascarpone Is Non-Negotiable
- Transfer your whipped cream to a larger bowl (you need room to work). Now comes the critical part: add your room-temperature mascarpone. Cold mascarpone will create lumps. Room-temperature mascarpone will be silky and pliable. If yours is cold, let it sit on the counter for 10-15 minutes before you fold it in. Don't use an electric mixer here. Grab a rubber spatula and get ready for the most important technique of this entire recipe.
Step 4: The Fold - Where Magic Happens
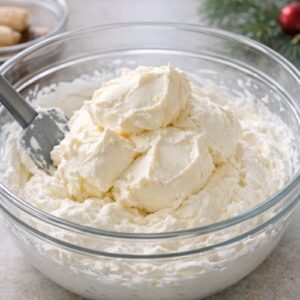
- Using a rubber spatula, cut down through the center of the cream at 12 o'clock. Sweep the spatula along the bottom of the bowl, then flip that bottom portion up and over the top, folding the mascarpone into the cream. Rotate the bowl slightly and repeat. Cut down, sweep the bottom, fold over the top. Rotate. Repeat. You're doing this deliberately and slowly. Each fold takes about one second. Don't rush this. Keep folding until you see streaks of mascarpone blend with the cream, but stop before it's completely homogeneous. You want some marbling—visual proof that you've preserved the air in your whipped cream. After about 15-20 folds, it should come together beautifully. You've just created an emulsified cream that's light, stable, and elegant. Set this mixture aside. You've done something incredible here, and you probably didn't even realize how much skill this took.
Step 5: Prepare Your Soaking Liquid
- Pour your cold espresso into a shallow bowl and add your coffee-flavored liqueur if you're using it. Stir to combine. The cold temperature is essential—warm coffee will melt your mascarpone mixture before you get the layers assembled, and that's a mistake you can avoid with this one simple step.
Step 6: The Dip - Speed and Intention
- Here's the thing about dipping ladyfingers: you want them wet but not soaked. Quickly dip each ladyfinger into the coffee mixture—I'm talking 1-2 seconds per side. In, flip, out. The ladyfinger should be moistened but still have structure. If you soak them for too long, they'll turn to mush and your tiramisu will be mushy instead of structured. As you dip each ladyfinger, arrange them in a single layer on the bottom of an 8x8-inch baking dish. You'll probably fit about 12-16 ladyfingers depending on their size. Don't overlap them too much—you want them snug but not squished.

Step 7: First Layer of Cream
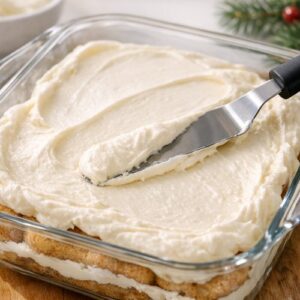
- Using an offset spatula or regular spatula, spread exactly half of your mascarpone cream over the ladyfingers in an even layer. Get into the corners, smooth it out, create an even surface. This is your foundation layer, and it should be about ½ inch thick.
Step 8: Second Layer of Dipped Ladyfingers
- Dip another batch of ladyfingers using the same quick method—1-2 seconds per side. Arrange them in a single layer over your cream layer. You're creating a sandwich structure here, and each layer matters for the final texture.
Step 9: Top Layer of Cream
- Spread the remaining cream over the top ladyfinger layer, creating a smooth, even surface. This final layer gets the cocoa powder, so make it beautiful.
Step 10: The Cocoa Powder Dust - The Grand Finale
- Place your cocoa powder in a fine mesh strainer. Hold it about 6 inches above your tiramisu and gently tap the bottom of the strainer, allowing a fine, even dusting of cocoa powder to fall over the entire surface. Don't go crazy—you want a visible but not overwhelming coating. Some people add chocolate shavings here too, and honestly, that's the move. Cover your tiramisu loosely with plastic wrap and refrigerate for at least 3-4 hours, or preferably overnight. This resting time allows the flavors to meld, the coffee to distribute throughout, and the structure to set. Tiramisu is actually better the next day—the flavors deepen and the texture becomes even more unified.
Notes
- Lumpy mascarpone that won't fold smoothly - Your mascarpone was cold when you folded it. Cold mascarpone is stiff and creates little clumps that resist folding. Fix: Let mascarpone sit on the counter for 15 minutes before folding. If you make this mistake, you can microwave the finished cream for 5-10 seconds and re-fold gently, though prevention is always better.
- Heavy, dense tiramisu that doesn't melt on your tongue - You either over-mixed your cream when folding (losing air bubbles) or you didn't whip the cream to stiff peaks initially. Fix: Be more intentional with your folding—each fold should be one deliberate motion, and stop as soon as the mixture is combined. Next time, whip your cream longer to ensure maximum volume.
- Mushy, structureless tiramisu that falls apart - You soaked your ladyfingers too long, or your coffee was too warm. Fix: Limit dipping to 1-2 seconds maximum per side. Chill your espresso completely before assembly. You can also store your tiramisu longer (overnight or even 2 days) to let the structure set more firmly.
- Grainy cream mixture that tastes crystalline - Your sugar wasn't fully incorporated when you were whipping. Fix: Always add sugar slowly while beating, and continue beating for at least 30 seconds after all sugar is added to ensure complete dissolution.