
Christmas Tiramisu Recipe
 By
By This post contains affiliate links. As an Amazon Associate I earn from qualifying purchases.
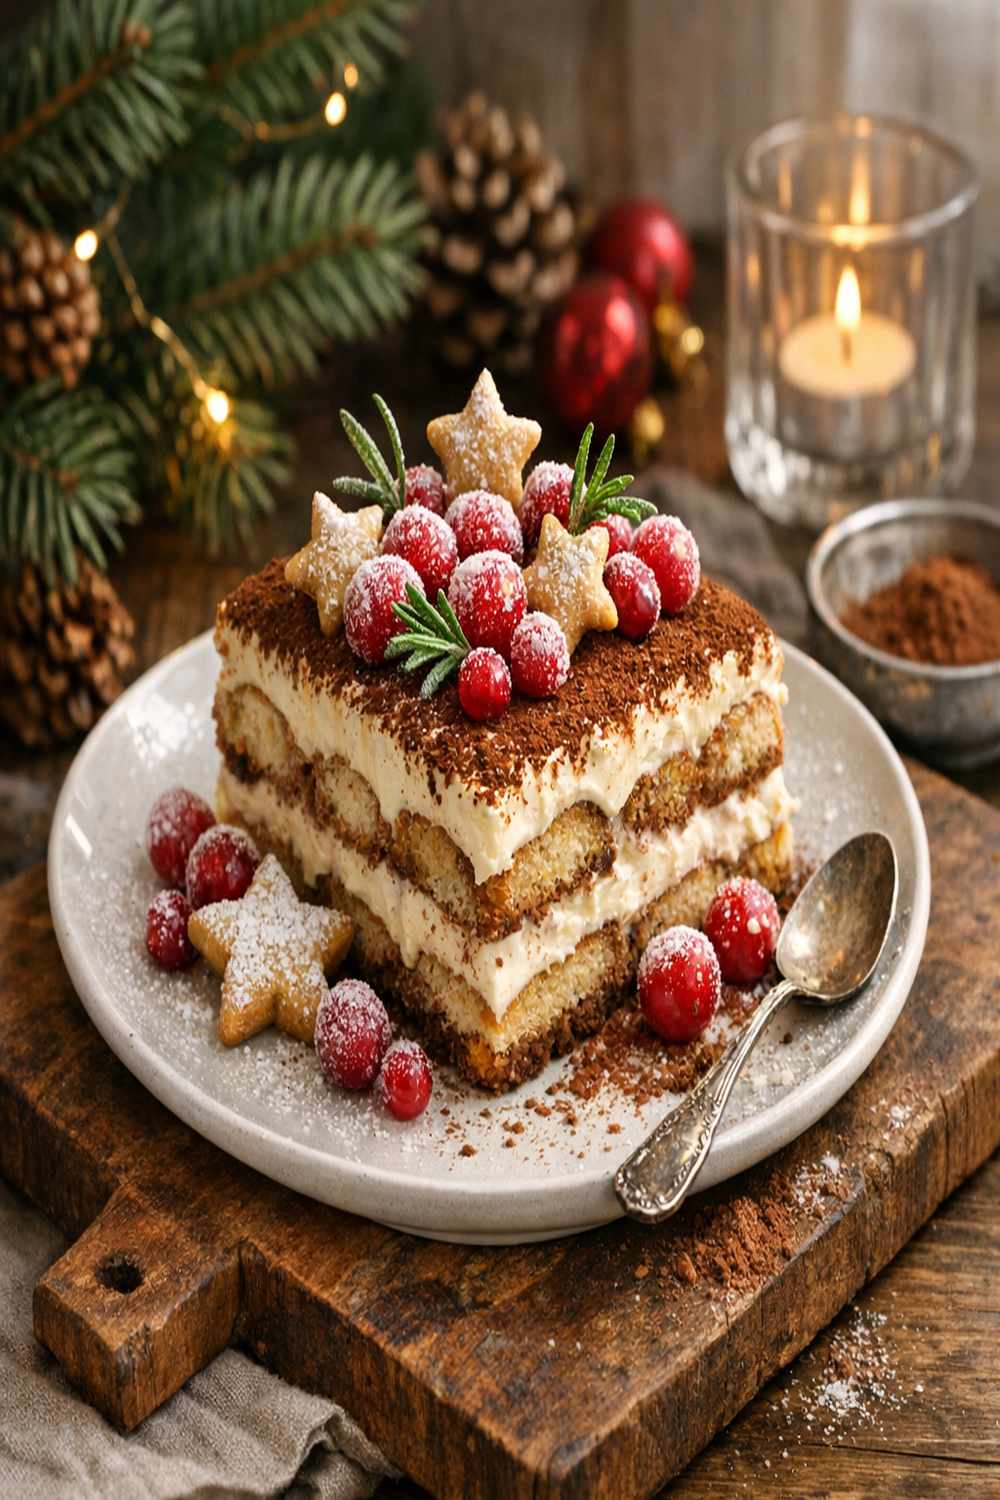
Learning to make Christmas Tiramisu isn’t just about this stunning dessert—it’s about mastering a technique that unlocks dozens of other recipes in your kitchen. When I first discovered the magic of creating silky, emulsified cream layers, everything changed. Suddenly, I understood how to make elegant desserts that look restaurant-quality but come together faster than you’d think. This technique—the art of folding whipped cream into mascarpone for perfect, cloud-like layers—is the foundation for mousses, parfaits, and so many showstopper desserts that’ll make your family think you spent hours in the kitchen.
Master the Technique Behind Christmas Tiramisu (And Never Struggle With Elegant Desserts Again)
I’ll never forget the Christmas Eve when my grandmother taught me how to fold cream into mascarpone. I was standing in her tiny kitchen in New Jersey, watching her hands move with such intention—she wasn’t stirring, she was folding, coaxing the two components together like they were old friends reuniting. “Natasha,” she said, “you’re not mixing. You’re marrying flavors.” That moment clicked something in my brain. I realized that the difference between a heavy, dense tiramisu and one that melts on your tongue isn’t fancy ingredients—it’s understanding how to handle delicate creams. That night, I made my first tiramisu, and when my family’s faces lit up after that first bite, I knew I’d learned something bigger than just a recipe.
As a registered dietitian, I’ve spent years understanding how ingredients interact at a molecular level, but this technique taught me that cooking is also about intuition and respect for what each component brings to the table. The folding technique isn’t complicated—it’s actually the opposite. It’s simple, deliberate, and transforms ordinary ingredients into something extraordinary.
The Core Technique Explained
The heart of this Christmas Tiramisu is folding—specifically, folding whipped cream into mascarpone cheese to create an emulsified, airy cream that holds its structure while staying light and pillowy. Let me break down what’s actually happening here from a food science perspective.
When you whip cream, you’re incorporating air into the fat molecules, creating millions of tiny bubbles. When you whip cream to stiff peaks, these bubbles are stabilized by the fat surrounding them. Mascarpone cheese is already rich in fat and has a smooth, creamy texture. When you fold these two together, you’re not trying to blend them completely—that would deflate all the air you just worked to incorporate. Instead, you’re gently combining them so the air pockets stay intact while the mascarpone adds richness and structure.
The folding motion is critical. You use a spatula to cut down through the center of the bowl, sweep along the bottom, then flip the bottom portion up and over the top. You rotate the bowl slightly and repeat. This motion keeps the whipped cream’s volume while distributing the mascarpone evenly. It’s the opposite of stirring or beating—it’s gentle, intentional, and respectful of the work you’ve already done.
This technique creates an emulsion without the need for eggs or complicated chemistry. It’s a mechanical emulsion where air bubbles stabilize the mixture, making it perfect for tiramisu, zabaglione, mousses, and any dessert that needs cloud-like texture. Understanding this principle changes how you approach dozens of desserts.
What This Technique Unlocks
Once you master folding whipped cream into mascarpone, you’ll suddenly understand how to make so many elegant desserts that seem intimidating but are actually quite simple. This technique is the gateway to becoming confident in the kitchen:
- Classic Italian Zabaglione – uses the same folding principle with whipped egg whites and cream
- Lemon Mousse Parfaits – applies this exact technique to create airy, refreshing layers
- Chocolate Tiramisu Variations – teaches you how to fold different flavorings into cream bases
- Strawberry Shortcake Filling – uses the same cream technique for fluffy, stable filling
- Peppermint Cream Desserts – demonstrates how to fold in extracts and flavorings without deflating
- No-Bake Cheesecake Mousse – combines cream cheese and whipped cream using this exact method
The Ingredients – Chosen to Teach the Technique
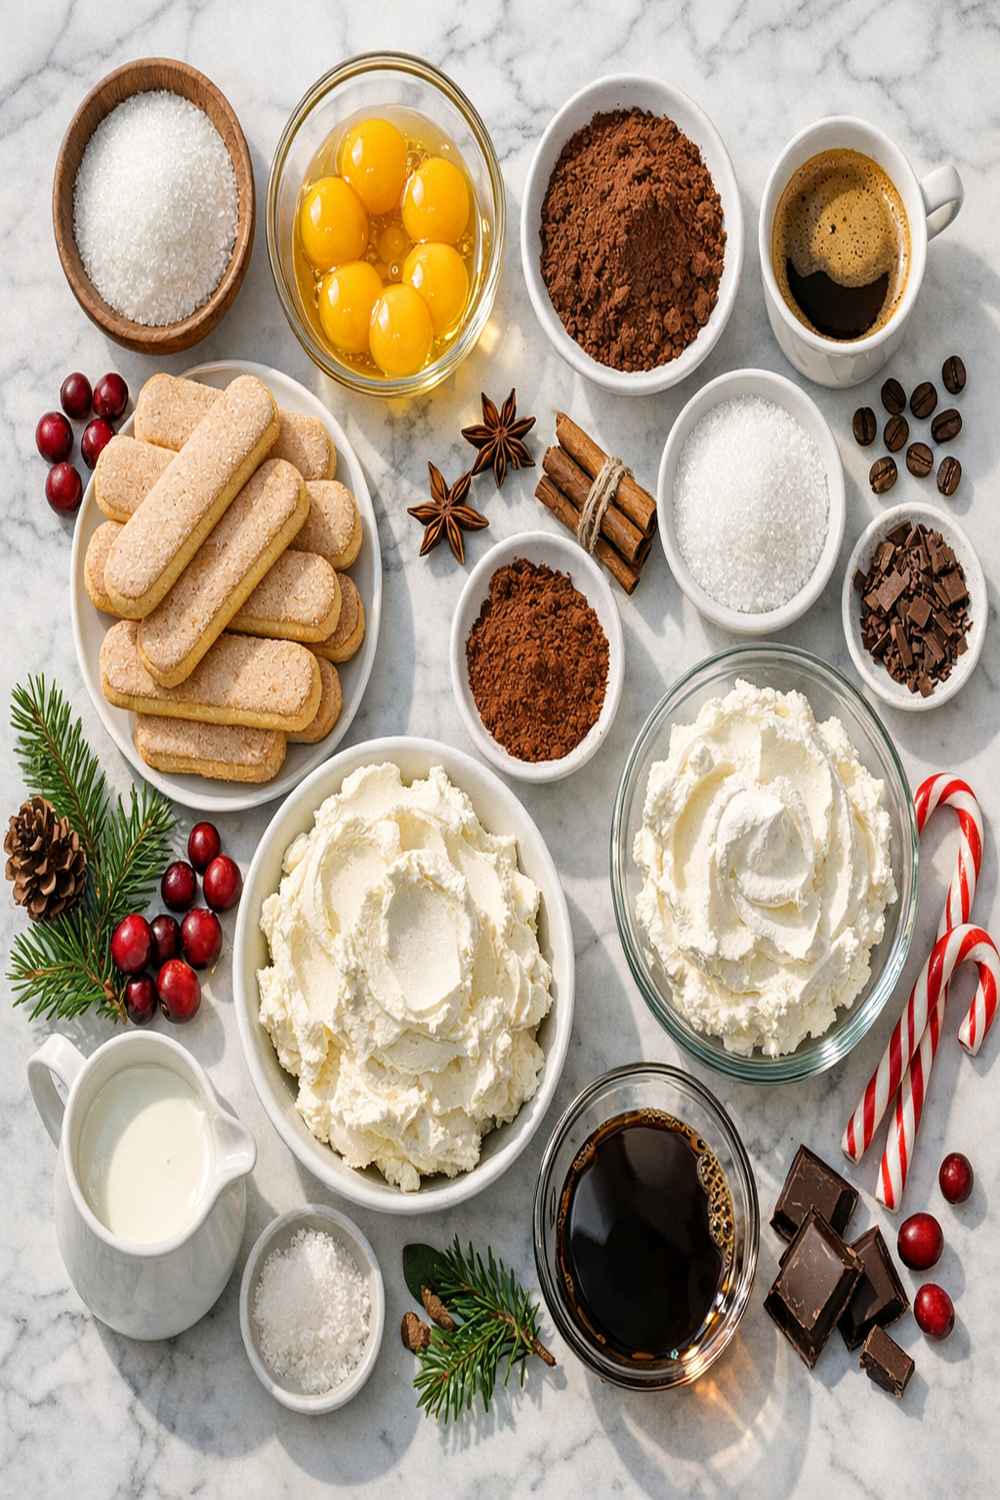
I’ve carefully chosen each ingredient in this Christmas Tiramisu to teach you something important about how they interact. Every single one serves a purpose in demonstrating the folding technique and how to build layers with confidence. These aren’t just ingredients—they’re your teachers.
For the Cream Layers
- 1½ cups heavy whipping cream (cold temperature essential for proper whipping and air incorporation)
- ⅓ cup granulated sugar (dissolves into cream for sweetness without grittiness)
- 1 teaspoon pure vanilla extract (flavor that complements both coffee and cream)
- 8 ounces mascarpone cheese (room temperature so it folds smoothly without lumping)
For the Soaking and Assembly
- 3 tablespoons coffee-flavored liqueur like Kahlua (optional but adds depth and authentic Italian flavor)
- 1 package ladyfinger cookies, Savoiardi brand (sturdy enough to absorb liquid without disintegrating immediately)
- 1½ cups cold espresso or strong brewed coffee (chilled to prevent the mascarpone from melting)
For the Finish
- 2 tablespoons unsweetened cocoa powder (for dusting and adding bitter contrast to sweet cream)
- ½ teaspoon finely grated dark chocolate (optional, adds elegance and additional chocolate note)
Makes 9-12 servings depending on portion size.
The cold espresso is crucial—if your coffee is warm, it’ll melt the mascarpone before you even get the layers assembled. The room-temperature mascarpone is equally important because cold mascarpone will have lumps that resist folding. The sugar goes into the whipped cream, not the mascarpone, because it dissolves better into the aerated liquid. These aren’t random choices; they’re the foundation of technique mastery.
The Masterclass: How to Make Christmas Tiramisu
This isn’t just a recipe—it’s a step-by-step tutorial in one of the most important techniques you’ll ever learn. Pay attention to the sensations and visual cues at each stage. These are your guides to knowing you’re doing it right.
Step 1: Whip Your Cream to Stiff Peaks (The Foundation)
Pour your cold heavy cream into a clean mixing bowl. This matters more than you might think—any residual fat or moisture in the bowl will interfere with whipping. Start beating on medium speed with an electric mixer. You’ll see the cream transform from liquid to soft, billowing clouds.
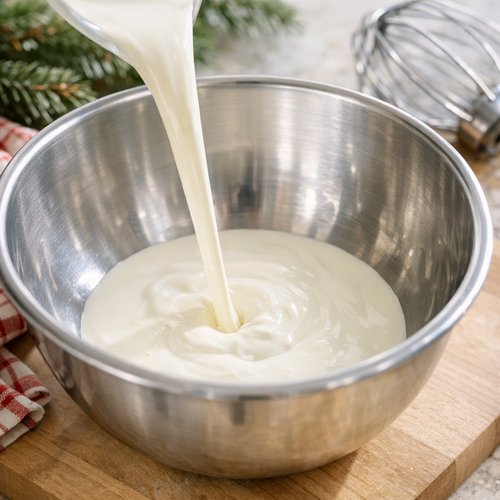
After about 1-2 minutes of beating, you’ll reach soft peaks—the cream holds its shape briefly but then collapses. Keep going. Don’t stop here. Continue beating on medium speed for another 1-2 minutes until you reach stiff peaks. At this point, when you lift your whisk, the cream stands straight up like little mountains. The texture is thick, almost like clouds you could touch. This is your target.
Why does this matter? Stiff peaks mean maximum air incorporation, which means your tiramisu will have the light, pillowy texture that makes it special. You can also use a stand mixer—just keep an eye on it because over-whipping creates butter, and nobody wants butter tiramisu.
Step 2: Add Sugar and Vanilla While Whipping
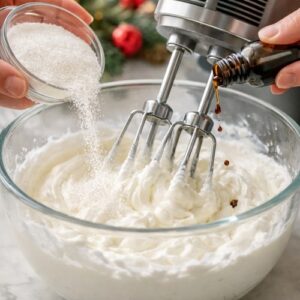
While the mixer is still running, slowly add your sugar to the whipped cream. Don’t dump it all at once. A slow, steady stream lets the sugar dissolve completely without deflating the cream. Add your vanilla extract at the same time. The granules dissolve into the aerated liquid, creating sweetness without any grittiness.
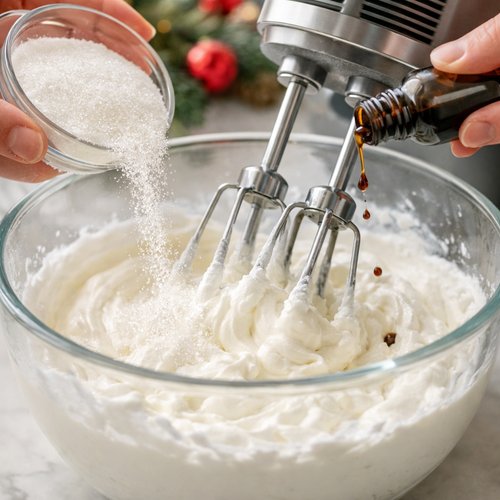
Continue beating for another 30 seconds until the sugar is fully incorporated and the mixture is glossy and smooth. You should see the texture change slightly—it becomes more stable and less likely to weep liquid over time. This is stabilized whipped cream, and it’s the workhorse of elegant desserts.
Step 3: Room Temperature Mascarpone Is Non-Negotiable
Transfer your whipped cream to a larger bowl (you need room to work). Now comes the critical part: add your room-temperature mascarpone. Cold mascarpone will create lumps. Room-temperature mascarpone will be silky and pliable. If yours is cold, let it sit on the counter for 10-15 minutes before you fold it in.
Don’t use an electric mixer here. Grab a rubber spatula and get ready for the most important technique of this entire recipe.
Step 4: The Fold – Where Magic Happens
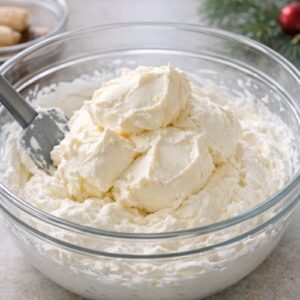
Using a rubber spatula, cut down through the center of the cream at 12 o’clock. Sweep the spatula along the bottom of the bowl, then flip that bottom portion up and over the top, folding the mascarpone into the cream. Rotate the bowl slightly and repeat. Cut down, sweep the bottom, fold over the top. Rotate. Repeat.
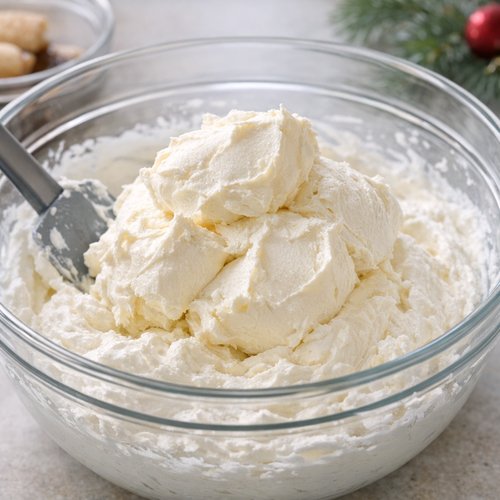
You’re doing this deliberately and slowly. Each fold takes about one second. Don’t rush this. Keep folding until you see streaks of mascarpone blend with the cream, but stop before it’s completely homogeneous. You want some marbling—visual proof that you’ve preserved the air in your whipped cream. After about 15-20 folds, it should come together beautifully. You’ve just created an emulsified cream that’s light, stable, and elegant.
Set this mixture aside. You’ve done something incredible here, and you probably didn’t even realize how much skill this took.
Step 5: Prepare Your Soaking Liquid
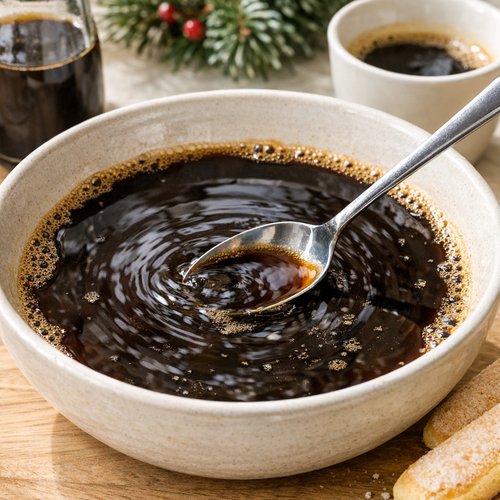
Pour your cold espresso into a shallow bowl and add your coffee-flavored liqueur if you’re using it. Stir to combine. The cold temperature is essential—warm coffee will melt your mascarpone mixture before you get the layers assembled, and that’s a mistake you can avoid with this one simple step.
Step 6: The Dip – Speed and Intention
Here’s the thing about dipping ladyfingers: you want them wet but not soaked. Quickly dip each ladyfinger into the coffee mixture—I’m talking 1-2 seconds per side. In, flip, out. The ladyfinger should be moistened but still have structure. If you soak them for too long, they’ll turn to mush and your tiramisu will be mushy instead of structured.
As you dip each ladyfinger, arrange them in a single layer on the bottom of an 8×8-inch baking dish. You’ll probably fit about 12-16 ladyfingers depending on their size. Don’t overlap them too much—you want them snug but not squished.
Step 7: First Layer of Cream
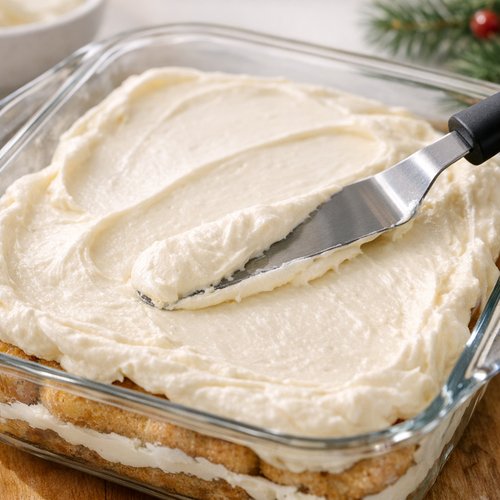
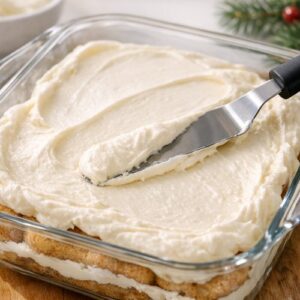
Using an offset spatula or regular spatula, spread exactly half of your mascarpone cream over the ladyfingers in an even layer. Get into the corners, smooth it out, create an even surface. This is your foundation layer, and it should be about ½ inch thick.
Step 8: Second Layer of Dipped Ladyfingers
Dip another batch of ladyfingers using the same quick method—1-2 seconds per side. Arrange them in a single layer over your cream layer. You’re creating a sandwich structure here, and each layer matters for the final texture.
Step 9: Top Layer of Cream
Spread the remaining cream over the top ladyfinger layer, creating a smooth, even surface. This final layer gets the cocoa powder, so make it beautiful.
Step 10: The Cocoa Powder Dust – The Grand Finale
Place your cocoa powder in a fine mesh strainer. Hold it about 6 inches above your tiramisu and gently tap the bottom of the strainer, allowing a fine, even dusting of cocoa powder to fall over the entire surface. Don’t go crazy—you want a visible but not overwhelming coating. Some people add chocolate shavings here too, and honestly, that’s the move.
Cover your tiramisu loosely with plastic wrap and refrigerate for at least 3-4 hours, or preferably overnight. This resting time allows the flavors to meld, the coffee to distribute throughout, and the structure to set. Tiramisu is actually better the next day—the flavors deepen and the texture becomes even more unified.
How to Know You’ve Mastered the Technique
Mastery isn’t about following steps perfectly. It’s about developing sensory awareness. Here’s what you should feel, see, and experience when you’ve truly mastered the folding and layering technique:
- Your mascarpone cream is cloud-light but holds its shape – When you spread it, it should be smooth and glossy, not broken or lumpy. A spoonful should hold its shape briefly before slowly melting. This tells you that you’ve achieved the perfect balance between air incorporation and emulsification.
- Your finished tiramisu cuts cleanly with a warm knife – This indicates that your layers have set properly and the structure is sound. The layers should be distinct but connected, not separated or mushy.
- You taste no grittiness in the cream – If you’re tasting crystals of sugar, your sugar didn’t dissolve properly, which means you either didn’t add it slowly enough or didn’t beat it long enough. Smooth and silky means you nailed it.
- The cream feels like it’s melting on your tongue – Your mascarpone mixture should have an almost zero-resistance texture. If it feels heavy or dense, you over-mixed or didn’t fold enough air in.
Common Technique Mistakes and How to Fix Them
I’ve made these mistakes myself, and I’ve watched countless home cooks make them too. Here’s what goes wrong and exactly how to fix it:
- Lumpy mascarpone that won’t fold smoothly – Your mascarpone was cold when you folded it. Cold mascarpone is stiff and creates little clumps that resist folding. Fix: Let mascarpone sit on the counter for 15 minutes before folding. If you make this mistake, you can microwave the finished cream for 5-10 seconds and re-fold gently, though prevention is always better.
- Heavy, dense tiramisu that doesn’t melt on your tongue – You either over-mixed your cream when folding (losing air bubbles) or you didn’t whip the cream to stiff peaks initially. Fix: Be more intentional with your folding—each fold should be one deliberate motion, and stop as soon as the mixture is combined. Next time, whip your cream longer to ensure maximum volume.
- Mushy, structureless tiramisu that falls apart – You soaked your ladyfingers too long, or your coffee was too warm. Fix: Limit dipping to 1-2 seconds maximum per side. Chill your espresso completely before assembly. You can also store your tiramisu longer (overnight or even 2 days) to let the structure set more firmly.
- Grainy cream mixture that tastes crystalline – Your sugar wasn’t fully incorporated when you were whipping. Fix: Always add sugar slowly while beating, and continue beating for at least 30 seconds after all sugar is added to ensure complete dissolution.
Practice Variations to Build Your Skill
Mastery comes from practice, and the best way to practice is with variations that build in complexity. Here are three progressively more challenging versions of this recipe to deepen your understanding of the folding and layering technique:
Variation 1: Classic Chocolate Tiramisu (Easiest) – Make the exact recipe as written, but add 2 tablespoons of unsweetened cocoa powder to your mascarpone mixture during the folding step. You’ll learn how to fold in a dry ingredient without deflating your cream. The cocoa powder is heavier than mascarpone, so this teaches you about the weight of different ingredients and how to handle them.
Variation 2: Espresso-Mascarpone Tiramisu with Marsala Wine (Medium) – Replace the coffee liqueur with dry Marsala wine, and add 1 tablespoon of instant espresso powder to your whipped cream before folding in the mascarpone. This teaches you how to fold in powdered ingredients and how to work with alcohol, which has different viscosity than liqueur. You’ll learn that some ingredients need to be incorporated differently based on their texture and weight.
Variation 3: Tiramisu Tartlets with Individual Plating (Advanced) – Take this exact recipe and create individual servings in small glasses or tartlet shells. You’ll learn plating technique, how to work with smaller volumes (which requires more precision), and how to present tiramisu beautifully. This pushes your knife skills, your eye for visual presentation, and your understanding of portion control.
Expert’s Nutritional Tip
As a registered dietitian, I need to be honest about tiramisu: it’s a rich dessert, and that’s okay. The mascarpone cheese provides fat-soluble vitamins like vitamins A, D, and E that help with nutrient absorption and bone health. The espresso contains polyphenols and antioxidants. The key to enjoying tiramisu without guilt is practicing portion control and treating it as an occasional indulgence rather than everyday food.
One serving of this tiramisu (about 1/12 of the pan) provides approximately 280-320 calories, with most of those coming from fat and carbohydrates. The protein content is moderate at about 4 grams per serving, thanks to both the mascarpone and the ladyfingers. If you’re looking to make this slightly lighter, you can replace half the mascarpone with Greek yogurt—it’ll change the texture slightly but still teach you the same folding technique, and you’ll reduce the calorie content by about 40 calories per serving.
Make-Ahead Guide: Perfect for Holiday Stress Management
I created this tiramisu recipe specifically for busy holiday schedules. You can prepare it completely up to 2 days in advance, which means less stress on your actual celebration day. Here’s how to manage your timeline:
The Day Before – Complete tiramisu assembly following all steps, dust with cocoa powder, cover loosely with plastic wrap, and refrigerate overnight. Flavors actually improve overnight as the coffee permeates the layers and everything melds together. This is your best-case scenario.
Two Days Before – Assemble everything and store. Your tiramisu will still be delicious, though the ladyfingers will become slightly softer. The flavor deepens further, which many people prefer.
The Morning Of – Remove tiramisu from refrigerator about 15-20 minutes before serving. This allows it to come to a more pleasant serving temperature. Cold tiramisu straight from the fridge is actually less flavorful because cold suppresses our taste buds. Allowing it to sit at room temperature briefly enhances the flavor dramatically.
Component Prep Ahead – You can prepare your mascarpone cream layer up to 24 hours in advance. Store it covered in the refrigerator and fold it again gently before assembling. Don’t prepare the whipped cream more than 4-6 hours ahead as it begins to break down and release liquid. Prepare your coffee mixture whenever you want—it’ll keep in the fridge indefinitely and can be chilled or refreshed before use.
Can I Store Christmas Tiramisu Recipe?
Storage is one of the best things about tiramisu. Here’s exactly how to handle it:
Refrigerator Storage – Your finished tiramisu will keep refrigerated, covered loosely with plastic wrap, for up to 3 days. The flavors actually improve on day 2 and 3 as the coffee flavor deepens throughout the layers. Don’t cover it tightly, as condensation can make the top soggy.
Freezer Storage – Tiramisu freezes beautifully for up to 1 month. Wrap it very well in plastic wrap and then aluminum foil to prevent freezer burn. The texture remains stable because of the emulsified cream structure. Thaw in the refrigerator for at least 4 hours before serving.
Serving Portions – Cut portions with a hot, wet knife (wipe it dry between cuts) for clean, beautiful pieces. Store individual portions in airtight containers for up to 3 days.
What NOT to Do – Don’t leave tiramisu on the counter at room temperature for more than 2 hours. The cream contains raw eggs (if you’re using traditional zabaglione-style) or in this case, just mascarpone, which should stay cool.
Nutrition Information
Per serving (1/12 of pan, based on USDA FoodData Central and standard nutritional databases):
- Calories: 295
- Total Fat: 18g (saturated fat 11g)
- Protein: 4g
- Total Carbohydrates: 28g (dietary fiber 1g, sugars 20g)
- Cholesterol: 65mg
- Sodium: 95mg
- Iron: 2mg (11% DV)
The mascarpone cheese contributes most of the fat and calories but also provides calcium for bone health. The espresso provides negligible calories but significant antioxidant benefits. The ladyfingers contribute most of the carbohydrates and provide some fiber.
What to Serve With Christmas Tiramisu Recipe?
Tiramisu is a complete dessert on its own, but it pairs beautifully with other components that let the technique shine:
- Sparkling Wine or Prosecco – The bubbles and slight sweetness complement the coffee-cream flavors beautifully. The acidity cuts through the richness perfectly.
- Dessert Coffee Service – Serve tiramisu with espresso or strong coffee. It completes the flavor journey and aids digestion.
- Biscotti for Dunking – Serve alongside crispy Italian biscotti for textural contrast and an additional element to enjoy.
- After a Lighter Main Course – Since tiramisu is rich, serve it after lighter meals. Pair your Christmas dinner with Lemon Broccolini Recipe or Butternut Squash Spinach Recipe as your vegetable side, keeping the meal balanced.
- Fresh Berries – Raspberries or strawberries alongside tiramisu add brightness and another flavor dimension. The tartness of berries balances the sweetness.

Christmas Tiramisu Recipe
Ingredients
Method
- Pour your cold heavy cream into a clean mixing bowl. This matters more than you might think—any residual fat or moisture in the bowl will interfere with whipping. Start beating on medium speed with an electric mixer. You'll see the cream transform from liquid to soft, billowing clouds. After about 1-2 minutes of beating, you'll reach soft peaks—the cream holds its shape briefly but then collapses. Keep going. Don't stop here. Continue beating on medium speed for another 1-2 minutes until you reach stiff peaks. At this point, when you lift your whisk, the cream stands straight up like little mountains. The texture is thick, almost like clouds you could touch. This is your target. Why does this matter? Stiff peaks mean maximum air incorporation, which means your tiramisu will have the light, pillowy texture that makes it special. You can also use a stand mixer—just keep an eye on it because over-whipping creates butter, and nobody wants butter tiramisu.
- While the mixer is still running, slowly add your sugar to the whipped cream. Don't dump it all at once. A slow, steady stream lets the sugar dissolve completely without deflating the cream. Add your vanilla extract at the same time. The granules dissolve into the aerated liquid, creating sweetness without any grittiness. Continue beating for another 30 seconds until the sugar is fully incorporated and the mixture is glossy and smooth. You should see the texture change slightly—it becomes more stable and less likely to weep liquid over time. This is stabilized whipped cream, and it's the workhorse of elegant desserts.
- Transfer your whipped cream to a larger bowl (you need room to work). Now comes the critical part: add your room-temperature mascarpone. Cold mascarpone will create lumps. Room-temperature mascarpone will be silky and pliable. If yours is cold, let it sit on the counter for 10-15 minutes before you fold it in. Don't use an electric mixer here. Grab a rubber spatula and get ready for the most important technique of this entire recipe.
- Using a rubber spatula, cut down through the center of the cream at 12 o'clock. Sweep the spatula along the bottom of the bowl, then flip that bottom portion up and over the top, folding the mascarpone into the cream. Rotate the bowl slightly and repeat. Cut down, sweep the bottom, fold over the top. Rotate. Repeat. You're doing this deliberately and slowly. Each fold takes about one second. Don't rush this. Keep folding until you see streaks of mascarpone blend with the cream, but stop before it's completely homogeneous. You want some marbling—visual proof that you've preserved the air in your whipped cream. After about 15-20 folds, it should come together beautifully. You've just created an emulsified cream that's light, stable, and elegant. Set this mixture aside. You've done something incredible here, and you probably didn't even realize how much skill this took.
- Pour your cold espresso into a shallow bowl and add your coffee-flavored liqueur if you're using it. Stir to combine. The cold temperature is essential—warm coffee will melt your mascarpone mixture before you get the layers assembled, and that's a mistake you can avoid with this one simple step.
- Here's the thing about dipping ladyfingers: you want them wet but not soaked. Quickly dip each ladyfinger into the coffee mixture—I'm talking 1-2 seconds per side. In, flip, out. The ladyfinger should be moistened but still have structure. If you soak them for too long, they'll turn to mush and your tiramisu will be mushy instead of structured. As you dip each ladyfinger, arrange them in a single layer on the bottom of an 8x8-inch baking dish. You'll probably fit about 12-16 ladyfingers depending on their size. Don't overlap them too much—you want them snug but not squished.

- Using an offset spatula or regular spatula, spread exactly half of your mascarpone cream over the ladyfingers in an even layer. Get into the corners, smooth it out, create an even surface. This is your foundation layer, and it should be about ½ inch thick.
- Dip another batch of ladyfingers using the same quick method—1-2 seconds per side. Arrange them in a single layer over your cream layer. You're creating a sandwich structure here, and each layer matters for the final texture.
- Spread the remaining cream over the top ladyfinger layer, creating a smooth, even surface. This final layer gets the cocoa powder, so make it beautiful.
- Place your cocoa powder in a fine mesh strainer. Hold it about 6 inches above your tiramisu and gently tap the bottom of the strainer, allowing a fine, even dusting of cocoa powder to fall over the entire surface. Don't go crazy—you want a visible but not overwhelming coating. Some people add chocolate shavings here too, and honestly, that's the move. Cover your tiramisu loosely with plastic wrap and refrigerate for at least 3-4 hours, or preferably overnight. This resting time allows the flavors to meld, the coffee to distribute throughout, and the structure to set. Tiramisu is actually better the next day—the flavors deepen and the texture becomes even more unified.
Notes
FAQs
Can I make tiramisu with mascarpone substitutes if I can’t find the real thing?
You technically can, but I wouldn’t recommend it if this is your first time. Mascarpone has a specific fat content and texture that’s crucial to the folding technique. If you can’t find it, cream cheese can work, though it’s tangier and requires less sugar. Ricotta is softer and won’t create the same stable emulsion. Your best bet is to check Italian markets, specialty grocery stores, or order online. Real mascarpone is worth the effort because it teaches you exactly how the technique should feel and perform.
My whipped cream broke and turned into butter-like clumps while whipping. What went wrong?
You over-whipped it. Heavy cream contains about 35-40% fat, and when you over-whip, you break the fat globule membranes, and the fat separates from the liquid. Once it’s turned to butter, you can’t reverse it without starting over. For next time, stop as soon as you reach stiff peaks—the exact moment when the cream stands straight up but hasn’t started looking grainy or separated. Watch for this point carefully during the last minute of whipping.
Is it okay to use instant espresso powder instead of brewed espresso?
Absolutely! Mix 1½ tablespoons of instant espresso powder with ¼ cup of hot water, then chill it completely before using. In fact, this method gives you more concentrated espresso flavor. You can also use instant espresso powder directly in your whipped cream (I mentioned this in the variation section) and skip the brewed espresso entirely. This technique change teaches you about how to work with concentrated flavors.
Can I make tiramisu without the alcohol?
Yes, completely. The coffee liqueur adds richness and a subtle boozy note, but it’s entirely optional. If you skip it, just use 1½ cups cold espresso and follow the exact same steps. The tiramisu will taste slightly less complex, but it’ll still be delicious. This is a great version for serving to children or anyone avoiding alcohol.
How do I know when my mascarpone has reached room temperature?
Touch it with your finger. It should feel soft and pliable, not cold or resistant. The best test is actually a small spoon—stir it gently, and if it moves smoothly without lumps or resistance, it’s ready. Room temperature is typically around 68-70°F. On a cold day, your counter might not be warm enough, so consider placing the mascarpone on a heating pad set to low, or in a warm (not hot) spot in your kitchen. This matters more than you might think for technique success.
More Recipes Using This Technique
- Penne alla Vodka – teaches you about emulsifying cream-based sauces without the folding technique
- Brie And Bacon Recipe – demonstrates working with soft cheeses and creamy textures in an appetizer format
- Best Homemade Meat Sauce Recipe – shows you layering techniques in savory cooking
Seasonal Variations
Winter Version (Holiday Season) – Add 1 teaspoon of peppermint extract to your cream mixture, and replace the cocoa powder with crushed candy canes on top. The cooling sensation of peppermint with warm espresso flavors is incredible.
Spring Version (Easter and Mother’s Day) – Replace half the ladyfingers with vanilla wafers, and add 1 teaspoon of lemon zest to your mascarpone cream. Use white cocoa powder instead of dark for a lighter appearance. This creates a lighter, more floral dessert perfect for spring celebrations.
Summer Version – Chill your espresso even more, and add 1 tablespoon of honey to your cream mixture. Serve with fresh berries on the side. The honey adds subtle floral notes that feel lighter and more summery than granulated sugar.
Fall Version (Thanksgiving and Halloween) – Add ½ teaspoon of cinnamon and ¼ teaspoon of nutmeg to your cream mixture. Replace the cocoa powder with a dusting of cinnamon sugar. This creates a warm, spiced tiramisu that feels like autumn on a plate.
Common Mistakes to Avoid
- Using warm espresso – I mentioned this before, but it bears repeating because this is the most common mistake I see. Warm espresso will literally melt your mascarpone cream. Your tiramisu will become pudding. Always chill your espresso completely, or use instant espresso powder mixed with cold water.
- Over-mixing the cream and mascarpone – There’s a difference between folding and mixing. Folding preserves air bubbles. Mixing incorporates the ingredients but destroys air. If you use an electric mixer to combine cream and mascarpone, you’ll create a dense, heavy tiramisu instead of the light, pillowy version you’re aiming for.
- Not chilling before serving – Tiramisu needs time to set. Serving it immediately after assembly means the layers aren’t structured and the flavors haven’t melded. Waiting at least 3-4 hours (overnight is better) transforms it from “nice” to “incredible.”
You’ve done something really special here. You’ve learned a technique that Italian grandmothers have perfected over generations. You’ve understood the science behind folding, emulsification, and layering. You’ve created something beautiful that tastes like you spent hours in the kitchen, even though you spent maybe 30 minutes on hands-on work.
This technique—this understanding of how to treat delicate creams with intention and respect—is going to change how you approach desserts forever. You’re going to start seeing layered desserts everywhere, and you’re going to think, “I can make that.” And honestly, you can. You now have the skills.
This Christmas, when your family tastes this tiramisu, they’re not just tasting mascarpone and espresso and ladyfingers. They’re tasting your skill, your intention, and your joy in feeding the people you love. That’s what good cooking really is.
Hope you find joy in every recipe!