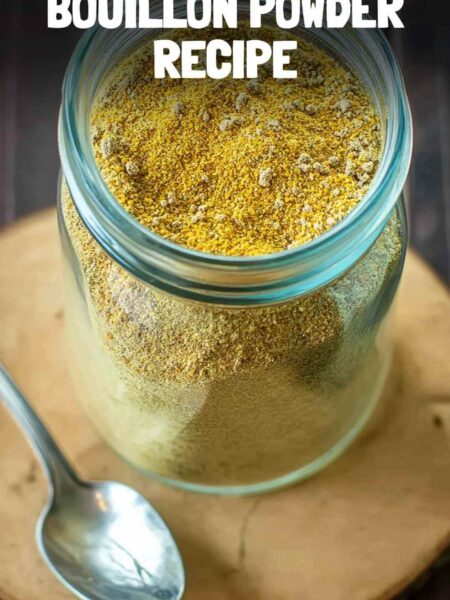
Let’s talk ghee. This golden, clarified butter is not just a cooking ingredient; it’s a culinary treasure. You can use ghee in countless dishes, and it adds a rich, nutty flavor that’s hard to beat.
Picture this: drizzling ghee over fluffy basmati rice, slathering it on warm naan, or using it to sauté veggies for that perfect finishing touch.
Even the simplest of dishes like scrambled eggs or popcorn can transform into something truly delightful with ghee. Let’s dive into how to make this golden elixir at home.

What is Ghee?
Ghee is essentially clarified butter, but it’s more than that. The process involves simmering unsalted butter until the water content evaporates and the milk solids sink to the bottom. This creates a rich, golden liquid.
Ghee has a higher smoke point than regular butter, making it suitable for high-heat cooking. The flavor is nutty and deep, and it’s lactose-free, which makes it a fantastic option for those with dairy sensitivities.
Why You’ll Love Making Ghee at Home
Making ghee at home provides not just satisfaction but also several benefits:
1. Healthier Option: Ghee is packed with fat-soluble vitamins like A, D, E, and K. It also contains conjugated linoleic acid (CLA), which has been linked to health benefits.
2. Culinary Versatility: Ghee can be used in cooking, baking, and even as a spread. It’s the Swiss Army knife of the kitchen.
3. Simplicity: You just need one ingredient – unsalted butter. No complicated techniques here.
4. Rich Flavor: The nutty taste enhances dishes in ways that ordinary butter can’t match.
5. Long Shelf Life: Ghee can last in the pantry for several months without refrigeration, giving you great flexibility.
The Ingredients You Will Need to Make Ghee at Home
To embark on your ghee-making adventure, you’ll just need:
- 1 teaspoon of sea salt
- 1 tablespoon of vanilla extract
- 1 pound of unsalted butter
The beauty of this recipe lies in its simplicity. No fancy ingredients, just butter.

Directions
Making ghee is as straightforward as pie. Below is the step-by-step guide to create your batch of ghee.
Step 1: Gather Your Tools
Before you start, you’ll need a few tools on hand:
- A saucepan
- A wooden spoon or spatula
- A fine mesh strainer or cheesecloth
- A jar for storage
Step 2: Melt the Butter
Place the unsalted butter in the saucepan over medium heat. As it melts, give it a gentle stir with the wooden spoon.
You’ll want to keep an eye on it as the butter transforms from solid to liquid. This process usually takes a few minutes.
Step 3: Simmer the Butter
Once the butter is melted, reduce the heat to low. You’ll notice it begins to foam. Stir occasionally.
This foaming happens because the water in the butter is beginning to evaporate. Keep simmering for about 15-20 minutes. As it cooks, you’ll see the color change to a lovely golden hue.
Step 4: Watch for the Milk Solids
As the butter simmers, you might see the milk solids start to settle at the bottom of the saucepan.
Keep an eye on those solids—they’ll turn a light brown. This is what you’re looking for; it’s the indication that your ghee is nearly ready.
Step 5: Strain the Ghee
Once the milk solids have browned and your ghee has a rich, golden color, it’s time to strain. Carefully pour the ghee through the fine mesh strainer or cheesecloth into your jar.
Step 6: Let It Cool
Allow the ghee to cool completely before sealing the jar. This cooling period enhances the flavor as well!
Notes: Helpful Tips for Making Ghee
Making ghee is pretty forgiving, but a little guidance goes a long way. Here are some tips to ensure your success:
– Use High-Quality Butter: Grass-fed butter has a richer flavor, and the nutrients are beneficial.
– Cook on Low Heat: If the heat is too high, your ghee can burn quickly. Patience is key here!
– Skim Off the Foam: You can skim off the white foam that forms on top if you want a clearer ghee.
– Storage: Store your ghee in a glass jar at room temperature. It will keep for several months without going rancid.
– Use for Popcorn: Drizzling ghee over freshly popped popcorn? Absolutely delightful!
Storage Tips for Ghee
Ghee is straightforward in terms of storage. You can keep it at room temperature for several months. Here’s how to handle it:
- Cool Down First: Ensure the ghee cools completely before sealing it in a jar to avoid condensation inside.
- Glass Jar Recommended: Always store in an airtight glass jar. It prevents any unwanted odors from affecting its flavor.
- No Need for Refrigeration: Ghee does not need to be refrigerated, which is a perk.
- Check for Rancidity: If ghee develops an off smell or taste, it’s time to toss it.
- Label the Jar: If you make ghee regularly, label the jar with the date of making.
Serving Suggestions
Ghee is incredibly versatile. Here are some suggestions for using it in your cooking:
– Over Rice: Drizzle ghee over cooked basmati rice for richness. This adds depth.
– In Baking: Use ghee in place of butter in your favorite cookie recipes. It enhances flavor.
– Sauteing Vegetables: Sauté your favorite veggies in ghee for an extra flavor kick. Trust me, it’s worth it!
– Spread on Bread: Use ghee as a spread for warm bread or naan. You might never go back to regular butter.
– In Curries: Incorporate ghee into your curry recipes. It rounds out flavors beautifully.
What Other Substitutes Can I Use Instead of Ghee?
If you find yourself without ghee, here are some substitutes:
– Coconut Oil: This is a popular dairy-free alternative that offers a distinct flavor. Great for cooking and baking.
– Butter: Regular unsalted butter can substitute, but with a lower smoke point. A classic alternative.
– Vegetable Oil: For frying, vegetable oil works fine, but lacks the flavor profile of ghee. Good in a pinch.
– Olive Oil: While it also has health benefits, the flavor differs significantly from ghee. Use in Mediterranean dishes.
– Lard: This is an animal fat option that can work in certain savory applications. Its taste is quite different.

Conclusion
Making ghee at home is a rewarding experience. It not only enriches your cooking but also empowers you in the kitchen.
The process is simple and the results are outstanding. Even if you’ve never tried before, I assure you that this is a skill you’ll appreciate for years to come.
So gather your ingredients, set aside some time, and embark on this culinary journey. Your taste buds will thank you, and so will your friends and family when they savor the delightful dishes you create with your homemade ghee!
You’ll also like the following recipes!
- The best Pizza Dough Copycat Recipe
- How to Make Homemade Chicken Bouillon Powder
- Best Easy Ponzu Sauce Recipe
How To Make Ghee At Home – Simple Easy Meals
Making ghee at home is like crafting your own masterpiece in the kitchen. Not only is it simple, but the end result is a luxurious ingredient that can elevate your meals. Growing up, my grandmother would always have a jar of ghee on the shelf.
The aroma would fill the room every time she cooked. I remember her sharing stories behind ghee—how it’s a staple in many cultures, especially in Indian cuisine.
As a registered dietitian and food enthusiast, I found my way back to this age-old practice and realized just how fulfilling it is to make something from scratch.
Now, let’s explore what ghee is, why you would love making it, its ingredients, and the step-by-step process.

Ingredients
Instructions
Step 1: Gather Your Tools
-
Before you start, you’ll need a few tools on hand:
- A saucepan
- A wooden spoon or spatula
- A fine mesh strainer or cheesecloth
- A jar for storage
- A saucepan
Step 2: Melt the Butter
-
Place the unsalted butter in the saucepan over medium heat. As it melts, give it a gentle stir with the wooden spoon.
You’ll want to keep an eye on it as the butter transforms from solid to liquid. This process usually takes a few minutes.
Step 3: Simmer the Butter
-
Once the butter is melted, reduce the heat to low. You'll notice it begins to foam. Stir occasionally.
This foaming happens because the water in the butter is beginning to evaporate. Keep simmering for about 15-20 minutes. As it cooks, you’ll see the color change to a lovely golden hue.
Step 4: Watch for the Milk Solids
-
As the butter simmers, you might see the milk solids start to settle at the bottom of the saucepan.
Keep an eye on those solids—they’ll turn a light brown. This is what you’re looking for; it’s the indication that your ghee is nearly ready.
Step 5: Strain the Ghee
-
Once the milk solids have browned and your ghee has a rich, golden color, it’s time to strain. Carefully pour the ghee through the fine mesh strainer or cheesecloth into your jar.
Step 6: Let It Cool
-
Allow the ghee to cool completely before sealing the jar. This cooling period enhances the flavor as well!
Nutrition Facts
Servings 32
- Amount Per Serving
- Calories 123kcal
- % Daily Value *
- Total Fat 7.8g12%
- Saturated Fat 4.9g25%
- Cholesterol 15mg5%
- Sodium 79mg4%
- Total Carbohydrate 2g1%
* Percent Daily Values are based on a 2,000 calorie diet. Your daily value may be higher or lower depending on your calorie needs.
Note
- Use High-Quality Butter: Grass-fed butter has a richer flavor, and the nutrients are beneficial.
- Cook on Low Heat: If the heat is too high, your ghee can burn quickly. Patience is key here!
- Skim Off the Foam: You can skim off the white foam that forms on top if you want a clearer ghee.
- Storage: Store your ghee in a glass jar at room temperature. It will keep for several months without going rancid.
- Use for Popcorn: Drizzling ghee over freshly popped popcorn? Absolutely delightful!


