
Fruit And Cheese Tray Recipe
 By
By This post contains affiliate links. As an Amazon Associate I earn from qualifying purchases.
If you’ve always wanted to make a stunning fruit and cheese tray but felt intimidated by the idea of hosting, this is your starting point. I’m going to walk you through every single step, and I promise you—this is one of the easiest, most impressive things you can put together in your kitchen. No cooking required. No special skills needed. Just fresh ingredients, a beautiful platter, and about 30 minutes of your time. This recipe is so approachable that it’s actually taught me more about building confidence in the kitchen than anything else. When you create something that looks restaurant-quality and tastes incredible, something shifts inside you. You realize you can do this. You realize entertaining doesn’t have to be stressful. And honestly? That’s what I want for you today.
How to Make a Fruit And Cheese Tray for the First Time (You’ve Got This!)
I remember the first time my mom asked me to help put together a fruit and cheese tray for a family gathering. I was maybe twelve years old, standing in her kitchen with fresh strawberries, blocks of cheddar, and this gorgeous wooden board spread out in front of me. I was so nervous I’d mess it up—that it would look messy or unbalanced or just… not good enough. My mom looked at me and said something I’ve never forgotten: “Natasha, the only rule here is to make it look full and colorful. Everything else is you being creative.” That single piece of advice changed how I approach food entirely.
Now, as a registered dietitian, I’ve made hundreds of these trays—for client consultations, for team meetings, for holiday celebrations with friends. And I can tell you with absolute certainty: this is one of the most forgiving dishes in the culinary world. There’s no exact science. There’s no “wrong” way. You get to play, experiment, and create something uniquely yours.
What to Expect Before You Start
Let’s set realistic expectations so you know exactly what you’re getting into. This entire project takes about 30 minutes from start to finish—and that includes washing fruit, slicing cheese, and arranging everything beautifully. You don’t need any special kitchen skills. You don’t need fancy equipment. You just need a board or platter, some fresh ingredients, and a willingness to have fun with your hands.
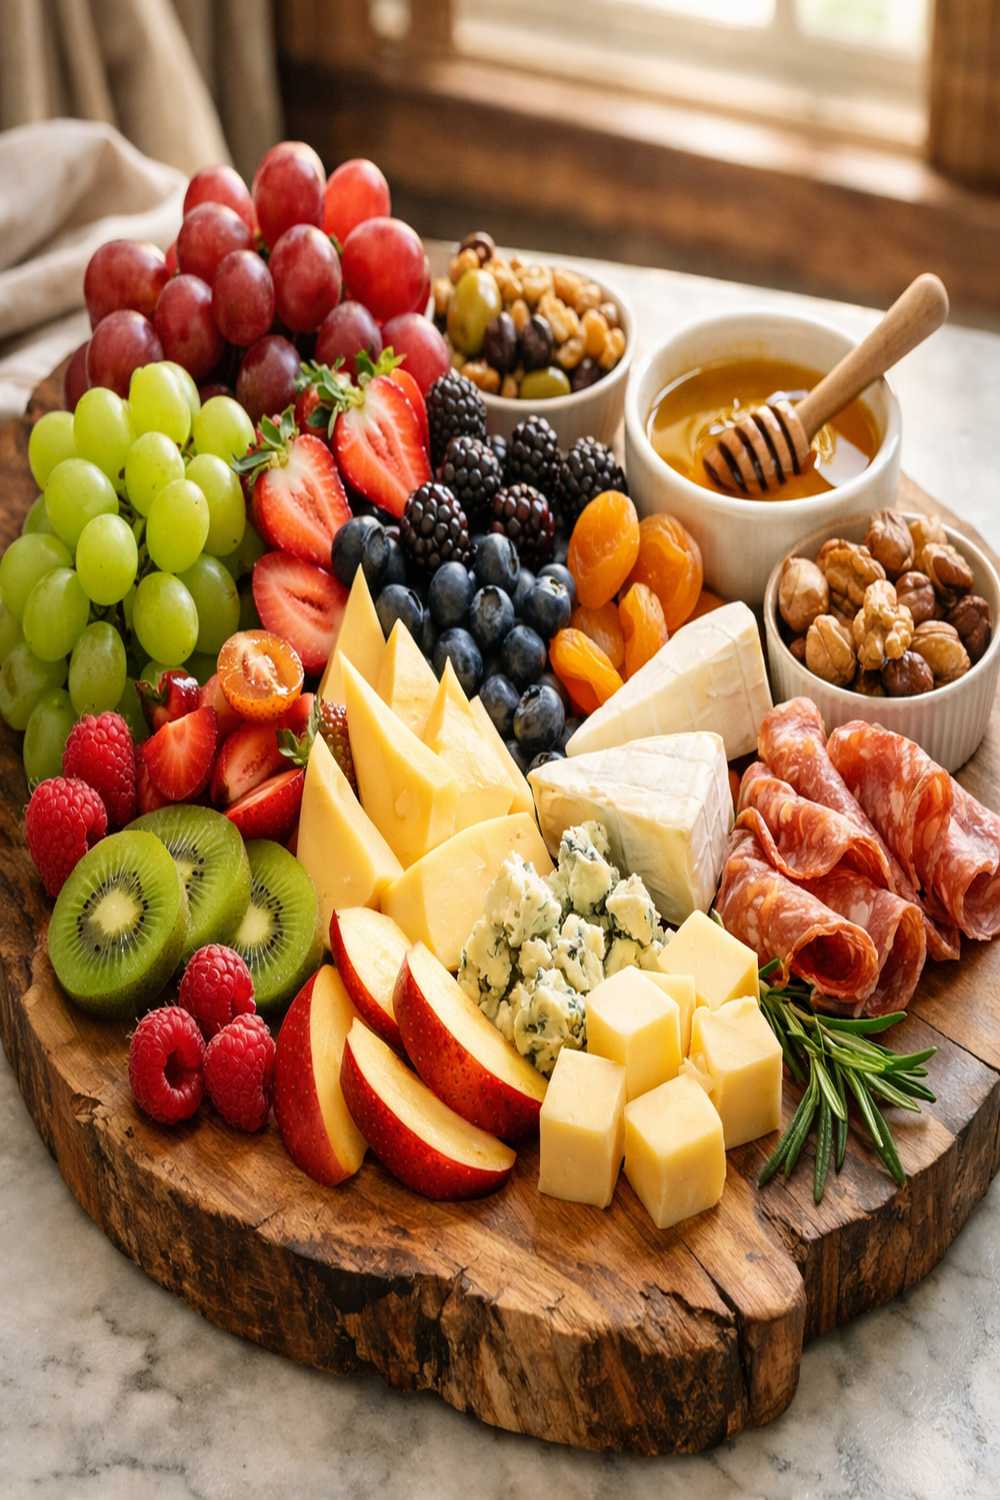
Success looks like a tray that feels abundant, colorful, and inviting. There should be barely any empty space visible when you’re done. The arrangement should feel balanced but organic—not overly perfect or stiff. And most importantly, you should be excited to show it off!
- The assembly is genuinely easy — this isn’t like baking where timing and precision matter. You’re literally arranging ingredients on a surface. If something doesn’t look right, you move it. That’s it.
- You don’t need expensive ingredients — some of the best trays I’ve made use budget-friendly cheeses and seasonal produce. Quality matters more than price tags.
- The hardest part is often deciding when to stop arranging — people get so into the creative process that they keep tweaking it! There’s a moment when it looks beautiful, and that’s when you stop.
Equipment You’ll Need (And What You Can Skip)
Here’s what I genuinely need you to have on hand. Everything else is optional and frankly, you probably already own most of this.
- A cutting board or wooden platter — this is your canvas. I prefer something around 16-18 inches. You can use a ceramic platter, a marble board, a wooden cutting board, or even a clean baking sheet. The material doesn’t matter; what matters is that it’s big enough to feel generous.
- A sharp knife — for slicing apples, cheese, and any fruit that needs it. A dull knife is actually dangerous and frustrating. A regular 8-inch chef’s knife works perfectly.
- Small bowls or ramekins — optional, but I love using 2-3 small bowls for nuts, berries, or honey for dipping. Ceramic bowls look nice and help break up the visual space.
- Serving utensils — optional, but useful. A cheese knife, small spoon, or wooden spoon helps guests serve themselves easily. Toothpicks are also nice for grabbing smaller items.
The Ingredients – A Beginner’s Shopping Guide
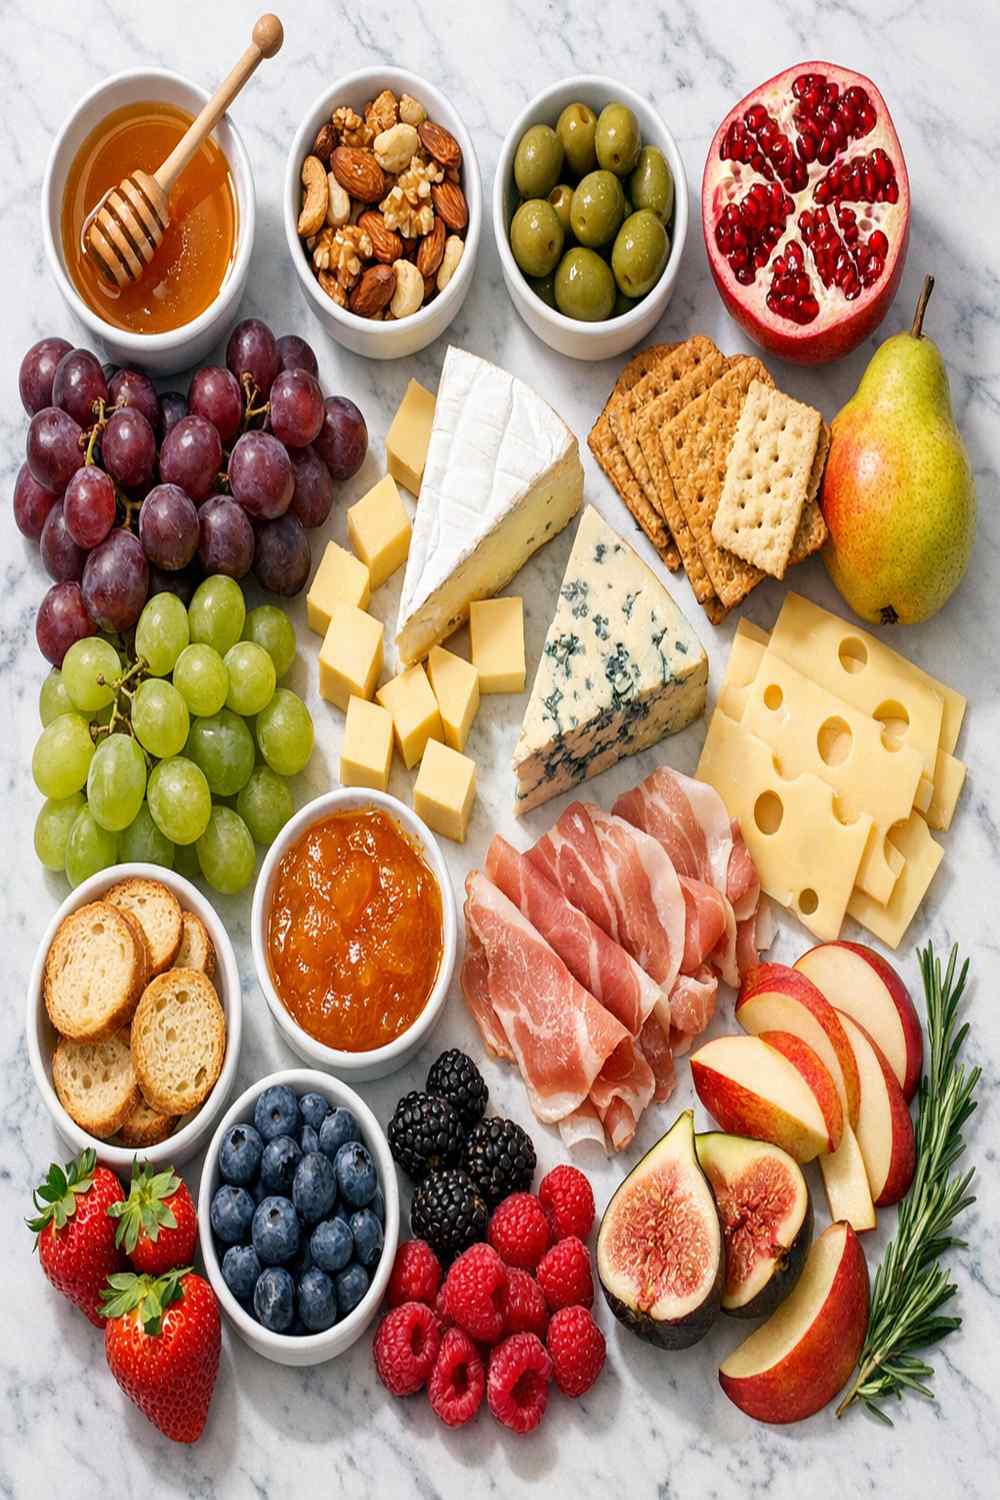
Shopping for this tray is where your creativity starts! The beauty of this recipe is flexibility. If you don’t like blueberries, skip them. If your market has gorgeous peaches instead of cherries, use those instead. I’m going to walk you through what I buy and where to find everything, but remember: your version is just as valid as mine.
- 2 tablespoons raw honey (optional but recommended for drizzling, found in the baking or condiment aisle)
- 1 pint mixed berries (I use a combination of blueberries, raspberries, strawberries, and blackberries—look for berries that are firm and deeply colored, found in the produce section or farmers market)
- 3-5 mandarin oranges (choose ones that feel heavy and have thin skins, optional but add bright color and natural sweetness)
- ½ pound red or green grapes (look for bunches where individual grapes feel plump and haven’t started shriveling)
- 1 Granny Smith apple (choose one that’s firm and crisp, not soft, found in the produce aisle—the tartness balances rich cheeses perfectly)
- 1 cup roasted pistachios (unsalted or lightly salted, found in the snack aisle or bulk section—these add gorgeous color)
- 8 ounces assorted sliced cheeses (I love mixing three varieties: a sharp cheddar, creamy Colby Jack, and mild Swiss cheese for texture variety)
- 1 cup fresh cherries (seasonal in summer, optional but stunning, found in produce—look for dark, glossy fruit)
- 1 cup mixed raw nuts (almonds, walnuts, and cashews work beautifully, found in snack or bulk section)
- 6 mini cheese rounds (like Babybel, or any small individually wrapped cheese—these are fun and visually interesting)
- ¼ cup fig jam or apricot preserves (optional for serving alongside—adds elegant sophistication)
- 25-40 crackers (I prefer a mix: some whole grain, some seeded, some plain—buy whatever you love eating)
- 8 ounces aged Parmesan-Reggiano cheese (ask the deli counter to slice this thin, or buy it pre-sliced—the nutty flavor is essential)
- ½ French baguette (buy this the day of—ask the bakery to slice it thin, or slice it yourself at home)
Step-by-Step: Your First Fruit And Cheese Tray
Okay, you’ve got your ingredients home. You’re ready. Take a breath—this is genuinely the fun part. I’m going to walk you through this like you’re right there in my kitchen with me, and I’ll explain every single decision so you understand not just what to do, but why we’re doing it.
Step 1: Wash and Prep Your Produce
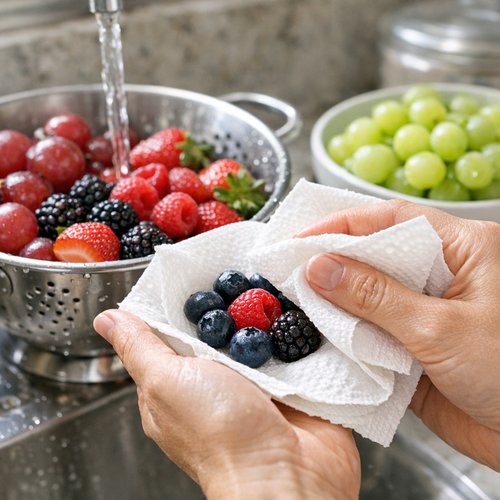
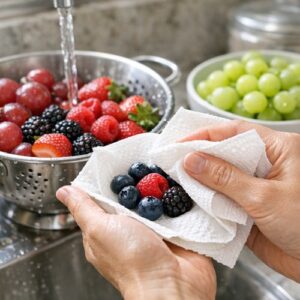
Start by rinsing all your fresh fruit under cool running water. Gently pat berries dry with paper towels—wet berries can get mushy and sticky on your board. For the apple, wash it well and slice it thinly (about ¼-inch thick). I slice mine lengthwise so you get those beautiful red or green striped rings. If you’re worried about the apple browning, which many people are, here’s my trick: slice it about 15 minutes before serving, and it’ll be fine. The acid in any citrus on your board will naturally prevent browning. If you’re making this hours ahead, you can toss the apple slices in a tiny bit of lemon juice.
For the mandarin oranges, peel them and separate into individual segments. Leave them whole—don’t break them up. For the grapes, rinse them and leave them in small clusters or separate them depending on your preference. I actually like leaving small clusters because they look more abundant on the board.
Step 2: Prep Your Cheeses and Breads
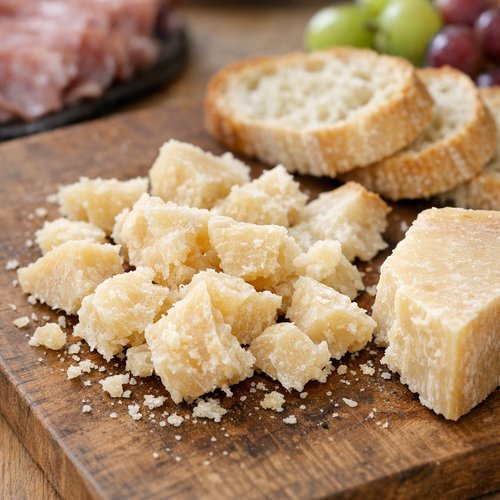
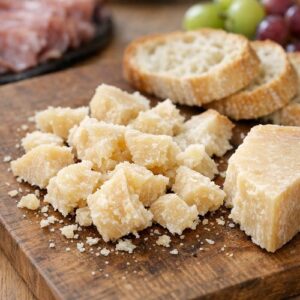
This is where the visual magic starts happening. Take your Parmesan-Reggiano and break or cut it into rough, irregular chunks. You’re not looking for perfect pieces—irregular looks more elegant and inviting. If your cheese came sliced, fold some slices into quarters or thirds.
For your assorted sliced cheeses, I like cutting them into triangles or leaving them as they are if they’re already sliced nicely. The variety of shapes matters more than perfection. Take those mini cheese rounds and unwrap them so they’re ready to go.
Slice your baguette into thin pieces—about ¼ to ½ inch thick. Arrange them on the board as you work, or keep them in a small pile off to the side if you’re worried about them drying out. They stay fresher that way until the last moment.
Step 3: Create Your Board Layout
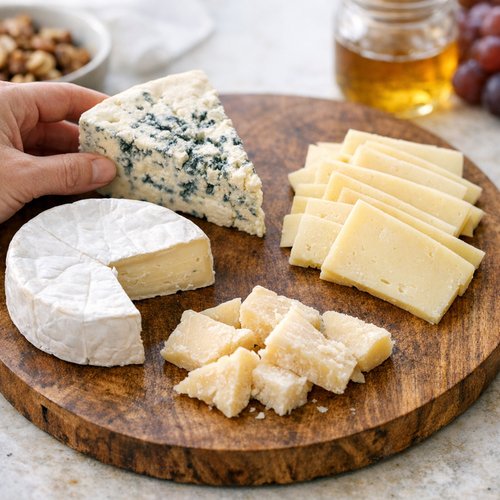
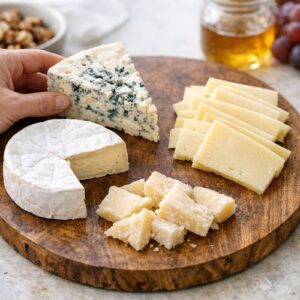
Now we get to the creative part! Take your board or platter and lay out your larger items first. I always start with the cheeses because they’re the anchors of this board. Place your Parmesan chunks in 2-3 small clusters spread across the board. Do the same with your sliced assorted cheeses—group similar types together but spread the groups around. This creates visual balance.
Next, arrange your mini cheese rounds in a small cluster or scatter them throughout. Think of these bigger items as the foundation of your design.
If you’re using small bowls for nuts or honey, place those on the board now. These bowls act as natural dividers and help you fill space efficiently.
Step 4: Fill in the Fruit and Nuts
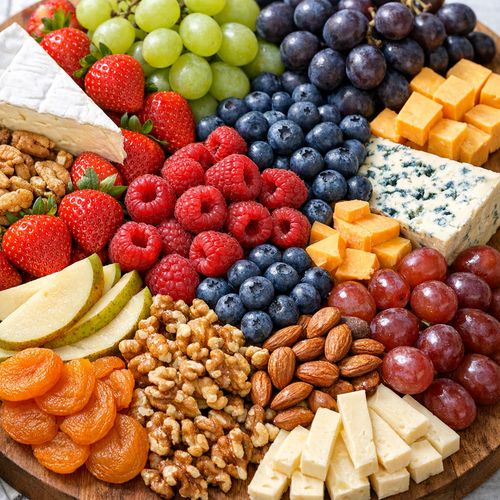
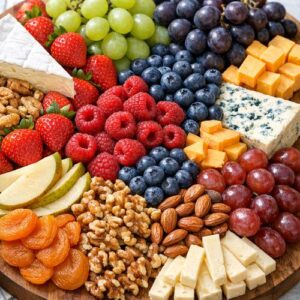
This is where it comes alive! Start filling in the gaps between your cheeses with fruit. Group same fruits together rather than scattering individual pieces everywhere. A cluster of berries looks better than berries dotted randomly across the board. A pile of apple slices looks intentional rather than scattered.
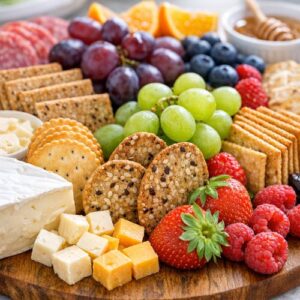
Create little sections: blueberries here, strawberries there, apple slices in that corner, grapes along the edge, mandarin segments in another spot. The key is to make it look full and colorful. If you see empty space, it’s not full enough yet.
Scatter your pistachios and mixed nuts around—these add beautiful color contrast and texture. I like putting nuts near the cheese since they pair so well together.
Step 5: Add Crackers and Final Details
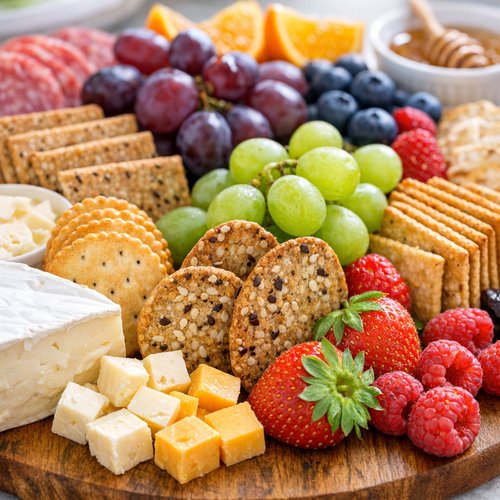
Now arrange your crackers around the board in small piles or standing slightly upright. Lean some crackers against the cheese or fruit—this looks more dynamic than laying them all flat. Fill any remaining gaps with additional crackers, extra berries, or a few more grapes.
If you’re using honey or jam, drizzle the honey decoratively or add a small spoon in the bowl. This signals to guests that these are meant for dipping.
Step back and look at your creation. Does it look full? Does it have color variety? Are there any glaringly empty spaces? If yes to all, you’re done!
Step 6: Add Serving Utensils and Serve
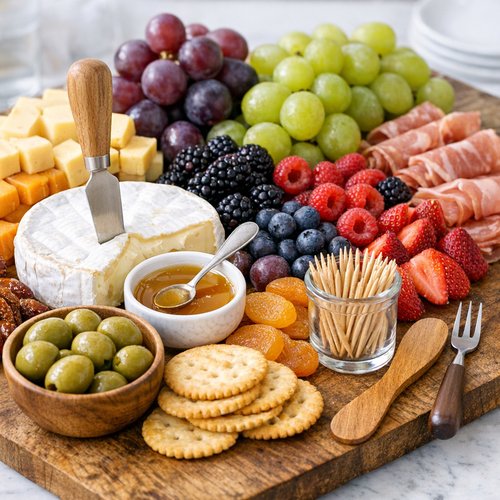
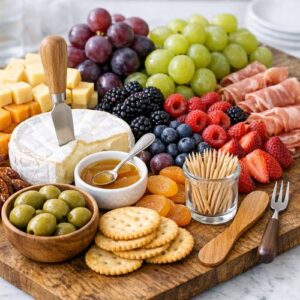
Before serving, place a cheese knife, small spoon, or wooden spreader on the board for guests to use. You can also add small toothpicks for grabbing berries or small pieces. This makes it easy for people to serve themselves without using their hands.
If you’re serving immediately, fantastic! If you made it ahead, cover it loosely with plastic wrap or a tea towel and refrigerate. Just let it sit at room temperature for about 10-15 minutes before serving so the cheese isn’t ice-cold.
How to Tell If You Did It Right
Success with this recipe is actually really easy to identify. You’re looking for visual cues that tell you it’s perfect.
- The board looks full and abundant — you should barely see any empty platter space. If you see large gaps, add more fruit, crackers, or nuts.
- There’s beautiful color variety — you should see reds (strawberries, raspberries), blues (blueberries), yellows (mandarin oranges), greens (grapes), whites and yellows (cheeses), and browns (nuts and crackers). This visual variety is what makes the tray stunning.
- The arrangement feels intentional but not stiff — this shouldn’t look like it was laid out with a ruler. It should feel generous and inviting, like someone put thought and care into it but didn’t overthink it.
- Fruits and cheeses are grouped, not scattered — clusters are more visually appealing than individual pieces spread everywhere.
- Your guests gravitate toward it immediately — when people see it, they want to eat from it. That’s the real success metric!
What Went Wrong? Beginner Fixes
- The board looks sparse or empty — this is the most common beginner mistake. You’re being too conservative with quantities. The fix? Buy more. Seriously. A full, abundant board is always more impressive than a minimalist one. Add 50% more fruit and crackers than you think you need.
- The apple is browning badly — this happens when you slice it too far ahead of time. Don’t slice apples until 20-30 minutes before serving. Or, immediately after slicing, toss them in a tiny bit of lemon juice or place them near any citrus on the board.
- The fruit is weeping or getting soggy — this means your berries were too wet when you placed them on the board. Pat them extra dry before arranging. Also, if you’re making this more than an hour ahead, keep berries off until the last moment.
- The cheese is too hard to cut or taste bad — you likely bought cheese that’s been sitting in your fridge too long, or the quality wasn’t great to begin with. Always buy cheese from a good source. Ask the deli counter for recommendations. Quality cheese makes this dish shine.
- Everything feels disorganized or chaotic — you’ve scattered ingredients instead of grouping them. Fix this by intentionally clustering similar items together. Create visual sections rather than random placement.
Your Next Steps After Mastering This
Once you’ve made this tray successfully, you’ve actually learned something crucial about food presentation and balance that applies to so much more. You understand color theory (mixing complementary colors), flavor pairing (how cheese and fruit go together), and visual composition.
This skill opens doors to making other beautiful entertaining boards. Try a full cheese board with cured meats and more varieties next. Or explore a stunning brie wreath for an elegant appetizer. You might even try a warm brie and bacon recipe to serve alongside your fruit board at your next gathering.
The confidence you’re building right now? That’s what matters most. You’re learning that entertaining doesn’t have to be complicated, and beautiful food doesn’t require culinary school.
Can I Store Fruit And Cheese Tray?
Yes, with some important timing guidelines! If you’re making this ahead, here’s exactly how to handle it.
Make it up to 2 hours ahead — assemble everything and cover the board loosely with plastic wrap. Keep it at room temperature. The fruit stays fresher, and the cheese is at the perfect temperature for eating. Remove the wrap about 10 minutes before serving.
Make it 2-4 hours ahead — assemble everything except the most delicate items (berries, apple slices). Cover and refrigerate. Add berries and apple slices 30 minutes before serving. This prevents mushiness and browning.
Make it more than 4 hours ahead — honestly, just don’t. The fruit gets sad, the cheese gets cold and hard, and the crackers lose their crispness. I recommend assembling this no more than a few hours before you serve it.
Leftover components last in the fridge for 3-5 days separately, but once mixed on a board, eat within a day. Cheese keeps longer than fruit, so if there’s leftover cheese, absolutely save it for snacking!
Nutrition Information
This tray is naturally nutrient-dense and flexible, which is why I love recommending it as a healthy entertaining option. One of the benefits of fruit and cheese boards is that guests can control their own portions and make choices that work for their nutritional needs.
According to USDA data, a serving that includes roughly 1 ounce of cheese, ½ cup mixed berries, ¼ apple, and a small handful of nuts provides approximately 180-220 calories, 6-8g protein, 18-22g carbohydrates, and 10-12g healthy fats. The beauty? Guests can eat more fruit and fewer crackers, or vice versa, based on their goals.
The fruit provides essential vitamins, minerals, and fiber. Berries are packed with antioxidants. Cheese provides protein, calcium, and satisfying fat that helps you feel full. Nuts add healthy fats and additional protein. This isn’t just pretty—it’s genuinely nourishing.
Expert’s Nutritional Tip: As a registered dietitian, I always notice that fruit and cheese boards naturally balance macronutrients beautifully. The sweetness of fruit plus the richness of cheese creates genuine satisfaction, which means people eat mindfully rather than mindlessly. If you’re looking to boost protein, add more nuts or choose aged cheeses, which are higher in protein per ounce. If you want more fiber, emphasize the fruit. This flexibility is what makes this recipe work for so many different nutritional goals.
What Can I Serve With Fruit And Cheese Tray?
This tray works beautifully as a standalone appetizer, but here are some pairing ideas if you want to round out your menu:
- As a complete light lunch — add some cured meats like prosciutto or salami and you’ve got a full meal. Pairs beautifully with a crisp white wine or sparkling water.
- Before a main course — serve this at the start of a meal to take the edge off hunger while you’re finishing up other dishes. It’s elegant and filling without being too heavy.
- Alongside warm appetizers — if you’re serving something warm like a butternut squash and spinach appetizer, the fresh, cool fruit board provides perfect balance.
- With healthy dinner sides — serve this before a main like lemon broccolini or grilled protein for a complete, balanced meal.
- At brunch — this is stunning alongside morning coffee, or pair it with pastries for a relaxed brunch spread.
Seasonal Variations: Adapt This Recipe Year-Round
One of my favorite things about this tray is how it changes with the seasons. You’re not locked into the same ingredients—instead, you follow what’s fresh and beautiful at your farmers market.
Spring: Highlight strawberries, fresh raspberries, asparagus tips (yes, really!), and tender goat cheese. Add edible flowers like pansies for color. Spring feels light and delicate on a board.
Summer: Go wild with stone fruits—peaches, plums, nectarines. Add cherries, blackberries, and bright berries. Fresh mozzarella and burrata cheese are perfect in warm months. Almonds and pistachios work beautifully.
Fall: Embrace pears, grapes, and apple varieties. Add dried apricots and figs for depth. Aged Cheddar and Gruyere are perfect fall cheeses. Walnuts and candied pecans add richness and warmth.
Winter: Use pomegranate seeds (beautiful color!), persimmons, citrus varieties like clementines and tangerines, and dried cranberries. Aged Parmesan and sharp Cheddar shine. Walnuts and candied nuts bring warmth.
Make-Ahead Guide: Prep Like a Pro
As a registered dietitian who’s spent years managing client nutrition consultations and group events, I’ve perfected the art of strategic prep. Here’s exactly how to tackle this if you’re short on time the day of:
The day before: Buy all your ingredients. Wash and dry fruit completely. Store in airtight containers in the fridge. Cut your baguette, wrap it in foil or a bag, and store at room temperature. Don’t cut cheese yet—it’s fresher when cut closer to serving.
2 hours before serving: Cut all your cheese. Slice your apples and place them on a plate with a bit of lemon juice to prevent browning. Arrange everything on your board according to the steps above. Cover with plastic wrap and refrigerate.
15 minutes before serving: Remove the board from the fridge. This gives cheese time to come to room temperature and flavors to fully express themselves. Add serving utensils. Do a final check for any gaps that need filling.

Fruit And Cheese Tray Recipe
Ingredients
Method
- Start by rinsing all your fresh fruit under cool running water. Gently pat berries dry with paper towels—wet berries can get mushy and sticky on your board. For the apple, wash it well and slice it thinly (about ¼-inch thick). I slice mine lengthwise so you get those beautiful red or green striped rings. If you're worried about the apple browning, which many people are, here's my trick: slice it about 15 minutes before serving, and it'll be fine. The acid in any citrus on your board will naturally prevent browning. If you're making this hours ahead, you can toss the apple slices in a tiny bit of lemon juice. For the mandarin oranges, peel them and separate into individual segments. Leave them whole—don't break them up. For the grapes, rinse them and leave them in small clusters or separate them depending on your preference. I actually like leaving small clusters because they look more abundant on the board.
- This is where the visual magic starts happening. Take your Parmesan-Reggiano and break or cut it into rough, irregular chunks. You're not looking for perfect pieces—irregular looks more elegant and inviting. If your cheese came sliced, fold some slices into quarters or thirds. For your assorted sliced cheeses, I like cutting them into triangles or leaving them as they are if they're already sliced nicely. The variety of shapes matters more than perfection. Take those mini cheese rounds and unwrap them so they're ready to go. Slice your baguette into thin pieces—about ¼ to ½ inch thick. Arrange them on the board as you work, or keep them in a small pile off to the side if you're worried about them drying out. They stay fresher that way until the last moment.
- Now we get to the creative part! Take your board or platter and lay out your larger items first. I always start with the cheeses because they're the anchors of this board. Place your Parmesan chunks in 2-3 small clusters spread across the board. Do the same with your sliced assorted cheeses—group similar types together but spread the groups around. This creates visual balance. Next, arrange your mini cheese rounds in a small cluster or scatter them throughout. Think of these bigger items as the foundation of your design. If you're using small bowls for nuts or honey, place those on the board now. These bowls act as natural dividers and help you fill space efficiently.
- This is where it comes alive! Start filling in the gaps between your cheeses with fruit. Group same fruits together rather than scattering individual pieces everywhere. A cluster of berries looks better than berries dotted randomly across the board. A pile of apple slices looks intentional rather than scattered. Create little sections: blueberries here, strawberries there, apple slices in that corner, grapes along the edge, mandarin segments in another spot. The key is to make it look full and colorful. If you see empty space, it's not full enough yet. Scatter your pistachios and mixed nuts around—these add beautiful color contrast and texture. I like putting nuts near the cheese since they pair so well together.
- Now arrange your crackers around the board in small piles or standing slightly upright. Lean some crackers against the cheese or fruit—this looks more dynamic than laying them all flat. Fill any remaining gaps with additional crackers, extra berries, or a few more grapes. If you're using honey or jam, drizzle the honey decoratively or add a small spoon in the bowl. This signals to guests that these are meant for dipping. Step back and look at your creation. Does it look full? Does it have color variety? Are there any glaringly empty spaces? If yes to all, you're done!
- Before serving, place a cheese knife, small spoon, or wooden spreader on the board for guests to use. You can also add small toothpicks for grabbing berries or small pieces. This makes it easy for people to serve themselves without using their hands. If you're serving immediately, fantastic! If you made it ahead, cover it loosely with plastic wrap or a tea towel and refrigerate. Just let it sit at room temperature for about 10-15 minutes before serving so the cheese isn't ice-cold.
Notes
FAQs
Can I make this board completely vegan?
Absolutely! Skip the cheese entirely or use plant-based cheese alternatives (though I’ll be honest, the flavor isn’t quite the same in my opinion). Build your board with extra fruit, nuts, seeds, olives, hummus, and crusty bread. You’ll have a stunning board that’s completely plant-based. The principle of abundance and color variety stays exactly the same.
What if someone has a nut allergy?
Simply skip the nuts entirely! Your board will still be beautiful and full with double the amount of fruit and extra crackers. You could also add seeds like sunflower or pumpkin seeds, which provide similar texture and nutrition. Just make sure all your ingredients, including cheese and crackers, are nut-free and made in nut-free facilities.
How far in advance can I assemble this?
I recommend assembling no more than 2-3 hours ahead. If you need to make it further ahead, prep your ingredients the day before and assemble the morning of your event. The challenge with making it too far ahead is that fruit loses freshness, cheese gets hard, and crackers lose their crisp texture. Fresh and delicious is always better than convenience.
What if my fruit isn’t ripe or looks sad?
This happens! If your berries aren’t as vibrant as you’d hoped, buy more of a different variety to boost color. If your apples are mushy, skip them and add more grapes or citrus. The most important thing is that everything on your board tastes and looks good. Don’t be afraid to adjust based on what’s beautiful at your store.
Can I include warm items on this board?
You can, but it’s tricky. I’ve served warm soft cheese (like baked brie) alongside a cold fruit and cheese board by keeping them on separate surfaces. If you want warmth, I’d suggest serving warm items on a separate platter and keeping your fruit board cold and fresh. They can live side by side on your buffet table beautifully.
More Beginner-Friendly Recipes
- Cheese Board Recipe — a more elaborate version that includes cured meats and additional cheese varieties for advanced entertaining
- Brie Wreath Recipe — an elegant warm cheese appetizer that’s perfect alongside your fruit board
- Brie And Bacon Recipe — a simple warm starter that complements cold fruit and cheese beautifully
- Air Fryer Grouper Recipe — a protein option to serve alongside your board for a complete meal
You did it. You made a fruit and cheese tray from scratch, and I’m genuinely proud of you. Whether this is your first time or your fiftieth, I hope you felt that little spark of joy when you stepped back and saw what you created. That’s the feeling I chase every single day in the kitchen—that moment when food becomes not just nourishing, but beautiful and meaningful.
This tray is going to impress your family and friends. More importantly, it’s going to remind you that you’re capable of creating something wonderful with your own hands. That confidence? Hold onto it. It’s going to serve you well in the kitchen and beyond.
Thank you for letting me guide you through this recipe today. I hope you find joy in every recipe!