
Easy Raisin Bread Recipe
 By
By This post contains affiliate links. As an Amazon Associate I earn from qualifying purchases.
I can still see my mother standing at our kitchen counter on Sunday mornings, kneading dough with flour dusting her apron, the scent of cinnamon and warm yeast filling every corner of our house. My grandmother would be nearby, telling stories about how she learned to bake in her own mother’s kitchen, and I’d be there as a kid, my small hands pressed into the dough alongside hers. That’s when I first understood something profound: food isn’t just about feeding your body—it’s about nourishing your soul and creating memories that last a lifetime. This easy raisin bread recipe is my love letter to those mornings, and I’m thrilled to share it with you. Whether you’re preparing for a cozy family breakfast, planning a holiday gathering, or simply wanting to fill your home with the aroma of homemade goodness, this recipe delivers pure comfort in every slice. I’ve streamlined it from my grandmother’s traditional method, making it achievable for modern kitchens while keeping every bit of that warmth and nostalgia intact.
Easy Raisin Bread Recipe That Will Transform Your Weekend Mornings
I remember the first time I truly appreciated what my mother was doing in that kitchen. I was probably eight years old, and I’d watched her make this bread dozens of times, but that particular Sunday felt different. She pulled the golden loaves from the oven, and the entire house seemed to pause in that moment. My dad came down the stairs drawn by the smell alone. My grandmother emerged from the living room. We all gathered around the cooling racks, waiting impatiently to taste those first warm slices slathered with butter.
What struck me then—and what I understand now as a registered dietitian—is that this bread represents something essential about how we nourish ourselves and our families. It’s made with real, whole ingredients. There’s no rushing the process, but there’s also no complicated technique that requires years of baking experience. It’s pure, honest, and accessible. And yes, it takes a bit of time, but most of that time is the dough rising while you go about your morning. The actual hands-on work? About 30 minutes total.
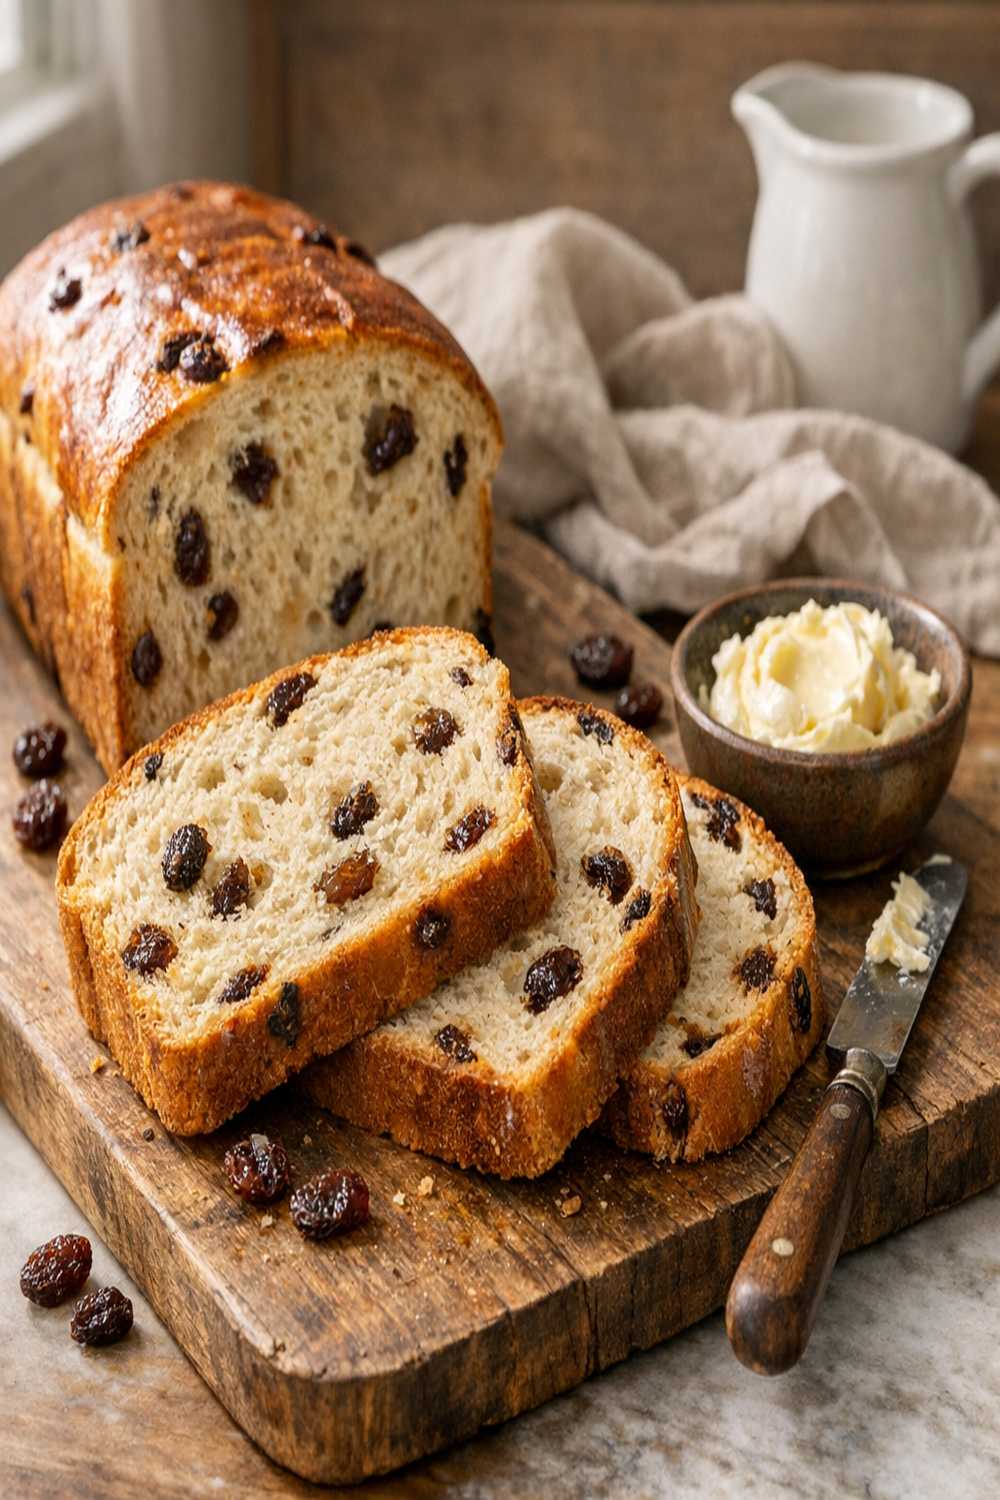
When to Make Easy Raisin Bread Recipe
This is the bread I reach for when life calls for something special, yet totally doable. Let me paint you some pictures of when this shines:
- Holiday mornings—Thanksgiving, Christmas, Easter—when you want your home to smell like celebration before anyone even wakes up. Fresh raisin bread with a cup of coffee is the perfect breakfast before a big family meal.
- Weekend entertaining—Make this the night before, and you’ll have an impressive, homemade gift for houseguests or a stunning addition to a brunch spread. People are genuinely amazed by homemade bread.
- Those “I need comfort” evenings—When stress is high or the weather turns cold, nothing settles the soul like warm bread with melting butter. I keep a loaf in my freezer year-round for these moments.
- Back-to-school season—Toast thick slices, add a bit of honey or almond butter, and you’ve got a breakfast that actually fuels your kids through their morning classes.
- Gift-giving occasions—Wrap a cooled loaf in parchment and tie it with twine. This is a gift that says “I took time to make something beautiful for you,” and it means so much more than store-bought alternatives.
What Makes This Easy Raisin Bread Recipe Special
From a nutritional standpoint, I love recommending this recipe because it’s built on whole, recognizable ingredients. You’re working with milk, eggs, real butter, and fresh yeast—not a list of preservatives or dough conditioners. The raisins aren’t just flavor; they’re providing natural sweetness, fiber, and minerals like iron and potassium. The cinnamon isn’t just for taste; research shows it can help with blood sugar management, making this bread slightly more balanced than standard white breads.
But beyond the nutrition, what makes this special is the tradition wrapped up in every step. This isn’t a five-ingredient miracle bread or some viral recipe designed to be trendy. This is the kind of bread that sustained families through generations. When you make it, you’re participating in something real and timeless. Your home will smell incredible, yes, but you’ll also feel connected to something bigger than yourself—to every person who ever stood in a kitchen and kneaded dough with intention and love.
Scaling for Your Crowd
I love how flexible this recipe is! It makes three beautiful loaves, which is perfect for a family of four to six for several breakfasts. But let me walk you through scaling:
- For 2 people (1 loaf): Divide all ingredients by three. Use one 9×5-inch loaf pan. Reduce the final baking time to 35-40 minutes, as a single loaf bakes faster. The rising times remain the same—yeast works on its own timeline regardless of quantity.
- For a crowd of 12-15 (6 loaves): Double this entire recipe. You’ll need two large mixing bowls to avoid overstuffing. Mix in batches if your stand mixer isn’t commercial-grade. You can let all loaves rise together on your kitchen counter if you have the space, or stagger them in two waves. Bake them in batches—three loaves at a time at 350 degrees.
The Ingredients
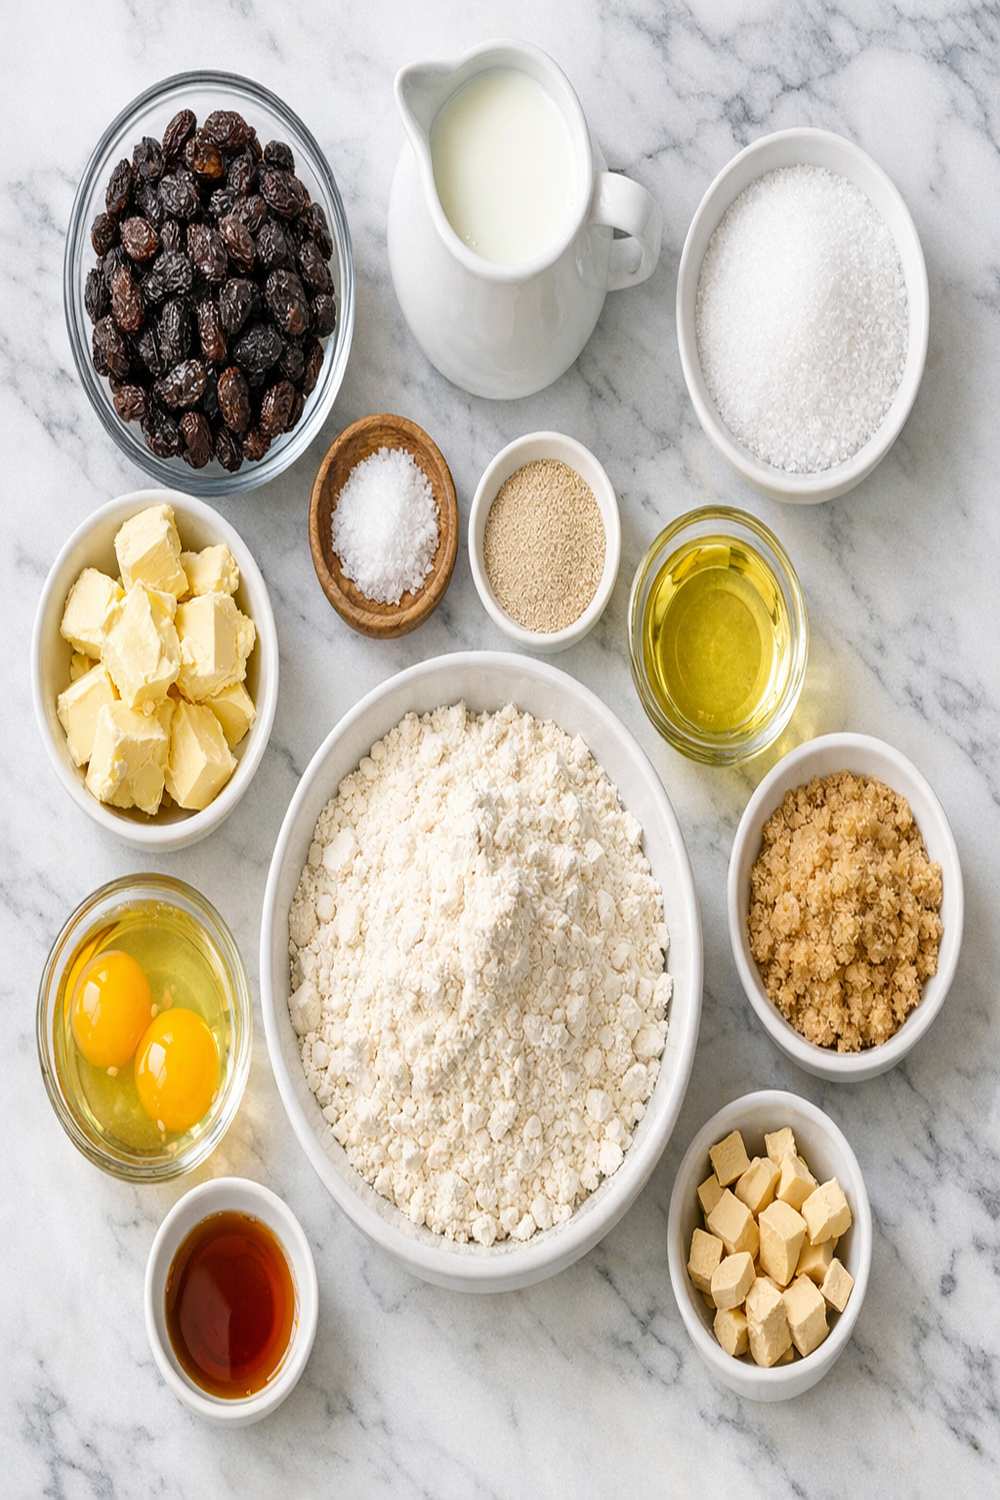
Here’s everything you need to create three stunning loaves that’ll make your kitchen feel like a professional bakery:
- ½ cup unsalted butter (softened, for a tender and flavorful dough)
- 1 cup warm water (between 110-115 degrees—this temperature is crucial for activating yeast)
- 1 cup raisins (plump and fresh, soaked in warm water for 5 minutes if they’re dry)
- 1½ cups whole milk (full-fat creates the richest texture and tender crumb)
- 2 tablespoons unsalted butter (melted, for brushing on finished loaves)
- 8 cups all-purpose flour (spooned and leveled, never packed, divided for mixing)
- ½ cup granulated white sugar (for the dough itself)
- 1 teaspoon sea salt (enhances all the flavors beautifully)
- 1 cup granulated white sugar (separate amount for the cinnamon filling)
- 1 tablespoon honey (optional but lovely—adds subtle richness to the finished crust)
- 3 large eggs (room temperature, so they incorporate smoothly without cooking)
- 2 packets active dry yeast (about ½ ounce total, the foundation of everything magical here)
- 3 tablespoons ground cinnamon (freshly ground if possible—it makes a real difference)
- 2 tablespoons whole milk (for moistening the dough before adding filling)
How to Make Easy Raisin Bread Recipe for Your Occasion
I’m going to walk you through this step by step, and I promise you—this is achievable. The yeast does most of the heavy lifting. You’re just guiding the process. Let’s create something beautiful together.
Step 1: Activate Your Yeast (The Critical Foundation)
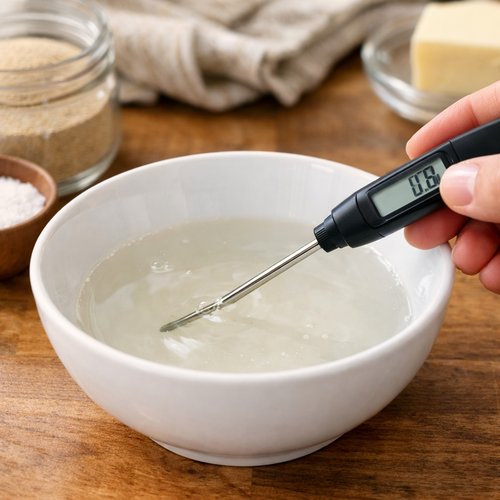
Pour your warm water into a small bowl and check the temperature with an instant-read thermometer. This matters more than you’d think. Water that’s too cool won’t activate the yeast; water that’s too hot will kill it. You’re aiming for that sweet spot between 110-115 degrees—think comfortably warm bath water.
Sprinkle both packets of yeast into that warm water and let it sit undisturbed for about 10 minutes. You’ll watch something magical happen: the yeast will bloom and become foamy on top. This foam is your signal that everything’s working. If you don’t see foam after 10 minutes, your yeast might be expired—start over with a fresh packet. Trust me on this one.
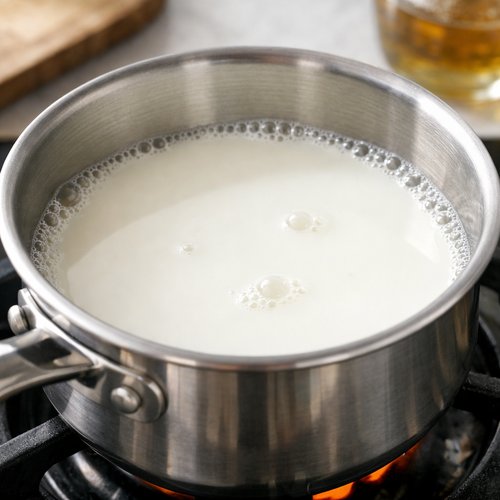
Step 2: Warm Your Milk (Gentle Heat, Big Impact)
In a small saucepan, pour your milk and turn the heat to medium. You’re not boiling it; you’re just warming it until you see small bubbles forming around the edges—that’s about 180 degrees. This step pasteurizes the milk slightly and helps develop the bread’s flavor and texture. Remove it from heat immediately and let it cool to lukewarm, about 120-125 degrees. This takes about 5-10 minutes of sitting time.
Why does temperature matter here? Milk that’s too hot can interfere with gluten development. Milk that’s too cool won’t help activate the yeast properly. You’re creating optimal conditions for your dough to rise beautifully.
Step 3: Combine Your Wet Ingredients (The Dough Foundation)
Pour your foamy yeast mixture into a large mixing bowl—or the bowl of your stand mixer if you have one. Add your cooled milk slowly, stirring gently. Then add your three room-temperature eggs, one at a time, mixing well after each addition. Add the milk slowly so the residual heat doesn’t scramble your eggs. This might sound overly cautious, but I learned this the hard way years ago!
Add your softened butter, ½ cup sugar, and salt. Mix until everything is combined and you have a slightly thick, wet mixture. This should take about 2-3 minutes with a stand mixer or about 5 minutes by hand with a wooden spoon.
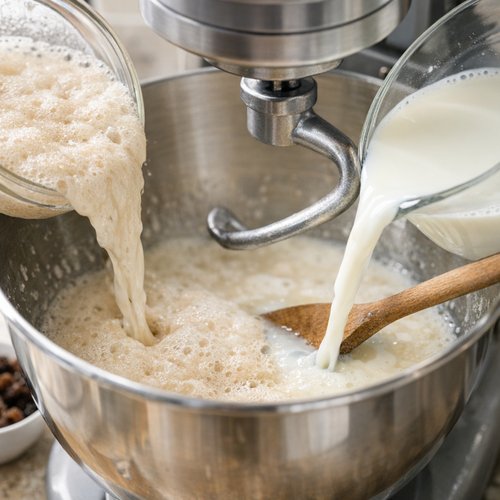
Step 4: Add Your Flour and Raisins (Building Structure)
Now comes the part where your dough transforms from a wet mixture into something with actual structure. Add your 8 cups of flour gradually—about 1 cup at a time—mixing between each addition. I like to use my stand mixer with the dough hook here, but a wooden spoon works beautifully too if you’re doing this by hand.
When you’ve added about 6 cups of flour, fold in your raisins. Continue adding flour until you have a stiff dough that pulls away from the sides of the bowl. You might not need all 8 cups, or you might need a little more—flour absorbs moisture differently depending on humidity. You’re looking for a dough that’s slightly sticky but holds together.
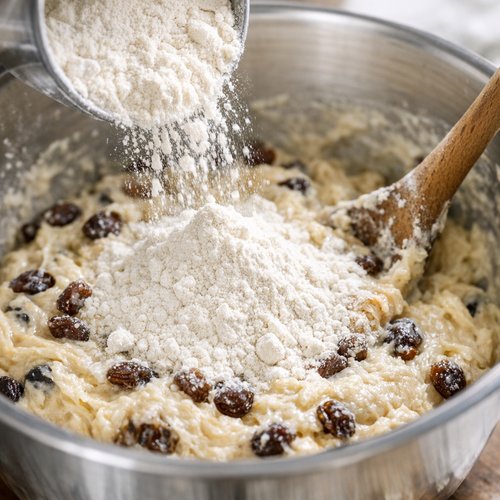
Step 5: Knead Your Dough (Creating the Gluten Network)
Turn your dough out onto a lightly floured surface. Knead it for about 8-10 minutes, using the heel of your hand to push the dough away from you, then folding it back over itself. If you’re using a stand mixer with a dough hook, run it on medium speed for 5-7 minutes—it does the same work.
You’ll feel the dough transform under your hands. It starts shaggy and slightly sticky, then gradually becomes smoother and more elastic. This is gluten development happening in real time. When you press your finger into the dough, it should spring back slowly—not immediately, but eventually. That’s your signal you’re ready to rise.
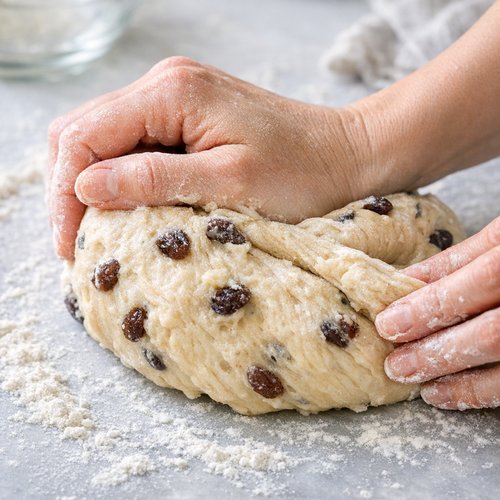
Step 6: First Rise—The Patience Phase (1½ Hours)
Lightly butter a large mixing bowl. Place your kneaded dough inside and turn it over so the surface is coated with a light layer of butter. This prevents a crust from forming on top. Cover it with a warm, damp kitchen towel or plastic wrap.
Here’s my favorite hack: place the covered bowl inside your oven with just the light turned on. The gentle warmth from that bulb creates the perfect rising environment—warm enough to encourage yeast activity but not so hot that it causes uneven rising. If your oven light doesn’t provide enough warmth, you can also place the bowl on top of your refrigerator or in a turned-off oven with the door cracked.
Let it rise for about 1½ hours, or until it’s doubled in size. The exact time varies based on your kitchen temperature. During winter, it might take closer to 2 hours. During summer, it might be done in an hour. You’re watching for size, not the clock.
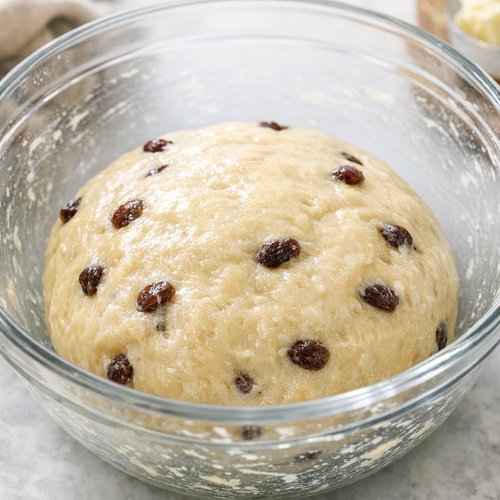
Step 7: Shape Your Loaves (The Transformation Moment)
Turn your puffy, risen dough out onto a lightly floured surface. Divide it into three roughly equal pieces. Take one piece and roll it out into a rectangle about ½ inch thick—roughly 8×12 inches.
Brush the surface lightly with your 2 tablespoons of milk. In a small bowl, mix your 1 cup of sugar with your 3 tablespoons of cinnamon. Sprinkle this mixture evenly over the moistened dough—don’t skimp here; you want every bite to have that cinnamon sugar goodness.
Starting from one long edge, roll the dough tightly toward you, creating a log about 3 inches in diameter. Roll tightly, but not so tight that you’re forcing out all the air. You want some gentle tension. Pinch the seam along the bottom and tuck the ends under slightly.
Repeat with your two remaining dough pieces.
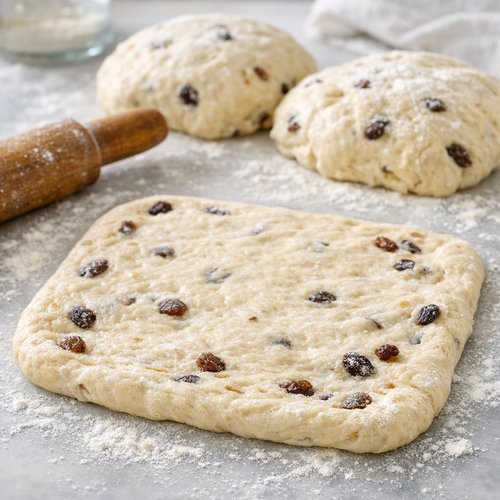
Step 8: Place in Pans and Second Rise (1 Hour)
Generously grease three 9×5-inch loaf pans with butter or non-stick spray. Place one shaped loaf into each pan, seam-side down. Lightly brush the tops with a little more melted butter. Cover them loosely with plastic wrap or a damp towel.
Let them rise in a warm place for about 1 hour, or until they’ve puffed above the edges of the pans. You want them puffy but not so overproofed that they collapse when you touch them. If you gently poke the side of a loaf, your finger should leave a slight indentation that springs back slowly.
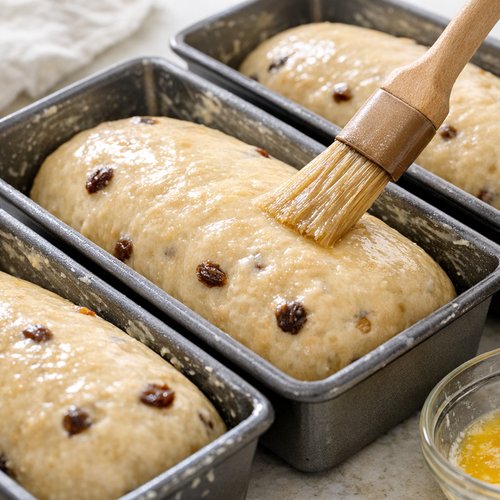
Step 9: Bake Until Golden (45 Minutes of Anticipation)
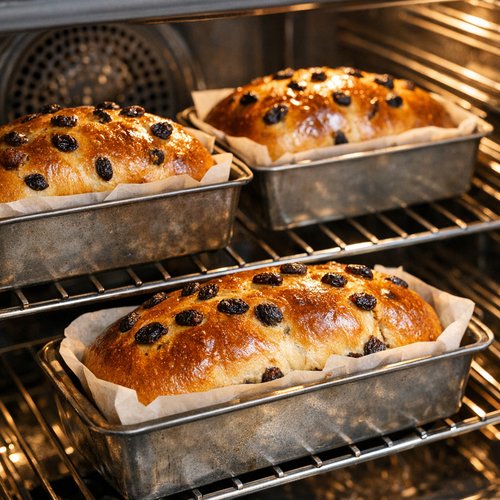
Preheat your oven to 350 degrees. Place your three loaves on the middle racks—if they’re on different racks, you might want to rotate them halfway through baking so they brown evenly.
Bake for 45 minutes, or until the tops are a beautiful golden brown and the loaves sound hollow when you tap them on the bottom. This hollow sound tells you the inside is fully cooked through. If the tops are browning too quickly, you can tent them loosely with foil after about 30 minutes.
Step 10: Cool and Final Brush (Finishing Touches)
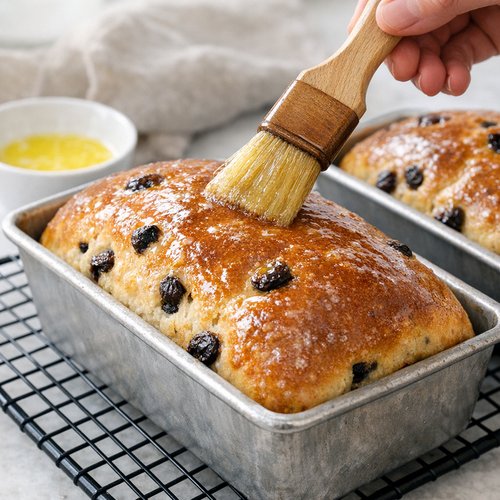
Remove your loaves from the oven and immediately brush the tops with melted butter. This creates a soft, tender crust and adds richness. Let them cool in the pans for about 20 minutes, then turn them out onto wire racks to cool completely. After about 20 minutes on the racks, you can lay them on their sides (they’ll be easier to slice this way) and continue cooling.
I know it’s torture to wait, but let these loaves cool completely before slicing—about 1-2 hours. If you slice them warm, the inside structure is still setting, and you’ll get gummy slices. Once fully cooled, they slice beautifully and stay fresh for days.
Make-Ahead Timeline
- 3 days before: Check your yeast packets to make sure they’re not expired. There’s nothing worse than starting this whole project and realizing your yeast is dead halfway through. Also, this is when I like to gather all my dry ingredients and measure them into separate bowls—it makes the actual baking day feel so much less hectic.
- 1 day before: You can actually make this entire recipe through the first rise the night before. Let your dough rise completely, punch it down, cover it tightly, and refrigerate it overnight. The next morning, divide and shape it, let it come to room temperature for about 30 minutes, then proceed with the second rise and baking. The cold fermentation actually develops the flavor beautifully.
- Day of: If you’re not using the make-ahead method, start early in the morning so your loaves finish baking by early afternoon. The actual hands-on time is about 30 minutes, spread across a few hours of rising time. While the dough rises, I like to do other things—drink my coffee, prep other recipes (maybe those Baked Oatmeal Cups for the week), or spend time with my family.
How to Present and Plate Easy Raisin Bread Recipe
Let’s talk about making this look as good as it tastes. There’s something deeply satisfying about a beautifully presented homemade loaf.
- Slice thickness matters: Use a sharp serrated knife and slice about ½ to ¾ inch thick. Thick enough that the bread holds its shape, thin enough to show off those pretty cinnamon swirls inside. Dip your knife in hot water and wipe it between slices for clean cuts.
- Toast and serve: I love serving this bread slightly warm, either plain or toasted. Place slices on a wooden cutting board, stack them casually, and let the golden color and those visible raisins tell the story. A pat of butter on a warm slice is all the presentation you need.
- Gift presentation: If you’re giving this as a gift, wrap it in parchment paper, tie it with kitchen twine, and maybe add a small card with a note about when it’s best eaten. The presentation says “I made this with care for you,” and that’s powerful.
Seasonal Variations
- Spring/Summer version: Replace half the raisins with fresh diced apricots or small pieces of dried pineapple. Use the zest of one lemon mixed into your cinnamon sugar filling. This brings brightness and a subtle tropical note that feels perfect as the weather warms. You can also reduce the cinnamon to 2 tablespoons and add ½ teaspoon cardamom for something more delicate and springlike.
- Fall/Winter version: Add 1 teaspoon of pumpkin pie spice to your dough for subtle warmth. Increase the cinnamon in your filling to 4 tablespoons and add ¼ teaspoon ground cloves. Some people love adding ½ cup chopped pecans or walnuts mixed with the raisins. These flavors deepen and warm the bread, making it feel like autumn itself in edible form.
What to Serve Alongside Easy Raisin Bread Recipe
While this bread absolutely shines on its own, here’s how I like to build a complete meal around it:
- Breakfast spread: Serve alongside fresh fruit, yogurt, and a simple green salad with lemon vinaigrette. I often make my Lemon Broccolini Recipe on the side for a dose of greens that balances the richness of the bread.
- Brunch entertaining: Pair with eggs (scrambled or baked), fresh berries, a mild cheese like brie, and maybe some Brie And Bacon for a more indulgent spread. The bread soaks up any egg yolks beautifully.
- Coffee and company: Toast thick slices and serve with good butter, honey, and a strong cup of coffee or tea. This is my favorite way to enjoy it—no fuss, just bread and warmth.
- Light dinner: Serve alongside soup or a simple salad like the Butternut Squash Spinach Recipe for a cozy autumn meal. Warm bread is perfect for dipping and soaking up delicious broth.
Can I Store Easy Raisin Bread Recipe?
Yes! This is one of the best parts of making your own bread—you control exactly what goes in, so you know exactly how long it stays fresh.
Room temperature (best for 2-3 days): Place cooled loaves in an airtight container or wrap tightly in plastic wrap. The bread stays soft and fresh this way. If you leave it uncovered, it will develop a hard crust within a day, which is fine if you like that texture for toasting, but less ideal for fresh slices.
Refrigerator (extends to 5-7 days): If you want to extend the shelf life, wrap tightly and refrigerate. The cool temperature slows down staleness, though the bread won’t stay quite as soft as room temperature storage. Toast slices before eating for best texture.
Freezer (best for 3 months): This is my favorite storage method. Let loaves cool completely, wrap tightly in plastic wrap, then in foil, and freeze. When you want bread, thaw it at room temperature for 2-3 hours, or slice while frozen and toast directly from frozen. The texture actually stays quite nice with proper freezing.
Pro tip: Slice your loaves before freezing. That way, you can pull out exactly how much you need and toast individual slices without thawing the whole loaf.
Nutrition Information
According to USDA standards, one slice of this raisin bread (approximately 1/18th of a loaf) contains roughly 210 calories, 5g protein, 38g carbohydrates, 4g fat, and 2g dietary fiber. The raisins contribute natural sugars and fiber, while the eggs and milk provide protein and calcium. The cinnamon adds compounds with potential anti-inflammatory properties.
From a registered dietitian perspective, what I appreciate about this recipe is that it uses whole ingredients without artificial additives. The fat comes from real butter and eggs, not shortening or dough conditioners. The sweetness is granulated sugar and naturally sweet raisins, not high-fructose corn syrup. One slice with butter and honey provides sustained energy from the carbohydrates, satiety from the protein and fat, and micronutrients like iron (from the raisins) and B vitamins (from the eggs and enriched flour).
Is it a health food? No—it’s still a bread with sugar and refined flour. But is it a nourishing, whole-ingredient treat made with care? Absolutely. This is the kind of bread I recommend families enjoy as part of a balanced diet, not as an everyday staple, but as a special occasion food that brings joy and connection.

Easy Raisin Bread Recipe
Ingredients
Method
- Pour your warm water into a small bowl and check the temperature with an instant-read thermometer. This matters more than you'd think. Water that's too cool won't activate the yeast; water that's too hot will kill it. You're aiming for that sweet spot between 110-115 degrees—think comfortably warm bath water. Sprinkle both packets of yeast into that warm water and let it sit undisturbed for about 10 minutes. You'll watch something magical happen: the yeast will bloom and become foamy on top. This foam is your signal that everything's working. If you don't see foam after 10 minutes, your yeast might be expired—start over with a fresh packet. Trust me on this one.

- In a small saucepan, pour your milk and turn the heat to medium. You're not boiling it; you're just warming it until you see small bubbles forming around the edges—that's about 180 degrees. This step pasteurizes the milk slightly and helps develop the bread's flavor and texture. Remove it from heat immediately and let it cool to lukewarm, about 120-125 degrees. This takes about 5-10 minutes of sitting time. Why does temperature matter here? Milk that's too hot can interfere with gluten development. Milk that's too cool won't help activate the yeast properly. You're creating optimal conditions for your dough to rise beautifully.

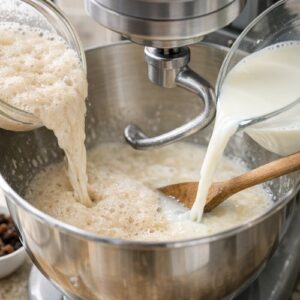
- Pour your foamy yeast mixture into a large mixing bowl—or the bowl of your stand mixer if you have one. Add your cooled milk slowly, stirring gently. Then add your three room-temperature eggs, one at a time, mixing well after each addition. Add the milk slowly so the residual heat doesn't scramble your eggs. This might sound overly cautious, but I learned this the hard way years ago! Add your softened butter, ½ cup sugar, and salt. Mix until everything is combined and you have a slightly thick, wet mixture. This should take about 2-3 minutes with a stand mixer or about 5 minutes by hand with a wooden spoon.
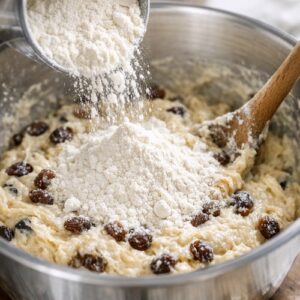
- Now comes the part where your dough transforms from a wet mixture into something with actual structure. Add your 8 cups of flour gradually—about 1 cup at a time—mixing between each addition. I like to use my stand mixer with the dough hook here, but a wooden spoon works beautifully too if you're doing this by hand. When you've added about 6 cups of flour, fold in your raisins. Continue adding flour until you have a stiff dough that pulls away from the sides of the bowl. You might not need all 8 cups, or you might need a little more—flour absorbs moisture differently depending on humidity. You're looking for a dough that's slightly sticky but holds together.
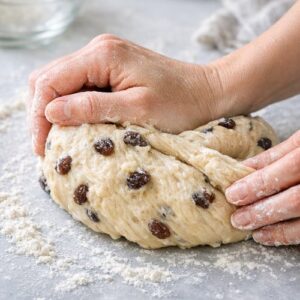
- Turn your dough out onto a lightly floured surface. Knead it for about 8-10 minutes, using the heel of your hand to push the dough away from you, then folding it back over itself. If you're using a stand mixer with a dough hook, run it on medium speed for 5-7 minutes—it does the same work. You'll feel the dough transform under your hands. It starts shaggy and slightly sticky, then gradually becomes smoother and more elastic. This is gluten development happening in real time. When you press your finger into the dough, it should spring back slowly—not immediately, but eventually. That's your signal you're ready to rise.
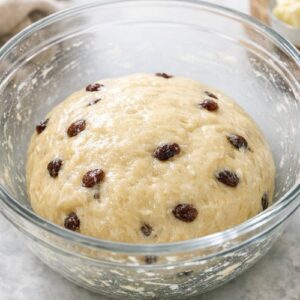
- Lightly butter a large mixing bowl. Place your kneaded dough inside and turn it over so the surface is coated with a light layer of butter. This prevents a crust from forming on top. Cover it with a warm, damp kitchen towel or plastic wrap. Here's my favorite hack: place the covered bowl inside your oven with just the light turned on. The gentle warmth from that bulb creates the perfect rising environment—warm enough to encourage yeast activity but not so hot that it causes uneven rising. If your oven light doesn't provide enough warmth, you can also place the bowl on top of your refrigerator or in a turned-off oven with the door cracked. Let it rise for about 1½ hours, or until it's doubled in size. The exact time varies based on your kitchen temperature. During winter, it might take closer to 2 hours. During summer, it might be done in an hour. You're watching for size, not the clock.
- Turn your puffy, risen dough out onto a lightly floured surface. Divide it into three roughly equal pieces. Take one piece and roll it out into a rectangle about ½ inch thick—roughly 8x12 inches. Brush the surface lightly with your 2 tablespoons of milk. In a small bowl, mix your 1 cup of sugar with your 3 tablespoons of cinnamon. Sprinkle this mixture evenly over the moistened dough—don't skimp here; you want every bite to have that cinnamon sugar goodness. Starting from one long edge, roll the dough tightly toward you, creating a log about 3 inches in diameter. Roll tightly, but not so tight that you're forcing out all the air. You want some gentle tension. Pinch the seam along the bottom and tuck the ends under slightly. Repeat with your two remaining dough pieces.
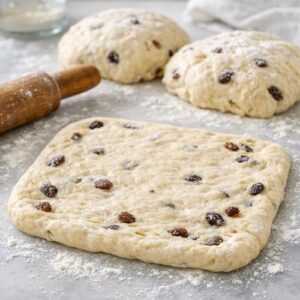
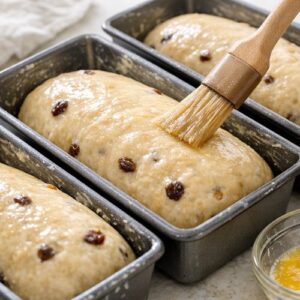
- Generously grease three 9x5-inch loaf pans with butter or non-stick spray. Place one shaped loaf into each pan, seam-side down. Lightly brush the tops with a little more melted butter. Cover them loosely with plastic wrap or a damp towel. Let them rise in a warm place for about 1 hour, or until they've puffed above the edges of the pans. You want them puffy but not so overproofed that they collapse when you touch them. If you gently poke the side of a loaf, your finger should leave a slight indentation that springs back slowly.
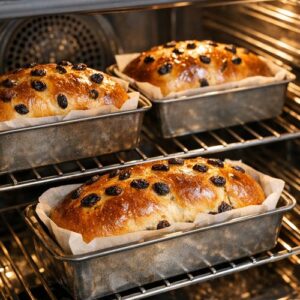
- Preheat your oven to 350 degrees. Place your three loaves on the middle racks—if they're on different racks, you might want to rotate them halfway through baking so they brown evenly. Bake for 45 minutes, or until the tops are a beautiful golden brown and the loaves sound hollow when you tap them on the bottom. This hollow sound tells you the inside is fully cooked through. If the tops are browning too quickly, you can tent them loosely with foil after about 30 minutes.
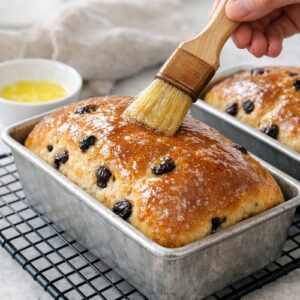
- Remove your loaves from the oven and immediately brush the tops with melted butter. This creates a soft, tender crust and adds richness. Let them cool in the pans for about 20 minutes, then turn them out onto wire racks to cool completely. After about 20 minutes on the racks, you can lay them on their sides (they'll be easier to slice this way) and continue cooling. I know it's torture to wait, but let these loaves cool completely before slicing—about 1-2 hours. If you slice them warm, the inside structure is still setting, and you'll get gummy slices. Once fully cooled, they slice beautifully and stay fresh for days.
Notes
FAQs
Can I make this recipe without a stand mixer?
Absolutely! I grew up making bread by hand, and it’s actually therapeutic. You’ll mix everything in a large bowl with a wooden spoon, and when it gets thick, you’ll turn it out and knead it by hand for about 10-12 minutes. Your arms will get a little workout, but you’ll have a stronger feel for when the dough is properly kneaded because you’re working with it directly. Just allow a little extra time for mixing by hand compared to using a stand mixer.
What if my yeast doesn’t foam after 10 minutes?
This means your yeast is likely expired or your water wasn’t the right temperature. Don’t proceed with the recipe—the whole batch won’t rise properly. Start over with a new yeast packet. Always check the expiration date on your yeast packets before starting, and always use an instant-read thermometer for the water temperature. This is non-negotiable for successful bread baking.
Can I use instant yeast instead of active dry yeast?
Yes! Instant yeast and active dry yeast are slightly different in particle size, but they work basically the same way. You might reduce the rising time by about 10-15 minutes with instant yeast since it’s slightly more concentrated. Watch your dough for signs of readiness (doubled in size) rather than relying solely on the clock.
My kitchen is cold—will the dough still rise?
Yes, but it will take longer. Cold kitchens slow yeast fermentation. Instead of 1½ hours for the first rise, you might need 2-2½ hours. This is actually fine—longer, slower rises develop more flavor. Avoid placing your bowl in a drafty area. If your kitchen is very cold (below 65 degrees), try warming your oven to 200 degrees, turning it off, then placing your covered dough inside. The residual warmth helps tremendously.
Can I add other mix-ins besides raisins?
Totally! This dough is very forgiving with add-ins. Try dried cranberries, chopped dried apricots, diced fresh apple mixed with a little extra cinnamon, or even chopped pecans. Add them at the same point you’d add the raisins. Just keep the total amount around 1 cup so the dough isn’t overstuffed and still rises properly.
Common Mistakes to Avoid
- Water temperature chaos: This is the number one mistake I see. People skip the thermometer, guess on the temperature, and end up with either dead yeast or accidentally cooked eggs. Don’t guess—use a thermometer. A ten-dollar instant-read thermometer is one of the best investments for bread baking.
- Slicing too early: The interior of bread continues to set as it cools. Slicing while still warm creates a gummy texture that feels disappointing after all your work. I know the warm bread smells amazing and you want to eat it immediately, but patience here truly pays off. Wait until it’s completely cool.
- Skipping the rise time signals: Every kitchen is different. Don’t just follow the timing blindly—watch for the dough doubling in size. If you have a cold kitchen, the timing will be longer. If you have a warm kitchen, it might be faster. Trust the visual cues, not the clock.
- Oversalting the cinnamon mixture: Some people add salt to their cinnamon-sugar filling—don’t. The dough already has salt, and the filling doesn’t need it. It’ll just make your final bread taste unpleasantly salty.
Expert’s Nutritional Tip
As a registered dietitian, I’m passionate about one thing with this recipe: the raisins. Most people think of raisins as just sweet add-ins, but they’re actually concentrated packets of nutrition. One cup of raisins provides about 3 grams of dietary fiber and a significant amount of iron—about 2 milligrams per cup. For context, adult women need 18 milligrams of iron daily, so these raisins are contributing meaningfully. The natural sugars in raisins (glucose and fructose) provide quick energy, which makes this bread particularly good for active people or as a breakfast choice before a busy day. The key is balance—one slice with raisins provides fiber that slows sugar absorption, preventing blood sugar spikes. Pair it with protein (like cheese or eggs) for even better metabolic stability.
More Recipes for Your Table
- Hermit Cookies – Another classic with warm spices and raisins, perfect alongside your morning bread and coffee
- Air Fryer Grouper Recipe – A lighter protein option for serving alongside bread-based meals
- Brie Wreath Recipe – An elegant appetizer that pairs beautifully with warm raisin bread slices at holiday gatherings
There’s something deeply grounding about making bread from scratch. It connects you to something timeless—to every person throughout history who has ever mixed flour and water and yeast and created nourishment for the people they love. My mother understood this. My grandmother understood it even more deeply. And now, when you make this recipe, you’re part of that same lineage.
Yes, this bread takes a few hours from start to finish. But most of that time is passive—the yeast doing its thing while you live your life. The actual hands-on work is maybe 30 minutes spread across the day. And what you get at the end? Three gorgeous loaves that fill your home with warmth and aroma, that taste infinitely better than anything store-bought, and that represent care and intention in every slice.
Whether you’re making this for a special occasion, a cozy weekend morning, or simply because you want your kitchen to smell like home, I hope you find it brings you joy. Bake this bread, share it with people you love, and create your own memories around it. That’s what good food does—it builds connection.
Hope you find joy in every recipe!