
Coconut Lime Fish Curry Recipe
 By
By This post contains affiliate links. As an Amazon Associate I earn from qualifying purchases.
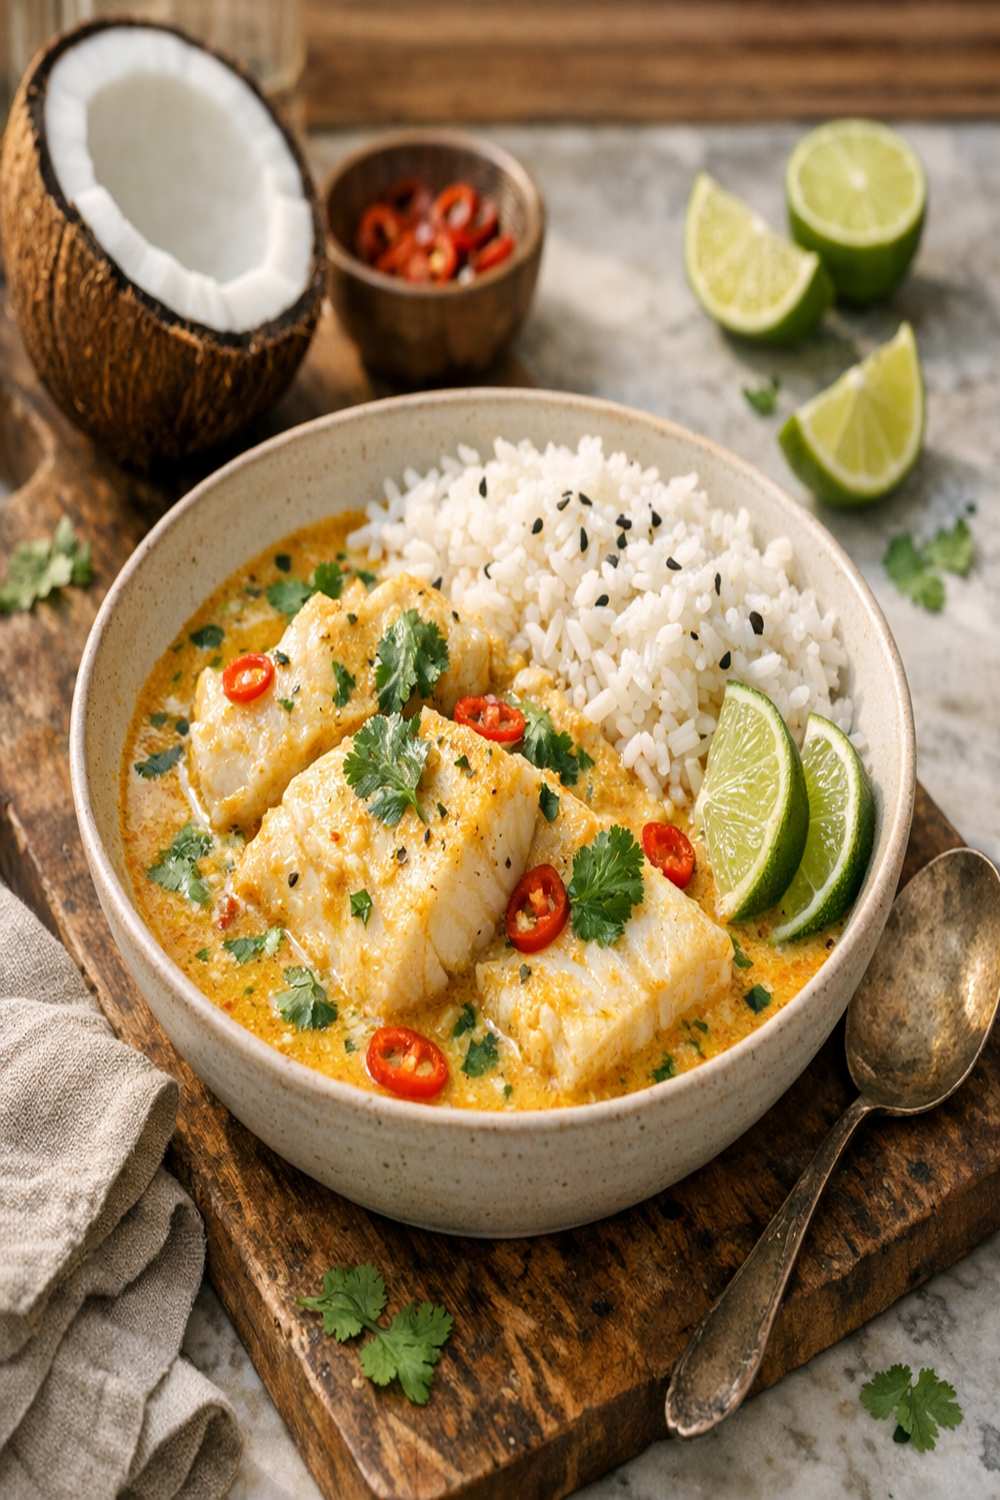
Listen, I get it. You’re exhausted by Sunday evening thinking about what you’re going to feed your family all week. Between work, kids’ schedules, and just life happening, the last thing you want is to stand in your kitchen every single night wondering what’s for dinner. That’s exactly why I’m obsessed with this Coconut Lime Fish Curry Recipe—make this once on Sunday and eat well all week. This creamy, aromatic curry comes together in under 30 minutes, stores beautifully for five days, and transforms into completely different meals depending on how you serve it. Whether you’re pairing it with steamed rice, rolling it into wraps, or spooning it over vegetables, this single batch becomes your secret weapon for stress-free weeknight eating. If you love bold flavors that don’t require complicated techniques, you’re going to adore this recipe just as much as my Apricot Salmon Recipe or our Air Fryer Grouper Recipe.
Coconut Lime Fish Curry Recipe Meal Prep: Cook Once, Eat All Week
I discovered the life-changing magic of proper meal prep during my first year as a registered dietitian. I was working full-time at a hospital, running nutrition education classes, and trying to keep my own family fed on whole foods. I remember standing in my kitchen on a Wednesday night at 7 PM, completely overwhelmed, staring at empty containers and a hungry family. My grandmother called—she was the one who taught me to cook as a kid—and asked what we were having for dinner. When I admitted I had no idea, she said something I’ll never forget: “Natasha, the best meal is the one you already made.” That week, I committed to Sunday meal prep. I made a big batch of curry, and suddenly I had five different dinners ready to go. No more 7 PM panic. No more takeout orders. No more guilt about what we were eating. That single moment transformed how I approach feeding my family, and it’s become my professional passion ever since.
Why This Recipe Is Perfect for Meal Prep
- One pan, maximum flavor, zero stress — The entire curry comes together in one pot, which means minimal cleanup while you’re prepping five days of meals. You’re looking at about 30 minutes of actual cooking time, leaving you with nearly the entire rest of your Sunday free.
- It actually gets better as it sits — Unlike many fish dishes that dry out or deteriorate over time, this coconut curry develops deeper, more complex flavors as it rests in the refrigerator. The fish stays tender wrapped in the creamy coconut sauce, and the aromatics continue to infuse throughout the week.
- Endless serving options keep boredom away — Serve it over rice Monday night, wrap it in lettuce cups Wednesday, toss it with noodles Friday. The curry itself doesn’t change, but how you plate it does, which tricks your brain into thinking you’re eating something completely different each time.
Your Weekly Meal Plan With This Recipe
Here’s exactly how I use one batch of this curry across my entire week. I make enough for six servings, which gives me flexibility for leftovers and unexpected guests. Each serving is about 1.5 cups of curry with approximately 180 grams of cooked fish. I divide my batch into individual containers and then get creative with sides based on what I’m craving and what nutrients my family needs that day.
- Monday Dinner: Classic Coconut Lime Fish Curry Over Jasmine Rice — Start your week with the curry exactly as it is, served over fluffy jasmine rice with lime wedges and fresh basil scattered on top. This is comfort food at its finest and sets the tone for a nutritious week ahead.
- Wednesday Lunch: Curry-Stuffed Lettuce Wraps — Take the same curry and serve it in crisp butter lettuce leaves with cucumber slices and fresh mint. It’s lighter, lower-carb, and feels completely different from Monday even though it’s the exact same base.
- Friday Night: Creamy Coconut Curry Noodles — Toss the curry with cooked rice noodles or whole wheat pasta, add a handful of spinach (which wilts right into the warm sauce), and finish with toasted cashews and cilantro. Suddenly it’s a completely different dish that satisfies those Friday cravings for something hearty.
The Ingredients — Scaled for a Full Week
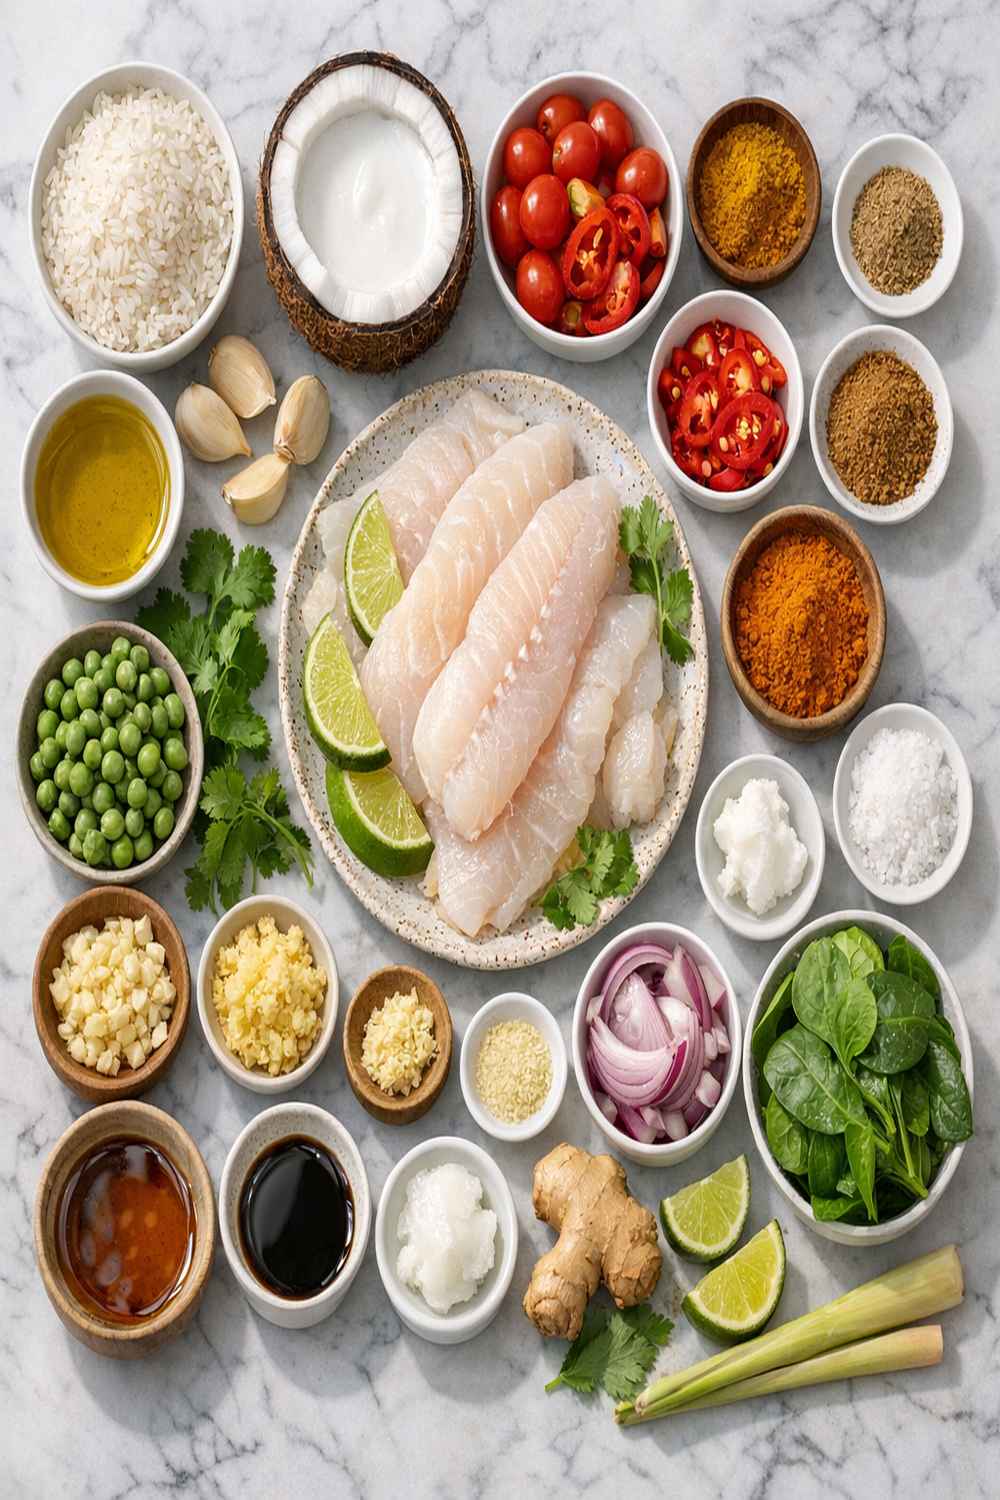
I’ve scaled all ingredients to make six substantial servings, which is what I recommend for meal prep. This gives you flexibility—you can eat it for three dinners and two lunches, or stretch it further if you’re adding lots of vegetables or rice to bulk it up. All of these ingredients keep beautifully for the full five-day window when stored properly in airtight containers. The fish actually becomes more tender as the flavors meld, and the coconut milk creates a protective layer that keeps everything fresh and moist.
- 6 cups steamed jasmine rice for serving
- 6 tablespoons neutral oil (divided between searing and aromatics; I use avocado oil for its high smoke point and clean flavor)
- 2 cans full-fat coconut milk, 14 ounces each (the fat content is crucial for richness and helping the curry reheat beautifully)
- 6 teaspoons fresh lime juice (about 2-3 limes; add this at the end so it stays bright and doesn’t cook off)
- 9 tablespoons Thai red curry paste (this is the backbone of flavor; I prefer brands made with minimal additives)
- 3 tablespoons fresh ginger, minced (using fresh ginger instead of ground makes this taste like it came from a restaurant kitchen)
- 2 teaspoons sea salt (divided; you’ll use some to season the fish and more to adjust the curry sauce)
- 9 garlic cloves, crushed (freshly crushed releases more aromatic compounds than pre-minced garlic)
- 2 limes, cut into wedges for serving
- 2 cups mixed fresh herbs: Thai basil, cilantro, and mint (torn just before serving to maximize freshness)
- 3 teaspoons fish sauce (umami powerhouse that deepens all the other flavors without making the dish taste fishy)
- 1 tablespoon red pepper flakes or 2-3 fresh red chillies, thinly sliced (for garnish; this lets people control their own heat level)
- 3 teaspoons brown sugar (balances the heat and salt with just a touch of sweetness)
- 3 pounds white fish fillets like cod or halibut (about 2-3 centimeters thick, which ensures even cooking; pat completely dry before cooking)
- 3 medium yellow onions, finely minced (about 1.5 cups total; the finer you mince, the faster they soften and distribute flavor)
The Meal Prep Process: How to Make Coconut Lime Fish Curry Recipe in Bulk
Think of this less as a recipe and more as an efficient system. When you approach it with intention—organizing your workspace, preparing everything before you start cooking, and using techniques designed for batch cooking—you’ll be finished in about 30 minutes. That’s including cleanup. I always tell people to mise en place (prepare everything before you start cooking), which takes about 10 minutes but saves you from scrambling mid-curry and burning your aromatics.
Step 1: Pat and Season Your Fish Like a Professional
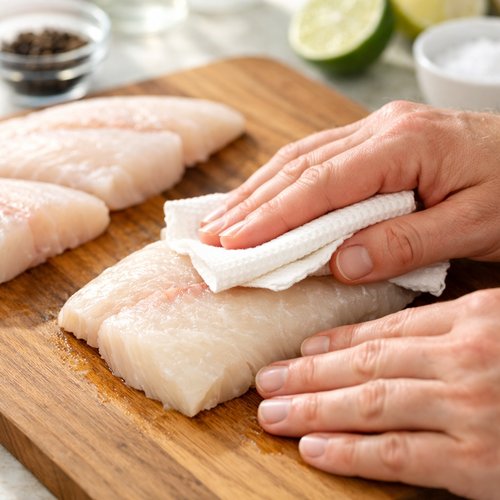
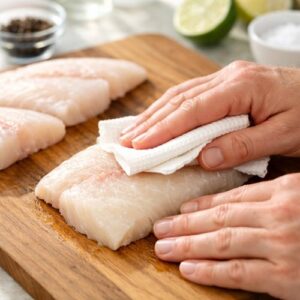
Remove your fish from the refrigerator 10 minutes before cooking—this helps it cook more evenly. Pat each fillet completely dry with paper towels, pressing gently to remove surface moisture. Moisture is the enemy of a good sear, and that golden-brown crust is where so much flavor develops. Divide the fillets into three batches (this prevents overcrowding and gives you better browning). Season each batch lightly with salt, then drizzle with just 1 tablespoon of oil per batch. The oil should shimmer when it hits the pan.
Step 2: Sear for Color, Not Cooking
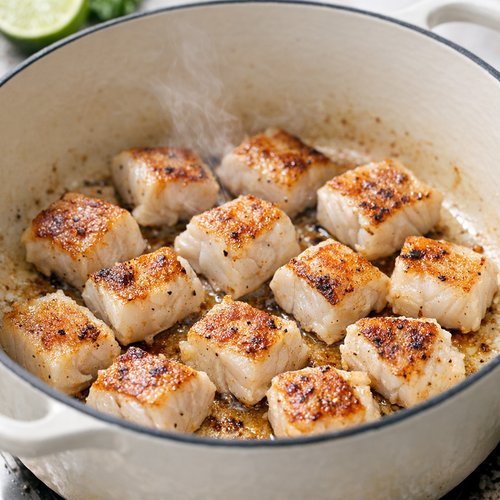
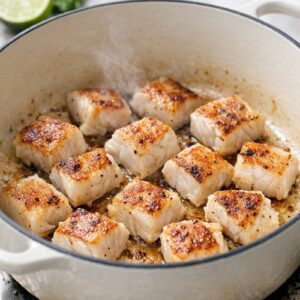
Heat your largest pan (I use a 5-quart Dutch oven for batch cooking) over medium-high heat until it’s genuinely hot—you should feel the heat radiating when you hold your hand 6 inches above it. Sear each batch of fish for 2-3 minutes per side until golden brown, working in stages so you don’t crowd the pan. This isn’t about cooking the fish through; it’s about creating a flavorful crust. Remove each batch to a clean plate. You’ll finish cooking the fish in the curry sauce, which keeps it impossibly tender.
Step 3: Build Your Flavor Foundation With Aromatics
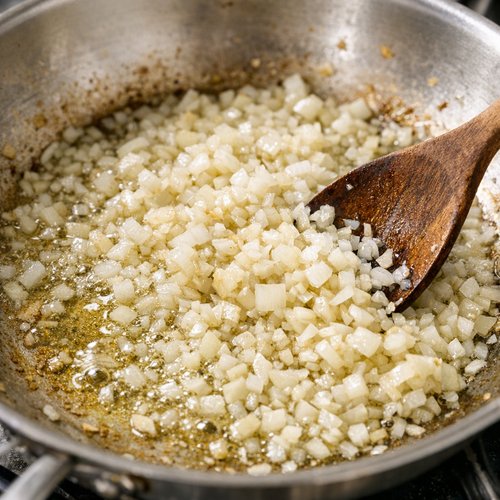
In the same pan (don’t wash it—those golden bits are pure flavor), add 2 tablespoons of oil over medium heat. Add all your minced onions and cook for about 3-4 minutes, stirring occasionally until they’re soft and just starting to turn translucent. Add your crushed garlic and minced ginger, stirring constantly for about 1 minute. You’re looking for that moment when the whole kitchen smells incredible—that’s your signal that the aromatics are releasing their essential oils and you’re ready for the next step.
Step 4: Toast the Curry Paste to Deepen the Flavor
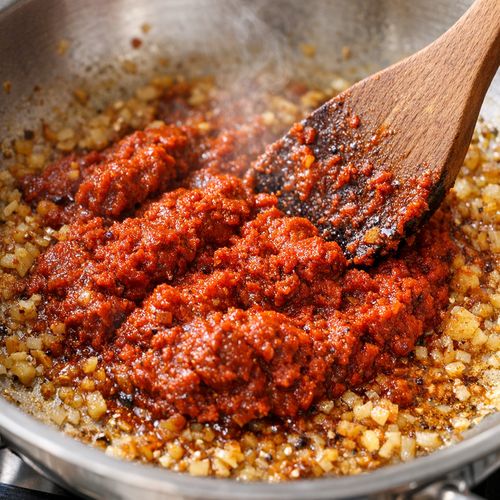
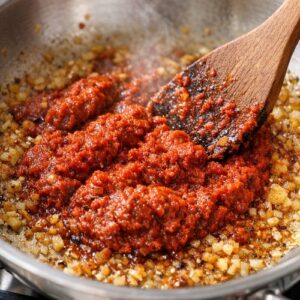
Add all 9 tablespoons of Thai red curry paste directly to your aromatic mixture. This is where people often rush, but cook the paste for 2-3 minutes, stirring frequently, until it darkens slightly and becomes incredibly fragrant. This toasting step is what separates a good curry from a restaurant-quality curry. You’re essentially blooming the spices and releasing their full potential. The paste should look like it’s starting to stick to the pan—that’s exactly what you want.
Step 5: Add the Coconut Milk and Create Your Sauce
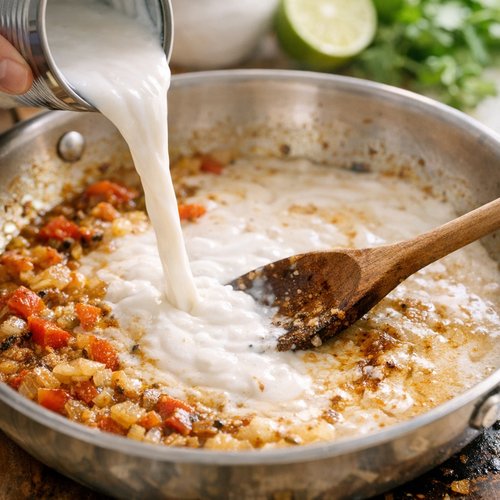
Pour in both cans of coconut milk slowly while stirring. Use a wooden spoon to scrape up all those flavorful browned bits stuck to the bottom of the pan (this is called deglazing, and it’s how you capture all that developed flavor). Add the fish sauce, brown sugar, and a teaspoon of salt. Stir everything together until completely combined.
Step 6: Simmer and Let Flavors Marry
Bring the sauce to a gentle simmer over medium heat. Let it bubble softly for 8-10 minutes, stirring occasionally. You’ll notice the sauce thickening and becoming more cohesive. The coconut cream will often separate slightly from the liquid—this is completely normal and actually creates a more luxurious texture. The sauce should reduce slightly and look noticeably thicker than when you started.
Step 7: Return the Fish and Finish Cooking
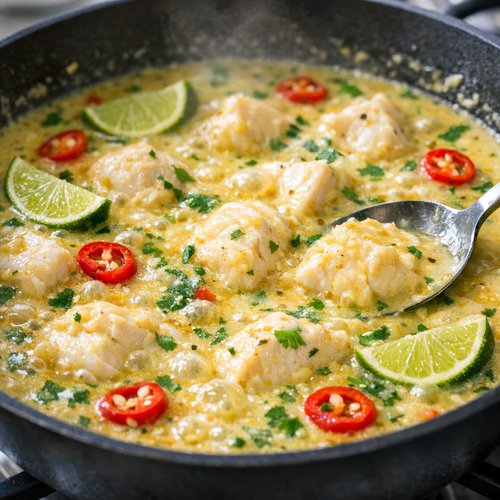
Carefully nestle all your seared fish fillets into the simmering curry sauce. Cook for 2-3 minutes over medium heat, which gently brings the fish through to completion while it absorbs all the coconut-lime flavors. The fish will be delicate and flake easily with a fork when it’s ready. Taste the sauce now and adjust your seasoning—add more salt if needed, more lime juice if you want brightness, or more curry paste if you want more heat.
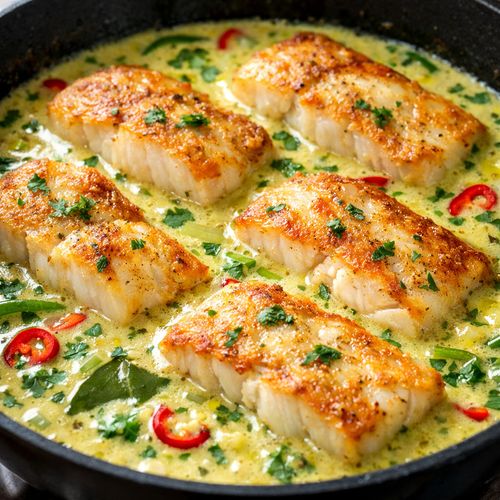
Step 8: Finish With Fresh Herbs and Chill for Storage
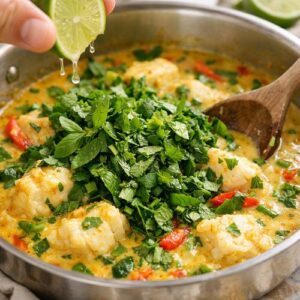
Remove from heat and stir in all your fresh herbs and the lime juice. This final addition of fresh basil, cilantro, and mint is what makes this curry taste alive and bright rather than heavy. Let the curry cool to room temperature (about 20 minutes) before portioning into meal prep containers. This cooling step prevents condensation from forming, which would make your containers soggy and introduce excess moisture.
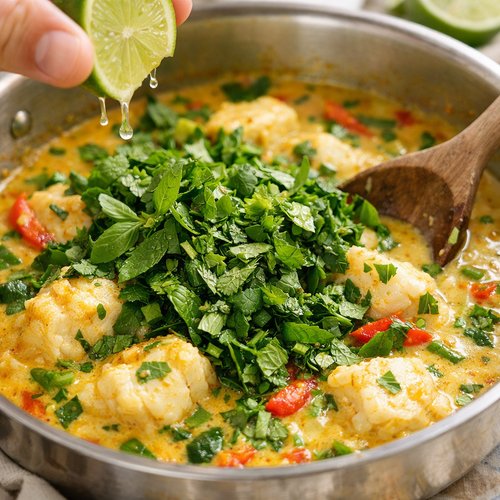
Storage and Organization System
- Glass containers with airtight lids are non-negotiable — I use 32-ounce glass meal prep containers because I can see exactly how full they are, they don’t absorb odors or stains, and the glass doesn’t leach anything into my food. Plastic containers work in a pinch, but glass maintains the curry’s quality significantly better over five days.
- The three-container method keeps your week organized — I portion the curry into three large containers (2-3 servings each) rather than six individual containers. This prevents overcrowding your fridge, makes it easier to grab what you need, and allows you to serve the curry differently depending on your mood. All three containers go straight to the back of your fridge where it’s coldest.
- Labeling with a permanent marker takes 30 seconds and saves your week — Write the date you made it and “Coconut Lime Curry” on a piece of masking tape. Stick it on the front. This eliminates the “is this still good?” question and helps you rotate through your meals in order. I always eat my meals in the order I made them, which is key to food safety and preventing spoilage.
How to Reheat Without Losing Quality
The beautiful thing about this curry is that it reheats better than most dishes, but you need to use the right method for each situation. If you’re reheating it immediately after taking it from the fridge (which is ideal), use the stovetop method. Heat a large skillet over medium heat, add your curry, and let it warm gently for about 4-5 minutes, stirring occasionally. The direct heat helps the sauce maintain its silky texture. If you’re in a rush and using the microwave, transfer your curry to a microwave-safe bowl (glass is better than plastic), cover it loosely with a damp paper towel, and heat for 3-4 minutes, stirring halfway through. The damp paper towel creates steam that keeps the curry from drying out. For the oven method (if you’re reheating a larger batch), transfer to a covered baking dish and warm at 350°F for about 8-10 minutes, stirring once halfway through. The dry heat of the oven can sometimes separate the coconut cream, so the covered baking dish is important.
Can I Freeze Coconut Lime Fish Curry Recipe?
Yes, you absolutely can freeze this curry, and it’s a fantastic hack for extending your meal prep even further. I typically freeze one portion (about 1.5 cups) in small freezer-safe containers immediately after it cools to room temperature. The curry will maintain quality for up to three months in the freezer, though I find the flavor is brightest within the first six weeks. The key is removing as much air as possible from your container—excess air causes freezer burn and can affect the texture slightly. When you’re ready to eat it, thaw the curry overnight in the refrigerator (never at room temperature, which creates food safety risks), then reheat using any of the methods I mentioned above. The coconut milk sometimes separates slightly after freezing, but a gentle stir while reheating brings everything back together beautifully. The fish itself remains tender and flavorful, which always surprises people who worry about freezing fish dishes.
Nutrition Information
Per serving (approximately 1.5 cups curry with 180 grams cooked fish): 385 calories, 22 grams protein, 28 grams fat (18 grams from the coconut milk’s healthy saturated fat), 12 grams carbohydrates, 2 grams fiber, and 680 milligrams sodium. According to USDA data, white fish is an exceptional source of lean protein and contains selenium, which supports thyroid function and antioxidant protection. The coconut milk provides medium-chain triglycerides (MCTs), which your body metabolizes differently than other fats, and they’ve been shown in clinical research to support sustained energy levels. The fresh ginger and garlic both contain powerful anti-inflammatory compounds—ginger specifically contains gingerol, which research shows may reduce exercise-related muscle damage and improve digestion. When you eat this curry across your week, you’re getting approximately 132 grams of complete protein, roughly 40% of your daily need for vitamin D (if using fish high in vitamin D like halibut), and significant amounts of B vitamins necessary for energy metabolism. This is exactly the kind of meal where nutrition and pleasure intersect perfectly.
What to Pair With Coconut Lime Fish Curry Recipe Throughout the Week
The curry itself is incredibly versatile, which means you can pair it with completely different sides depending on what your body needs that day and what sounds appealing. Variety is crucial in meal prep because it prevents decision fatigue and keeps you excited about eating well. When you’re not bored with your meals, you’re exponentially more likely to stick with them.
- Monday: Jasmine Rice with a Side of Steamed Broccoli — Start your week with the classic pairing. Jasmine rice’s subtle floral notes complement the coconut and lime beautifully. Add steamed broccoli to get a vegetable serving and some crunch. This traditional presentation feels comforting and sets a positive tone for the week.
- Tuesday: Cauliflower Rice for a Lighter Lunch — If you’re looking for something lower-carb, serve the curry over cauliflower rice with extra lime wedges. The brightness of the lime helps compensate for the earthiness of the cauliflower. This version is particularly nice if you had a heavier meal the day before.
- Wednesday: Butter Lettuce Wraps with Cucumber and Avocado — Transform the curry into something you eat with your hands. The coolness of the lettuce and cucumber provides beautiful contrast to the warm, creamy curry. Sliced avocado adds healthy fats and creaminess that makes this feel like a completely different meal.
- Thursday: Coconut Curry with Lemon Broccolini — The brightness of lemon broccolini cuts through the richness of the curry in the most beautiful way. The garlic in the broccolini echoes the aromatics already in the curry, creating a cohesive meal that feels intentional.
- Friday: Rice Noodles with Peanuts and Fresh Herbs — Mix the curry with cooked rice noodles, then top with crushed peanuts, extra cilantro, and chili flakes. Friday feels like it should be a little celebratory, and this noodle situation absolutely delivers that energy.
Expert’s Nutritional Tip: The Magic of Fish Sauce
Here’s something most home cooks don’t realize: that teaspoon of fish sauce (also called nam pla) isn’t making your curry taste fishy—it’s doing something far more sophisticated. Fish sauce is essentially nature’s umami bomb, containing glutamates and nucleotides that activate the same taste receptors as parmesan cheese, tomato paste, and aged meats. From a clinical nutrition perspective, umami is the fifth taste (alongside sweet, salty, sour, and bitter), and our brains are hardwired to recognize it as a sign of protein-rich food. When fish sauce is present in a dish, you psychologically feel more satisfied with smaller portions, which naturally supports portion control and weight management without any restriction. I always tell clients that when you understand the “why” behind ingredients like fish sauce, you can use them strategically to create meals that are both delicious and nutritionally optimized. The amount we’re using here is minimal (just ½ teaspoon per serving), so the sodium impact is negligible compared to the satisfaction it creates.
Make-Ahead Guide: Taking Meal Prep to the Next Level
True meal prep isn’t just about cooking on Sunday—it’s about setting yourself up for success all week long. If you have 45 minutes instead of 30, here’s how I’d use that extra time to make your week even smoother. While your curry is simmering (the 8-10 minute window), start cooking your rice in a separate pot. By the time the curry is done, your rice will be nearly finished. I like to portion my rice into containers simultaneously with my curry, so everything goes straight into the fridge together as complete meals. This takes the thinking out of dinner—you literally just grab a container, reheat, and eat. If you want to go even further, spend 5 minutes rough-chopping vegetables for salads (cucumber, bell peppers, and carrots last the entire week if stored properly in airtight containers). I also like to make a quick lime-coconut dressing at this point—just whisk together 3 tablespoons of coconut milk, juice from one lime, and a splash of fish sauce. Keep this in a small jar and drizzle it over salads to make them taste like they’re part of the same meal. The more you can prepare upfront, the less decision-making happens during the week, and the more likely you are to stick with your healthy eating goals.
Common Mistakes to Avoid When Making This Curry
- Skipping the fish dry step — This is the most common mistake I see, and it absolutely tanks your sear. Wet fish releases steam instead of browning, and you end up with pale, steamed fillets instead of golden, flavorful ones. Spend 60 seconds patting your fish dry. It’s the difference between a good curry and a great one.
- Crowding the pan while searing — I know it’s tempting to try to sear all your fish at once to save time, but you’re actually costing yourself time and quality. Crowded fish steams instead of searing, and you end up searing for longer anyway. Work in three batches. It’s faster and better.
- Cooking the curry paste for less than 2 minutes — The toasting step is where the magic happens. This is where the spices bloom and deepen. If you skip this or rush it, you’ll have a curry that tastes one-dimensional and thin. Give it time.
- Adding fresh herbs while the curry is still hot — If you stir herbs into boiling curry, they’ll wilt and turn dark, losing their brightness and fresh flavor. Always add them at the very end, after you’ve turned off the heat. This is the difference between a curry that tastes alive and one that tastes muddled.
Seasonal Variations: Making This Recipe Year-Round
Spring version: Replace some of the coconut milk with a splash of coconut water, and add a handful of fresh peas and baby spinach in the last minute of cooking. The lightness of spring comes through, and you get a pop of green color. Top with fresh mint and thin-sliced lemon instead of lime.
Summer version: Serve the curry chilled over a bed of shredded cabbage and carrots (which stay fresh all week) with chopped mango and fresh herbs. This becomes a deconstructed curry situation that feels fresh and bright on warm days. The cooling coconut milk is surprisingly refreshing.
Fall version: Add butternut squash (which you can prep in advance and roast while you make the curry) and a pinch of cinnamon. The sweetness of squash plays beautifully with the coconut and curry, and it makes the portion more substantial. Top with toasted pumpkin seeds for crunch.
Winter version: Serve over creamy cauliflower puree or root vegetable mash instead of rice. Add extra ginger and garlic to make it warming and grounding. The richness of the curry becomes extra cozy when paired with winter vegetables.

Coconut Lime Fish Curry Recipe
Ingredients
Method
- Remove your fish from the refrigerator 10 minutes before cooking—this helps it cook more evenly. Pat each fillet completely dry with paper towels, pressing gently to remove surface moisture. Moisture is the enemy of a good sear, and that golden-brown crust is where so much flavor develops. Divide the fillets into three batches (this prevents overcrowding and gives you better browning). Season each batch lightly with salt, then drizzle with just 1 tablespoon of oil per batch. The oil should shimmer when it hits the pan.
- Heat your largest pan (I use a 5-quart Dutch oven for batch cooking) over medium-high heat until it's genuinely hot—you should feel the heat radiating when you hold your hand 6 inches above it. Sear each batch of fish for 2-3 minutes per side until golden brown, working in stages so you don't crowd the pan. This isn't about cooking the fish through; it's about creating a flavorful crust. Remove each batch to a clean plate. You'll finish cooking the fish in the curry sauce, which keeps it impossibly tender.
- In the same pan (don't wash it—those golden bits are pure flavor), add 2 tablespoons of oil over medium heat. Add all your minced onions and cook for about 3-4 minutes, stirring occasionally until they're soft and just starting to turn translucent. Add your crushed garlic and minced ginger, stirring constantly for about 1 minute. You're looking for that moment when the whole kitchen smells incredible—that's your signal that the aromatics are releasing their essential oils and you're ready for the next step.
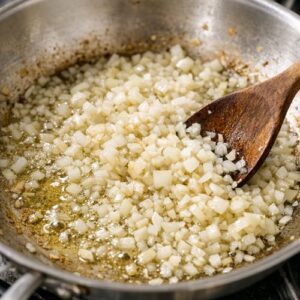
- Add all 9 tablespoons of Thai red curry paste directly to your aromatic mixture. This is where people often rush, but cook the paste for 2-3 minutes, stirring frequently, until it darkens slightly and becomes incredibly fragrant. This toasting step is what separates a good curry from a restaurant-quality curry. You're essentially blooming the spices and releasing their full potential. The paste should look like it's starting to stick to the pan—that's exactly what you want.
- Pour in both cans of coconut milk slowly while stirring. Use a wooden spoon to scrape up all those flavorful browned bits stuck to the bottom of the pan (this is called deglazing, and it's how you capture all that developed flavor). Add the fish sauce, brown sugar, and a teaspoon of salt. Stir everything together until completely combined.

- Bring the sauce to a gentle simmer over medium heat. Let it bubble softly for 8-10 minutes, stirring occasionally. You'll notice the sauce thickening and becoming more cohesive. The coconut cream will often separate slightly from the liquid—this is completely normal and actually creates a more luxurious texture. The sauce should reduce slightly and look noticeably thicker than when you started.

- Carefully nestle all your seared fish fillets into the simmering curry sauce. Cook for 2-3 minutes over medium heat, which gently brings the fish through to completion while it absorbs all the coconut-lime flavors. The fish will be delicate and flake easily with a fork when it's ready. Taste the sauce now and adjust your seasoning—add more salt if needed, more lime juice if you want brightness, or more curry paste if you want more heat.

- Remove from heat and stir in all your fresh herbs and the lime juice. This final addition of fresh basil, cilantro, and mint is what makes this curry taste alive and bright rather than heavy. Let the curry cool to room temperature (about 20 minutes) before portioning into meal prep containers. This cooling step prevents condensation from forming, which would make your containers soggy and introduce excess moisture.
Notes
FAQs
Can I Use a Different Type of Fish for This Curry?
Absolutely. White fish is my go-to because it’s budget-friendly and takes flavor beautifully, but this curry works wonderfully with any firm white fish—halibut, sea bass, flounder, or even tilapia. I wouldn’t recommend delicate fish like sole or flaky fish like cod if you’re batch cooking (they fall apart too easily), but otherwise, you have lots of options. The cooking time stays the same regardless of which fish you choose, around 2-3 minutes in the simmering curry sauce.
What If I Don’t Have Thai Red Curry Paste?
Thai curry paste is worth buying (it keeps in your refrigerator for months), but if you truly can’t find it, you can substitute 2 tablespoons of red chili powder, 1 tablespoon of garlic powder, 1 tablespoon of ginger powder, 2 teaspoons of coriander powder, and 1 teaspoon of cumin powder mixed with a splash of lime juice to create a paste consistency. It won’t be identical, but it’ll be delicious and definitely meal-prep-friendly.
Is This Curry Suitable for Freezing With the Fish Already Cooked In?
Yes, it freezes beautifully with the cooked fish inside. The fish maintains its texture better than you’d expect because it’s protected by the creamy coconut sauce. Just make sure you’re using airtight containers to prevent freezer burn. When you thaw and reheat, you don’t need to do anything special—just warm it gently and the fish will be tender and flavorful.
How Do I Adjust the Heat Level If My Family Has Different Spice Preferences?
Make the curry at a medium heat level (which is what this recipe produces), then let people customize their own bowls. Top half the servings with fresh sliced chillies and the other half with just fresh herbs. If someone wants more heat, they can add chili flakes or hot sauce to their portion. If someone wants it milder, they can add a dollop of sour cream or yogurt, which cools things down beautifully.
Can I Make This Curry in a Slow Cooker or Instant Pot for Even More Hands-Off Cooking?
You can, but I don’t recommend it, and here’s why: the slow cooker will overcook your fish into mushiness, and the Instant Pot, while faster, doesn’t give you the opportunity to properly sear the fish for color and flavor development, which is crucial for depth. The stovetop method is genuinely the fastest way to make this while keeping the quality high. That said, if convenience is your priority, you could make the curry sauce (steps 3-6) in an Instant Pot on sauté mode, then sear your fish separately in a pan and combine them at the end. This gets you the best of both worlds.
More Meal Prep Recipes You’ll Love
- Basic Lamb Curry Recipe — Another one-pot wonder that meal preps beautifully and tastes even better as leftovers
- Cauliflower Korma Recipe — A vegetarian curry that’s equally satisfying and batch-cooking friendly for plant-based meal prep weeks
- Balsamic Steak Marinade Recipe — If you’re looking to meal prep protein beyond fish, this marinade works beautifully and creates multiple dinner variations
You just reclaimed your entire week. Seriously—by spending one focused hour on a Sunday (30 minutes cooking plus 30 minutes for prep and cleanup), you’ve eliminated the stress of weeknight dinner decisions. You’ve taken back control. You’ve proven to yourself that eating well isn’t complicated or time-consuming; it just requires intentionality. This curry is going to carry you through your week with flavor, nutrition, and genuine joy in every bite. That’s what I’m passionate about as a dietitian and as someone who learned to cook in my grandmother’s kitchen—creating meals that nourish your body and your spirit simultaneously. When you eat well, everything else gets easier. You have more energy. You make better choices. You feel capable. That’s the real magic of meal prep. Hope you find joy in every recipe!