
Chicken Tomato Rice Recipe
 By
By This post contains affiliate links. As an Amazon Associate I earn from qualifying purchases.
You know that Chicken Tomato Rice from your favorite Italian or Mediterranean spot? The one where the chicken is impossibly tender, the rice soaks up all that savory tomato goodness, and you find yourself ordering it again and again because nothing at home ever tastes quite as good? I’ve been there. For years, I kept ordering this dish at restaurants, never quite believing I could recreate it myself. Then one day, my clinical dietitian brain kicked in, and I decided to reverse-engineer every single element. What I discovered changed my weeknight dinner game forever. Not only did I crack the code, but I also made it healthier, faster, and way more affordable than any restaurant version. Plus, I added my own twists that honestly taste better than the original. Keep reading to learn exactly how I did it—and how you can have restaurant-quality Chicken Tomato Rice on your table in just 30 minutes.
Copycat Chicken Tomato Rice Recipe That Tastes Better Than the Restaurant Version
I became absolutely obsessed with this dish during a cooking class with my grandmother years ago. She made a version that tasted nothing like what I was ordering out, yet somehow felt even more comforting. When I started my career as a registered dietitian, I realized restaurants often rely on heavy cream, excess sodium, and shortcuts that compromise flavor for speed. My mission became clear: create a version that captures all that restaurant magic—the depth, the richness, the way the chicken practically melts in your mouth—but using whole-food ingredients, smart cooking techniques, and recipes I could make in less time than it takes to pick up takeout.
The result? A recipe that tastes like you’ve been simmering this for hours, but comes together in about 30 minutes, costs a fraction of restaurant pricing, and is packed with nutrients your body actually recognizes. This is the kind of meal that makes your family ask, “Did you order this somewhere?” And when you tell them you made it at home, suddenly you’re the hero at the dinner table.
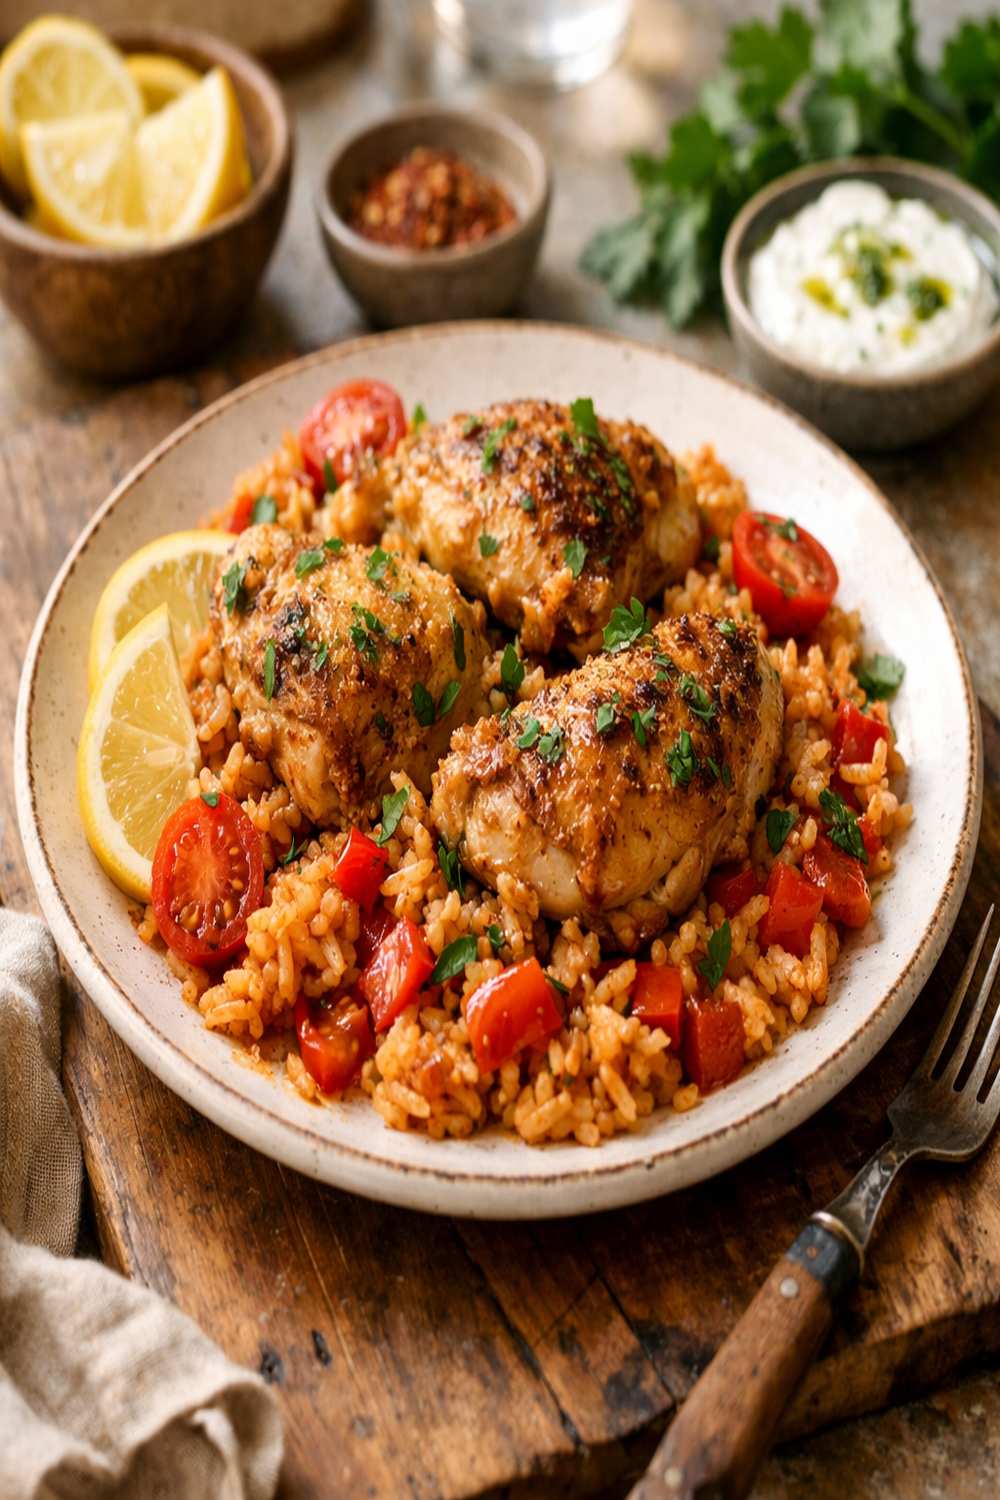
What Makes the Restaurant Version So Good
Before I could recreate this dish, I had to understand what made the original so irresistible. I ordered it from three different restaurants, took notes like a spy, and analyzed every element. Here’s what I discovered: the magic isn’t complicated. It’s actually quite simple, but the execution matters tremendously.
Restaurants make this dish crave-worthy through layered flavor development. First, they brown the chicken properly—and I mean properly, with a golden, deeply caramelized crust that develops umami flavor. Second, they build a flavor base with aromatics that are cooked low and slow until they release their oils and become fragrant. Third, they deglaze the pan with wine, which lifts all those delicious browned bits off the bottom—that’s where so much flavor lives. Finally, they let everything simmer together long enough for flavors to marry, but not so long that the rice turns mushy.
- The Maillard Reaction on Chicken – restaurants understand that proper browning creates complex flavors that can’t be rushed. They brown chicken on high heat until it’s deeply golden on all sides, which is the foundation for rich, savory depth.
- Wine Deglazing Technique – using white wine instead of water or stock isn’t just fancy; it adds acidity that brightens the dish and prevents it from tasting one-dimensional. The wine reduces and concentrates, becoming part of the sauce.
- Layered Seasoning Strategy – restaurants season at multiple stages (after browning, with aromatics, with the liquid, and at the end), building complexity rather than dumping salt in once.
- Fresh Herb Finishing Touch – basil added at the very end provides freshness and brightness that cuts through the richness, making the dish feel elegant and balanced.
How This Homemade Version Compares
Here’s the honest truth: my homemade version wins on nearly every metric that matters. Yes, restaurants might have industrial-sized burners that create a slightly more dramatic sear, but at home, we’re operating in our favor in almost every other way.
Where homemade wins: You control ingredient quality completely. I use fresh, never-frozen chicken thighs (which have more flavor and fat than breasts), real San Marzano tomatoes when possible, and fresh basil picked moments before cooking. The chicken is never sitting under heat lamps before it reaches your plate. You can customize everything—adjust wine, add vegetables, change the stock ratio based on how you like your rice. Most importantly, you’re investing 30 minutes of active time instead of $18–25 per person plus tax and tip.
Where restaurants technically have an edge: Industrial equipment heats faster and more evenly. They might use professional stock that’s been simmering for days. But honestly? These aren’t advantages you’ll taste. The difference between restaurant and home is mostly about technique, not magic.
The Ingredients—Reverse-Engineered
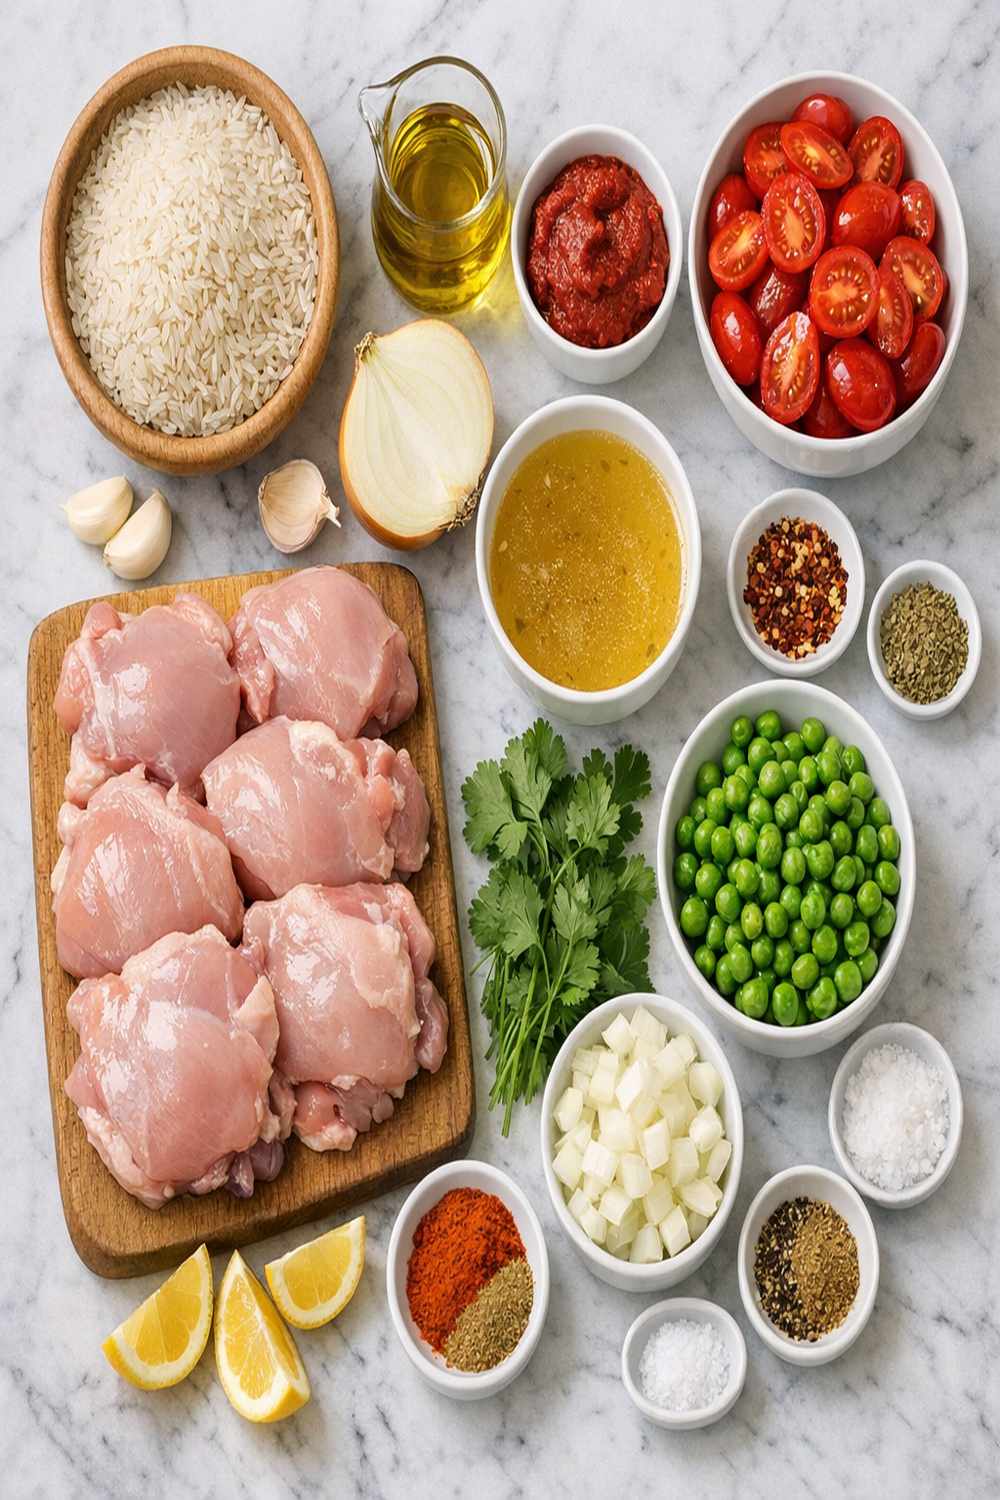
When I set out to recreate this dish, I tested each ingredient methodically. I tried different chicken cuts (thighs won because of their fat content), tested rice varieties (arborio is too creamy; medium-grain white rice is ideal), and even compared different tomato products. Here’s exactly what goes into my version and why each element matters.
For the Protein and Aromatics
- 1 kilogram boneless chicken thighs (cut into bite-sized pieces; thighs have more flavor and stay moist longer than breast meat)
- 1 large yellow onion (finely diced; yellow onions caramelize beautifully and add subtle sweetness)
- 4 large garlic cloves (minced finely; raw garlic becomes sweet and mellow when cooked slowly)
- 2 tablespoons extra virgin olive oil (for browning; this is where you start building flavor)
For the Rice and Liquid Components
- 3 cups chicken stock (homemade is better, but quality store-bought works perfectly)
- 2½ cups medium-grain white rice (long-grain won’t absorb flavor as well; arborio is too creamy)
- 1 cup dry white wine (or chicken stock if preferred; the wine adds acidity and depth)
- 1 teaspoon lemon juice (added at the end; this brightens everything and prevents it from tasting heavy)
For the Flavor Base
- 1 tablespoon tomato paste (this adds concentrated umami and depth)
- sea salt and cracked black pepper (to taste)
- 1 can (400 grams) diced tomatoes (San Marzano if you can find them; canned is fresher than most “fresh” tomatoes in winter)
- ½ cup fresh basil leaves (loosely packed; about half goes in during cooking, half as garnish)
The Copycat Method: How to Recreate Chicken Tomato Rice Recipe at Home
Ready to crack the code? Here’s where restaurant technique meets home cooking efficiency. I’ve simplified the professional approach without losing any of the sophistication. You’ll notice this comes together quickly because everything is prepped before you start cooking—just like in a real restaurant kitchen.
Step 1: Build a Golden Crust on the Chicken
This step is non-negotiable. Heat your largest sauté pan or Dutch oven over medium-high heat. Add 2 tablespoons of olive oil and let it heat for about 60 seconds—you want it shimmering and hot, not smoking. Working in batches if needed (don’t crowd the pan, or the chicken will steam instead of sear), add your chicken pieces and let them sit undisturbed for 2-3 minutes on each side. This is where the Maillard reaction happens—that golden-brown crust that tastes impossibly savory. Resist the urge to move it around. Once deeply golden on two sides, transfer to a plate. Don’t worry about cooking it through; it will finish cooking in the next steps.
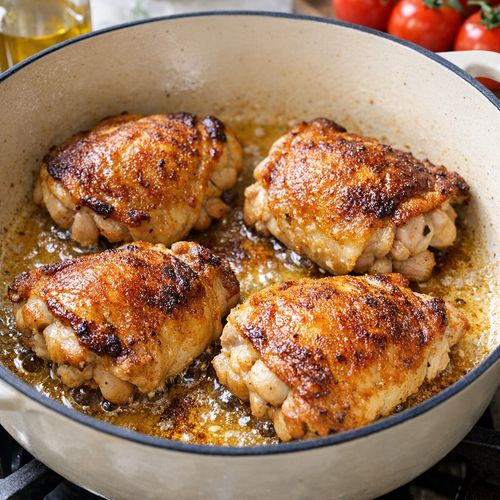
Pro tip from my clinical background: chicken thighs contain more connective tissue than breast meat, which converts to gelatin during cooking. This is why restaurant versions feel more luxurious—the gelatin creates a silky mouthfeel that plain breast meat just can’t achieve.
Step 2: Create Your Aromatic Base
In the same pan (don’t clean it!), reduce heat to medium and add your diced onion. Let it cook for about 3-4 minutes, stirring occasionally, until it becomes translucent and starts to stick slightly to the bottom of the pan. This is when you add your minced garlic. Cook together for another 60-90 seconds until the garlic becomes fragrant—you’ll smell it clearly. This is the moment to stop. Overcooked garlic becomes bitter, and we’re building elegance here.
Step 3: Deglaze and Deepen Flavor
Pour in your 1 cup of white wine. Use a wooden spoon to scrape the bottom of the pan—this is deglazing, and it’s where you lift all those browned, flavorful bits into your liquid. These are concentrated flavor compounds that will distribute throughout your entire dish. Let the wine reduce by about half (you’ll see it visibly decrease), which takes about 3-4 minutes. The liquid should look slightly thicker and more concentrated. This reduction concentrates the wine’s flavor and allows some of the alcohol to cook off.
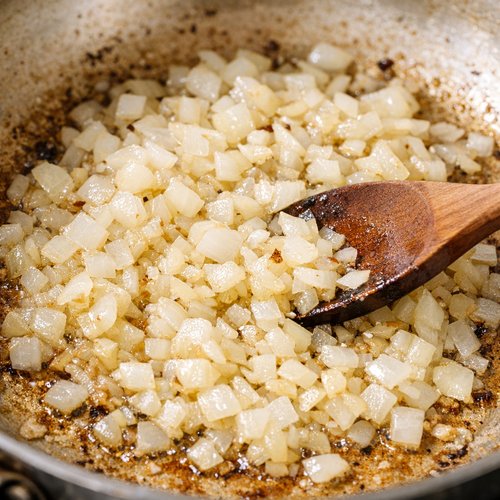
Step 4: Add Rice and Toast Briefly
Add your 2½ cups of rice directly to the pan. Stir constantly for about 2 minutes. You want every grain coated in the oil and wine mixture, and you want a slight toast to develop. This toasting adds a subtle nuttiness that keeps the rice from tasting one-dimensional.
Step 5: Build the Braising Liquid
Add your 3 cups of chicken stock all at once, along with the can of diced tomatoes (juice and all), the tomato paste, and about ¼ cup of your fresh basil leaves (chopped). Season generously with sea salt and cracked pepper. Stir everything together until well combined. This is your second seasoning opportunity—taste and adjust now before the liquid reduces. The flavor will concentrate as the rice cooks, so be slightly aggressive with seasoning at this stage.
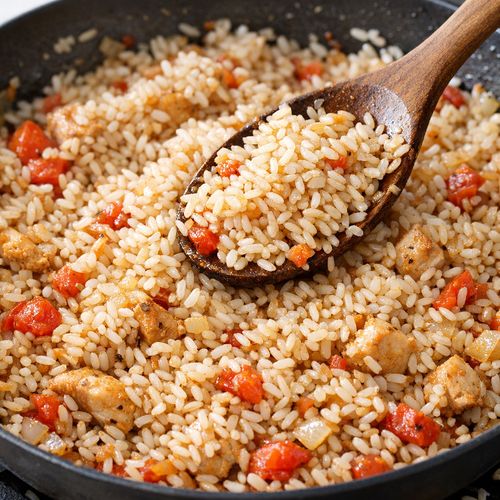
Step 6: Return the Chicken and Simmer
Nestle your browned chicken pieces on top of the rice mixture—don’t stir it in. By placing it on top, the chicken cooks gently in the steam and stays moist. Cover the pan with a lid (if you don’t have one, heavy foil works), reduce heat to medium-low, and let it simmer undisturbed for 15-20 minutes. The rice will absorb all the liquid, and the chicken will cook through gently.
At 15 minutes, lift the lid and check if the liquid is absorbed. The rice should be tender but not mushy, and you shouldn’t see liquid pooling in the bottom. If there’s still liquid and the rice isn’t tender, recover and cook another 2-3 minutes.
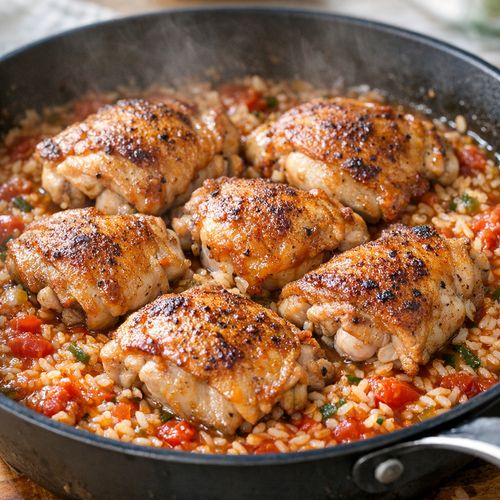
Step 7: Finish with Fresh Elements
Remove from heat. Let it sit covered for 2-3 minutes (this is called carryover cooking and allows the rice to finish setting). Remove the lid, taste, and adjust seasoning with the lemon juice and additional salt and pepper as needed. The lemon is crucial—it cuts through the richness and makes everything feel fresh and balanced, even though you’re making it on a weeknight.
Garnish with remaining fresh basil and freshly grated Parmesan cheese. Serve immediately.
The Secret Sauce (Or Rather, the Secret Seasoning Strategy)
Here’s where most home cooks stumble, and why restaurants get it right: they season in layers, not all at once. If you dump all your salt in at the beginning, it distributes unevenly, and you end up under-seasoning in some bites and over-salting in others. More importantly, seasoning at different stages allows flavors to develop complexity.
First seasoning happens after the chicken is browned—a pinch of salt and pepper on the chicken itself.
Second seasoning happens when you add the braising liquid (step 5 above)—this is your major seasoning moment. Taste the liquid before covering. It should taste slightly over-seasoned at this point because it will concentrate as the rice cooks and absorbs liquid.
Final seasoning happens at the end with lemon juice and adjustments. The lemon isn’t just flavoring; it’s brightening. Acid heightens perception of flavor, which is why restaurant dishes taste more vibrant than homemade attempts.
My formula: for every 3 cups of liquid, I use approximately 1½ teaspoons of fine sea salt and ½ teaspoon of freshly cracked black pepper at the braising stage. Then I adjust at the end. This is more salt than you’d use in many recipes, but remember—you’re distributing it across a full pan of rice that will feed 4-6 people, and salt is essential for bringing out the other flavors.
How to Make It Even Better Than the Original
Once you’ve mastered the basic recipe, here’s how to elevate it beyond any restaurant version. These upgrades are things chains simply can’t do at scale.
- Add Fresh Vegetables at the Right Moment – dice up bell peppers, zucchini, or mushrooms and add them during step 5 (with the liquid). They’ll cook gently and add nutrition. Restaurants use pre-cut vegetables that have been sitting for days; yours will be fresh.
- Use Homemade Chicken Stock – if you have it, homemade stock contains more gelatin and real chicken flavor than even the best store-bought version. This adds a silky mouthfeel that makes it taste restaurant-quality immediately.
- Finish with Burrata or Fresh Mozzarella – instead of just Parmesan, place a spoonful of burrata on top of each serving. It melts slightly and adds richness that’s nothing like what restaurants offer.
- Pair with Lemon Broccolini – make the Lemon Broccolini Recipe as a side. The brightness of the lemon and the slight bitterness of the greens balance the richness of the chicken and rice perfectly.
Cost Comparison: Home vs. Restaurant
Let me show you the math, because this is where homemade becomes undeniable. I’ve calculated this recipe based on current grocery prices in New Jersey (where I’m located), and I know prices vary by region, but the comparison is meaningful.
Restaurant Cost (per person): Most restaurants charge $16–24 for this dish. Let’s say $20 per person. With tax (8.875% in NJ) and a modest 18% tip, you’re looking at $25.65 per person. If you go once a week, that’s $1,333.80 per year for one person.
Homemade Cost (per serving): Boneless chicken thighs run about $4–5 per pound, so 1 kilogram (2.2 lbs) costs roughly $9–11. Rice is about $0.50 for the amount you’ll use. Onion, garlic, and aromatics combined: $1. White wine (using a portion of a bottle you probably have): $2. Canned tomatoes: $1.50. Stock: $2. Parmesan: $1. Total cost per batch: approximately $17–18, which feeds 4-6 people generously.
Cost per serving: $3–4.50. If you make this once a week instead of ordering out, you’ll save roughly $1,000 per year per person. That’s a new vacation right there.
Can I Store Chicken Tomato Rice Recipe?
Yes, and this is one of its best qualities. This dish actually tastes better the next day because the flavors have more time to marry.
Refrigerator Storage: Cool completely before transferring to an airtight container. It will keep for up to 4 days in the refrigerator. The rice may absorb any remaining liquid, which is fine—just add a splash of stock when reheating if you prefer it looser.
Freezer Storage: This recipe freezes beautifully for up to 3 months. Cool completely, then transfer to a freezer bag or container. Thaw overnight in the refrigerator before reheating. I recommend not adding the fresh basil and Parmesan until after reheating to preserve the brightness.
Reheating: In a saucepan over medium heat with a splash of stock or water, warming takes about 5-7 minutes. Or microwave in a covered bowl for 2-3 minutes, stirring halfway through. The rice won’t dry out because there’s enough sauce to keep it moist.
Make-Ahead Strategy: This is perfect for meal prep. Make it on Sunday, portion into containers, and you have lunch or dinner ready for half your week. I usually make this on Sunday afternoon and eat it three times throughout the week.
Nutrition Information
Based on USDA nutrition database calculations, one serving (approximately 1½ cups) of this recipe contains roughly:
- Calories: 480–520
- Protein: 38–42 grams
- Carbohydrates: 52–58 grams
- Fat: 8–10 grams
- Fiber: 1–2 grams
- Sodium: 950–1100 mg
Expert’s Nutritional Tip: The protein content in this dish is exceptional. Chicken thighs provide not just protein, but also B vitamins (especially niacin and B6) and iron in a form your body can absorb efficiently. The combination of chicken, tomatoes, and olive oil creates a nutrient-dense meal where the fat from the olive oil and chicken actually helps your body absorb the fat-soluble vitamins (like lycopene from the tomatoes). This is why homemade versions are nutritionally superior to restaurant versions, which often add cream or butter. You’re getting restaurant-quality satisfaction with actual nutrition your body recognizes.
Compared to typical restaurant versions (which often contain 800–1000+ calories and twice the sodium), this homemade approach is significantly lighter while tasting just as satisfying. The key is using quality ingredients without excess oil or salt—something restaurants can’t do when they’re feeding hundreds of people daily.
What to Serve Alongside for the Full Experience
Restaurant dishes feel complete because they’re part of a composed plate. At home, you can create that same experience with minimal effort. Here’s what I serve alongside my Chicken Tomato Rice to make it a complete, restaurant-quality meal.
- Lemon Broccolini – the bright lemon and slight bitterness of the greens balance the richness perfectly. Check out my Lemon Broccolini Recipe for my version, which takes just 8 minutes.
- Simple Green Salad – dress arugula or mixed greens with a basic vinaigrette (3 parts olive oil, 1 part red wine vinegar, Dijon mustard, salt, and pepper). This adds freshness and texture contrast.
- Crusty Bread – use it to soak up the sauce. This is non-negotiable for the full restaurant experience.
- Butternut Squash Spinach Side – if you want something more substantial, my Butternut Squash Spinach Recipe creates a warm, comfort-food complete meal.
Common Mistakes to Avoid
I’ve taught this recipe to dozens of people in my nutrition consultations, and I’ve seen patterns in where folks stumble. Here are the most common mistakes and how to avoid them.
- Crowding the Pan When Browning Chicken – if you have too much chicken in the pan at once, the temperature drops, and you get steamed chicken instead of seared chicken. Work in batches. It takes an extra 3 minutes, but it makes all the difference between restaurant-quality and mediocre.
- Skipping the Deglazing Step – I know it seems simple, but people often skip this because they don’t understand why it matters. That browned material stuck to the bottom is concentrated flavor. When you deglaze with wine, you’re dissolving it into your liquid and distributing it throughout the entire dish. Skip this, and your finished dish tastes flat.
- Under-Seasoning the Braising Liquid – home cooks are often terrified of salt. But seasoning properly at the liquid stage is crucial. Taste it before covering the pan. It should taste noticeably salty—more than you’d eat on its own. As the liquid reduces, that seasoning concentrates.
- Opening the Lid Too Often – this is the biggest culprit for uneven cooking. Every time you open the lid, you lose steam and the temperature drops. The rice won’t cook evenly. Set a timer, trust the process, and don’t peek until 15 minutes have passed.
Seasonal Variations
The beauty of this recipe is its flexibility. Here’s how to adapt it throughout the year to take advantage of seasonal ingredients.
Spring Variation: Add fresh peas and diced asparagus during the braising step. Use lighter chicken stock if possible—spring calls for bright, fresh flavors. Add more lemon at the end and consider using fresh tarragon instead of (or alongside) basil. Tarragon has a delicate anise-like flavor that screams springtime.
Summer Variation: This is when fresh tomatoes shine. If you can get your hands on beautiful summer tomatoes, dice them and add them at the very end (after cooking is complete) instead of using canned. Also add diced bell peppers during the braising—any color works, but yellow and orange are particularly summery. Zucchini is another excellent summer addition.
Fall Variation: Add roasted butternut squash pieces or diced mushrooms. Use red wine instead of white wine for deeper, earthier flavors. Consider adding a touch of sage or thyme alongside the basil. The squash adds a subtle sweetness that pairs beautifully with chicken in cooler months.
Winter Variation: Canned tomatoes are actually at their best in winter because fresh tomatoes are mediocre. Add diced carrots and celery to the onion/garlic base. These give you that classic French mirepoix flavor. Use beef or darker chicken stock for more body. Winter is when this dish truly shines because the warm, deeply savory flavors are exactly what your body craves.

Chicken Tomato Rice Recipe
Ingredients
Method
- This step is non-negotiable. Heat your largest sauté pan or Dutch oven over medium-high heat. Add 2 tablespoons of olive oil and let it heat for about 60 seconds—you want it shimmering and hot, not smoking. Working in batches if needed (don't crowd the pan, or the chicken will steam instead of sear), add your chicken pieces and let them sit undisturbed for 2-3 minutes on each side. This is where the Maillard reaction happens—that golden-brown crust that tastes impossibly savory. Resist the urge to move it around. Once deeply golden on two sides, transfer to a plate. Don't worry about cooking it through; it will finish cooking in the next steps. Pro tip from my clinical background: chicken thighs contain more connective tissue than breast meat, which converts to gelatin during cooking. This is why restaurant versions feel more luxurious—the gelatin creates a silky mouthfeel that plain breast meat just can't achieve.

- In the same pan (don't clean it!), reduce heat to medium and add your diced onion. Let it cook for about 3-4 minutes, stirring occasionally, until it becomes translucent and starts to stick slightly to the bottom of the pan. This is when you add your minced garlic. Cook together for another 60-90 seconds until the garlic becomes fragrant—you'll smell it clearly. This is the moment to stop. Overcooked garlic becomes bitter, and we're building elegance here.
- Pour in your 1 cup of white wine. Use a wooden spoon to scrape the bottom of the pan—this is deglazing, and it's where you lift all those browned, flavorful bits into your liquid. These are concentrated flavor compounds that will distribute throughout your entire dish. Let the wine reduce by about half (you'll see it visibly decrease), which takes about 3-4 minutes. The liquid should look slightly thicker and more concentrated. This reduction concentrates the wine's flavor and allows some of the alcohol to cook off.
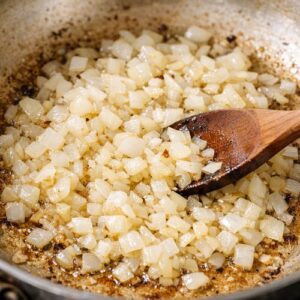
- Add your 2½ cups of rice directly to the pan. Stir constantly for about 2 minutes. You want every grain coated in the oil and wine mixture, and you want a slight toast to develop. This toasting adds a subtle nuttiness that keeps the rice from tasting one-dimensional.
- Add your 3 cups of chicken stock all at once, along with the can of diced tomatoes (juice and all), the tomato paste, and about ¼ cup of your fresh basil leaves (chopped). Season generously with sea salt and cracked pepper. Stir everything together until well combined. This is your second seasoning opportunity—taste and adjust now before the liquid reduces. The flavor will concentrate as the rice cooks, so be slightly aggressive with seasoning at this stage.
- Nestle your browned chicken pieces on top of the rice mixture—don't stir it in. By placing it on top, the chicken cooks gently in the steam and stays moist. Cover the pan with a lid (if you don't have one, heavy foil works), reduce heat to medium-low, and let it simmer undisturbed for 15-20 minutes. The rice will absorb all the liquid, and the chicken will cook through gently. At 15 minutes, lift the lid and check if the liquid is absorbed. The rice should be tender but not mushy, and you shouldn't see liquid pooling in the bottom. If there's still liquid and the rice isn't tender, recover and cook another 2-3 minutes.
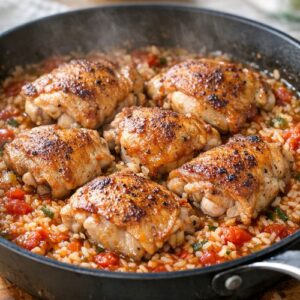
- Remove from heat. Let it sit covered for 2-3 minutes (this is called carryover cooking and allows the rice to finish setting). Remove the lid, taste, and adjust seasoning with the lemon juice and additional salt and pepper as needed. The lemon is crucial—it cuts through the richness and makes everything feel fresh and balanced, even though you're making it on a weeknight. Garnish with remaining fresh basil and freshly grated Parmesan cheese. Serve immediately.
Notes
FAQs
Can I use chicken breast instead of thighs?
You can, but I don’t recommend it. Chicken breast is very lean and becomes dry easily, especially during the extended cooking time. Thighs have more fat and connective tissue, which means they stay moist and actually become more tender as they cook. If you absolutely must use breast meat, reduce the simmering time to 12–15 minutes and check for doneness earlier. But honestly, thighs cost less and taste better, so this is my strong recommendation.
What if I don’t have white wine?
You have several options. Dry sherry works beautifully and adds depth. Chicken stock works fine, though you lose the acidity that wine provides. In a pinch, use 1 cup of stock plus 2 tablespoons of lemon juice or white vinegar—this mimics the acidity of wine. Avoid using sweet wine or anything like Moscato; the sweetness will throw off the balance. You want dry, acidic liquid.
Is this recipe gluten-free?
Yes, completely. Rice and tomatoes are naturally gluten-free, and there’s no flour or gluten-containing ingredients in the recipe. The only thing to watch is the chicken stock—some brands add gluten-containing thickeners. Check your stock’s label, or use homemade stock if you’re serving someone with celiac disease or severe gluten sensitivity. Everything else is inherently gluten-free.
Can I make this in a slow cooker or instant pot?
Yes to both, though the technique changes. For an Instant Pot on high pressure: Brown the chicken and aromatics using the sauté function, add all other ingredients, pressure cook for 15 minutes, then natural release for 5 minutes. For slow cooker: Brown the chicken and aromatics in a separate skillet first (don’t skip this), transfer everything to the slow cooker, and cook on low for 4–5 hours. The slow cooker version is less ideal because you lose the deglazing element, but it still works in a pinch.
Why is my rice mushy?
Overcooking is the most common cause. Every stove is different—some run hot, some run cold. The first time you make this, check at 15 minutes rather than waiting the full 20. You want the rice tender but with just a slight firmness in the center of each grain. Also, if you’ve been peeking and opening the lid, the moisture distribution is off. Trust the process and only check once.
More Restaurant Copycat Recipes
- Cauliflower Korma Recipe – that creamy, aromatic Indian restaurant dish you love, made better at home with real spices and fresh cauliflower
- my weeknight pasta – restaurant-quality comfort in a bowl, finished in 25 minutes with ingredients you already have
Final Thoughts: The Joy of Cracking the Code
There’s something deeply satisfying about reverse-engineering a restaurant dish and discovering you can not only recreate it, but improve it. You’re not just saving money—though you absolutely are. You’re also taking control of what goes into your body, creating memories in your kitchen instead of sitting in a noisy restaurant, and developing skills that serve you for life.
Every time you make this recipe, you’ll get slightly faster. By the third time, you won’t need to check the instructions. By the fifth time, you’ll be making confident adjustments—adding extra garlic because you love garlic, swapping in different vegetables, experimenting with the herbs. This is how home cooking becomes creative instead of just following recipes.
I still remember standing in my mother’s kitchen while she made risotto, thinking there was no way I could ever replicate what she created. Turns out, with the right technique and understanding of flavor development, anyone can create restaurant-quality meals at home. That’s what I want for you. I want you to surprise yourself with what you’re capable of creating.
Hope you find joy in every recipe!