
Beef Fillet Recipe
 By
By This post contains affiliate links. As an Amazon Associate I earn from qualifying purchases.
This beef fillet recipe doesn’t just taste incredible — it stops people in their tracks. I still remember the first time I seared a perfect beef tenderloin at home and watched my family’s faces light up when I brought it to the table. The deep mahogany crust, the rose-pink center, that creamy mushroom sauce pooling around it — it felt like magic on a plate. Here’s how to make a dish that looks as good as it tastes, and honestly? It’s way easier than restaurant chefs want you to believe. Whether you’re planning a special anniversary dinner or want to impress guests without spending all day in the kitchen, this recipe delivers every single time.
The Most Beautiful Beef Fillet Recipe You’ll Ever Make (And It’s Easier Than It Looks)
I’ll never forget the moment I realized that presentation changed everything. It wasn’t just about how the food tasted — it was about how it made people feel before they even took a bite. I was working as a clinical dietitian, helping families understand nutrition, and I noticed something powerful: when food looked beautiful, people slowed down. They noticed flavors they’d normally rush past. They experienced joy, not just calories.
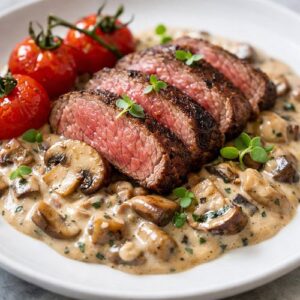
That’s exactly what this beef fillet does. When you slice into a perfectly cooked center-cut tenderloin, revealing that gorgeous pink center with a caramelized crust, something shifts in the room. The conversation stops. Everyone leans forward. And then — that first taste of tender, buttery beef with a sophisticated creamy mushroom sauce? That’s when you know you’ve created something memorable. This isn’t fancy cooking. This is simple, confident cooking that happens to look like you’ve been trained at Le Cordon Bleu.
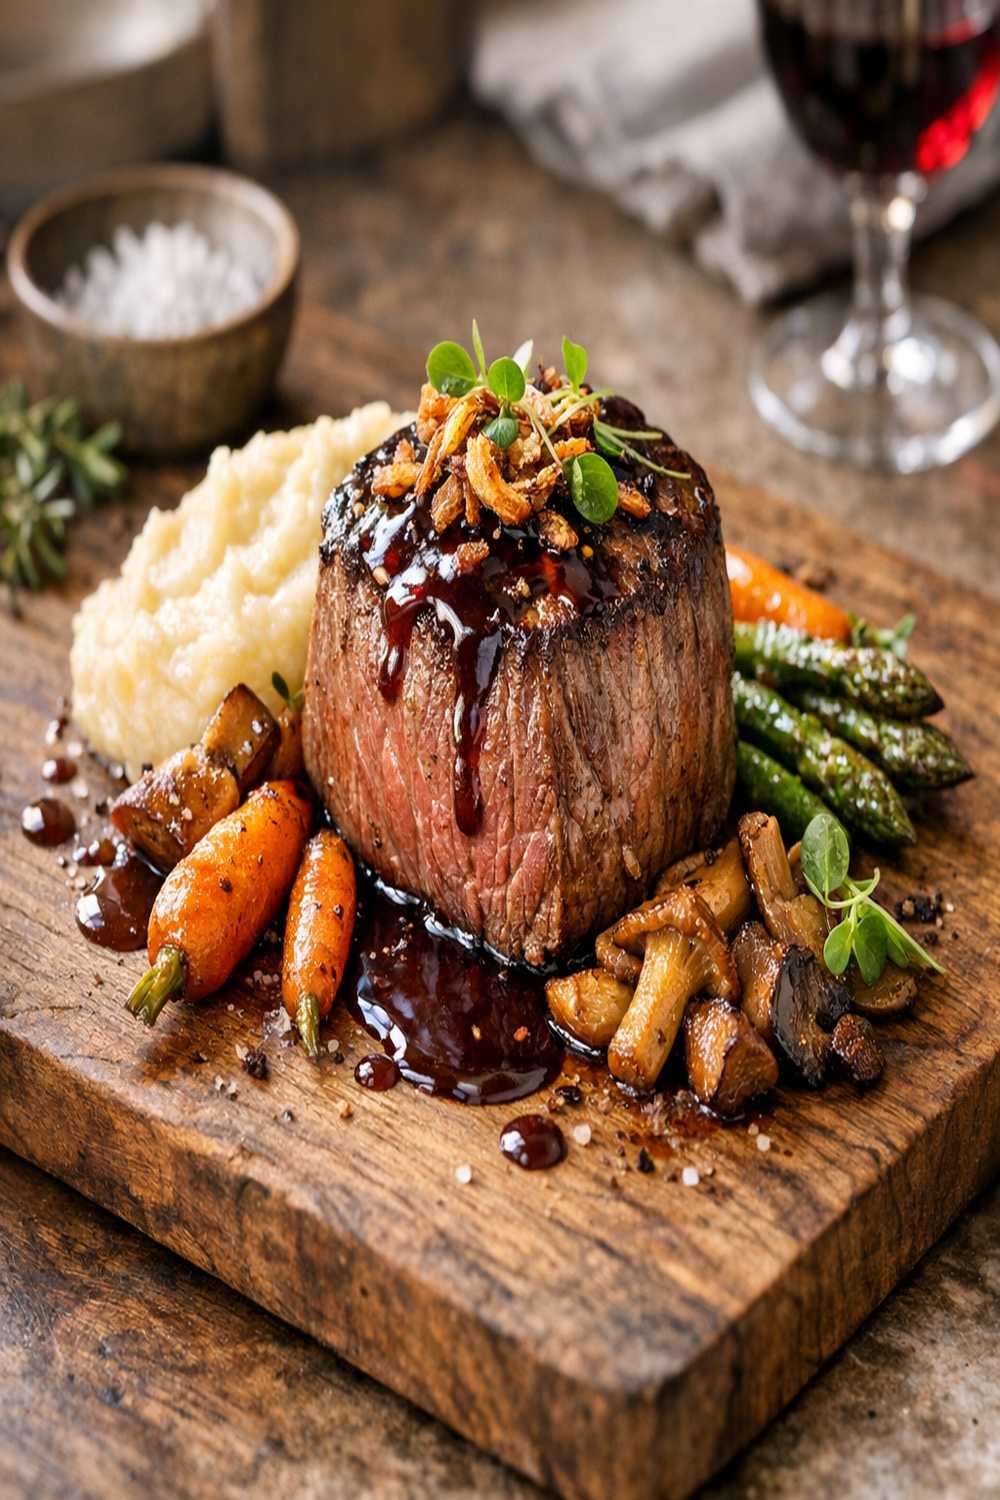
The Visual Elements That Make This Dish Stunning
Let me break down exactly what makes this beef fillet visually spectacular, because every element serves a purpose. I’m not talking about random plating tricks — I’m talking about understanding how color, texture, and composition work together to create a dish that photographs beautifully and tastes even better.
- The Mahogany Sear — This is where the magic starts. When you get that proper high-heat sear on all sides, you’re creating a beautiful brown crust through the Maillard reaction. This isn’t just flavor (though it’s incredible flavor) — it’s visual depth. That rich, dark exterior against the rose-pink center creates the contrast that makes this dish show-stopping. The butter basting amplifies this color, creating a glossy, appetizing finish.
- The Rose-Pink Interior — Medium-rare beef tenderloin has this naturally beautiful pink tone that signals tenderness and quality. When you slice it and arrange those slices, that color is your proof of perfect cooking. It says “I know what I’m doing” without you having to say a word.
- The Creamy Mushroom Sauce Contrast — Earthy brown mushrooms create depth around the beef. The cream sauce has this gorgeous pale ivory color that frames the beef perfectly. When you spoon it artfully around the plate, it creates negative space that lets the beef be the star while adding visual interest.
Choosing Ingredients for Maximum Visual Impact
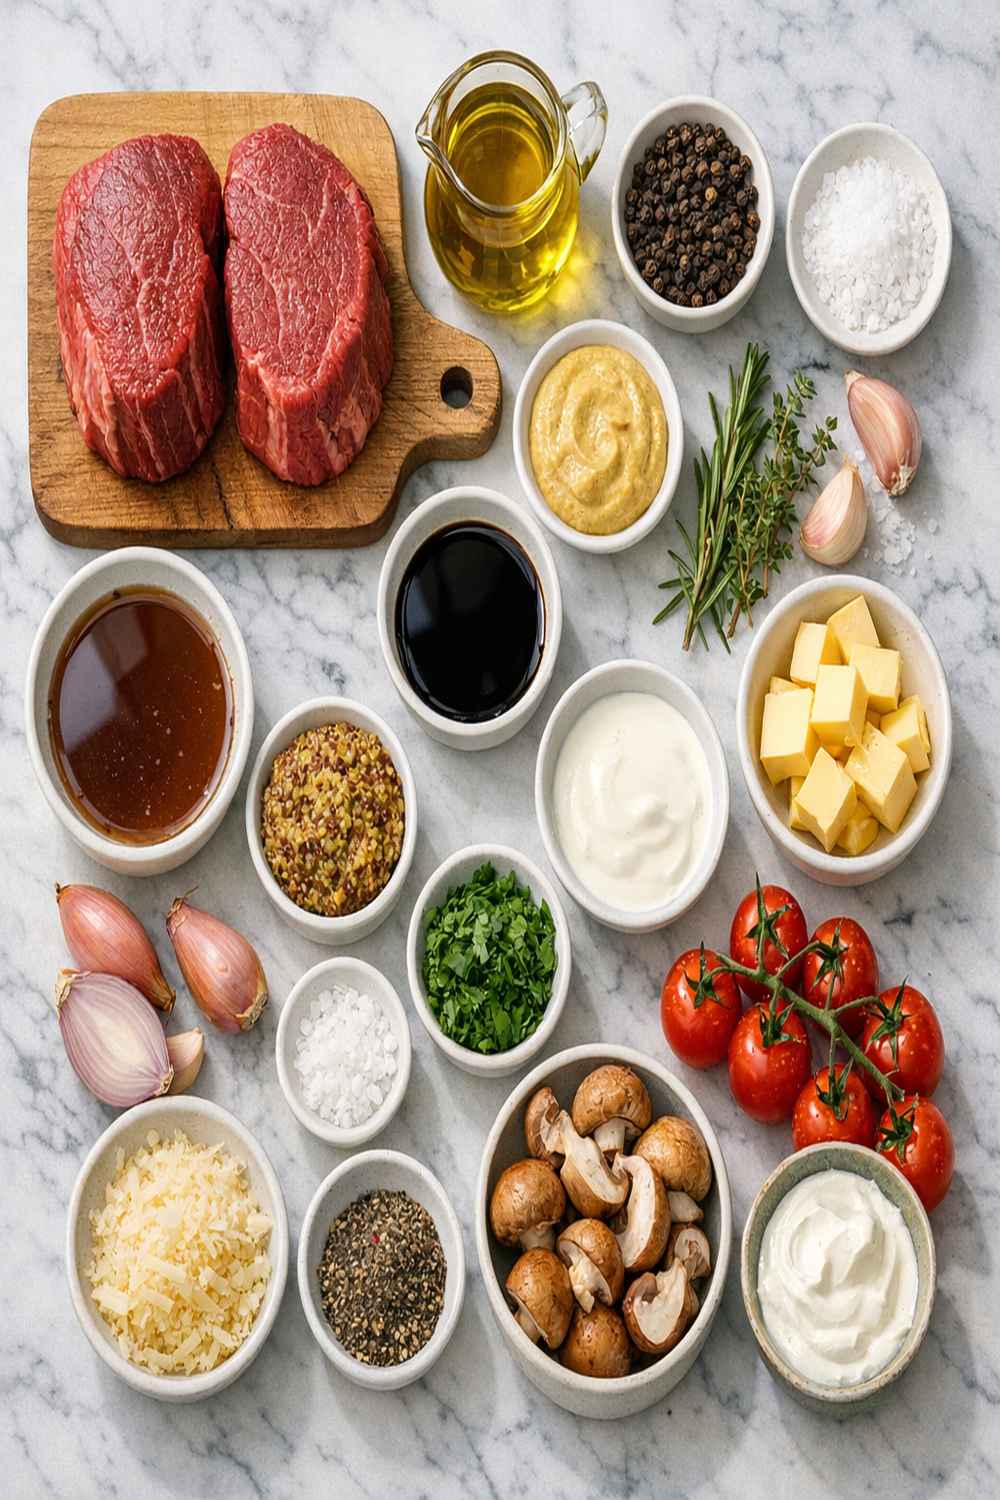
Every ingredient in this recipe does double duty — it contributes flavor AND visual appeal. As a registered dietitian, I always think about how colorful ingredients signal nutritional diversity to your body. In this case, you’re getting premium protein, B vitamins, selenium, and zinc from the beef. The mushrooms add umami depth plus B vitamins and antioxidants. The fresh herbs bring vibrant green notes that signal freshness. Let me walk you through exactly what you need and why.
For the Beef and Searing:
- 1 tablespoon vegetable oil with a high smoke point (neutral flavor lets the beef shine)
- 1½ teaspoons kosher salt (for seasoning the exterior and creating that beautiful crust)
- ½ teaspoon freshly ground black pepper (freshly ground makes a visual difference too — larger specks look more elegant)
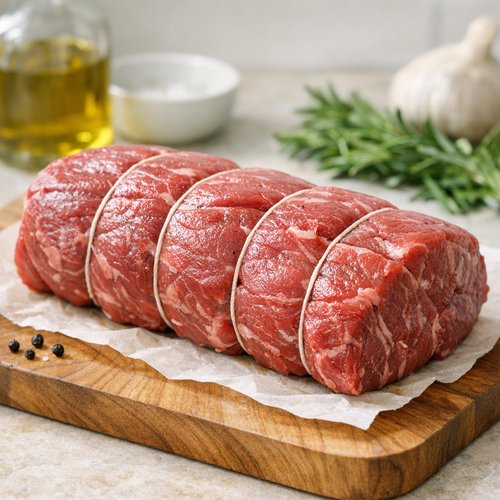
- 1 to 1.25 kilograms (2 to 2.5 pounds) center-cut beef tenderloin, tied securely (this is your star — choose the most uniform piece you can find for even cooking and beautiful presentation)
For the Herb Butter:
- 1 teaspoon fresh thyme leaves, finely chopped (the green specks add visual interest to the butter)
- 1 teaspoon fresh garlic, finely grated (minced finely so it distributes evenly)
- 75 grams (5 tablespoons) unsalted butter at room temperature (the richness creates that glossy finish)
- ¼ teaspoon freshly ground black pepper
- ¼ teaspoon kosher salt
For the Creamy Mushroom Sauce:
- ¾ cup marsala wine, Italian fortified wine (creates a rich, wine-colored reduction that deepens the sauce’s visual appeal)
- 1 fresh thyme sprig (adds elegant visual element when garnishing the finished plate)
- 2 tablespoons fresh parsley, finely chopped (the bright green garnish is your final visual flourish)
- ½ teaspoon minced fresh garlic
- ¾ cup heavy cream (creates that luxurious pale ivory color)
- ¼ teaspoon freshly ground black pepper
- ½ cup low-sodium chicken stock (adds body without overpowering)
- 2 cups beef stock or cooking liquid reserved from the beef (adds depth to the sauce)
- 150 grams (5 ounces) fresh white mushrooms, sliced 3 millimeters thick (uniform slicing ensures even cooking and professional appearance)
Serves: 4 people with elegant portions, or 6 if you’re serving alongside substantial sides.
How to Make Picture-Perfect Beef Fillet Recipe
I’m going to walk you through this step-by-step, with specific attention to the moments that affect how gorgeous your final dish looks. This is the part where I share what I’ve learned from years of cooking and from my background helping families create nourishing meals. You’ll notice I’m giving you options and explanations — that’s intentional. Understanding the “why” behind each step makes you a more confident cook.
Step 1: Prepare Your Beef for Even Cooking (Optional But Recommended for Best Results)
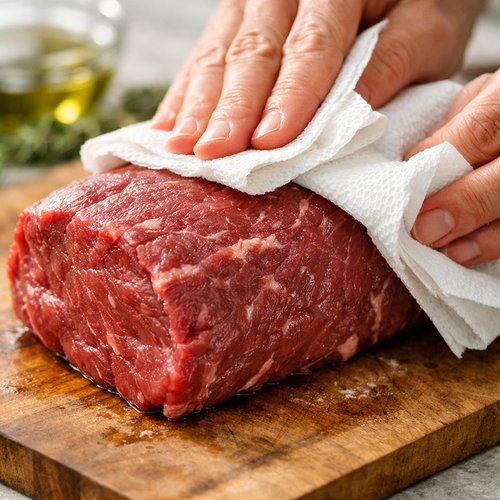
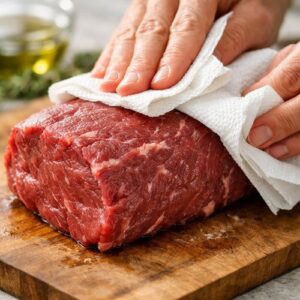
Pat your beef tenderloin completely dry with paper towels — this is crucial for creating that beautiful mahogany sear. Any moisture on the surface will steam instead of brown. Sprinkle salt and pepper generously all over the beef, making sure every surface gets seasoned. Place it on a wire rack set over a baking sheet and refrigerate uncovered for 12 to 24 hours.
Why? I know this seems like an extra step, but here’s the science: when beef sits uncovered in the fridge, the surface dries out slightly and the salt begins to dissolve and penetrate the meat. This creates more even seasoning and, crucially, that beautiful, even brown crust you see on restaurant-quality beef. If you’re short on time, you can skip this, but trust me — your crust will thank you if you don’t.
Step 2: Remove Beef From Refrigeration and Let It Come to Temperature
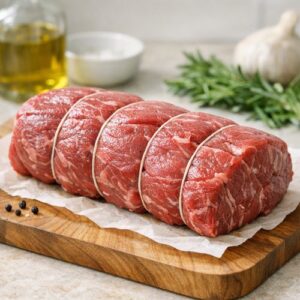
This is where patience rewards you with perfect doneness. Remove your beef from the refrigerator exactly 2 hours before you plan to cook it. I set a timer on my phone so I don’t forget. Cold meat cooks unevenly — the outside gets overdone before the inside reaches temperature. When beef comes to room temperature, it cooks evenly throughout, giving you that perfect rose-pink center.
While it’s coming to temperature, prep everything else: make your herb butter, slice your mushrooms, gather your liquids. In my experience, mise en place (having everything ready) is what separates stressed cooking from joyful cooking.
Step 3: Create Your Herb Butter Mixture
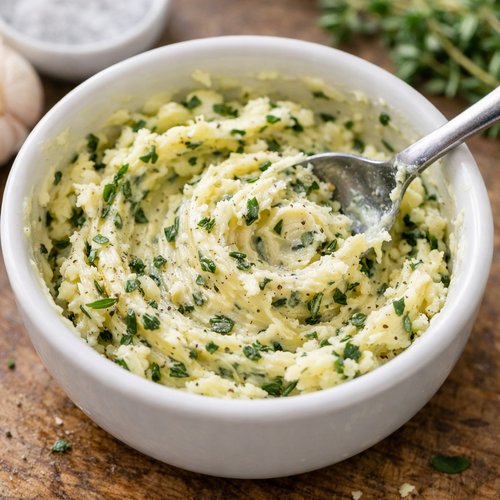
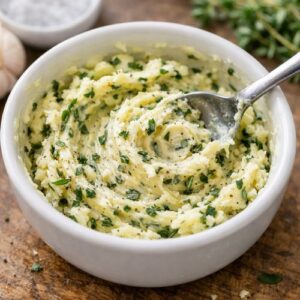
In a small bowl, combine softened unsalted butter, finely grated garlic, finely chopped fresh thyme, salt, and pepper. Mix until well combined — you want an even distribution of herbs throughout. This is going to become the glossy, golden coating that makes your beef look restaurant-quality. Set it aside at room temperature so it stays spreadable.
Pro tip from my kitchen: if your butter is too soft, it’ll melt immediately when it hits the hot beef and you’ll lose that beautiful coating. If it’s too cold, it won’t spread evenly. Room temperature is your sweet spot.
Step 4: Sear the Beef Until It’s Gorgeously Browned
Heat vegetable oil in an oven-safe, heavy-based pan (cast iron or stainless steel work beautifully) over high heat until it’s just beginning to smoke. You want it hot enough that the beef sizzles aggressively the moment it hits the pan. This is non-negotiable for that beautiful crust.
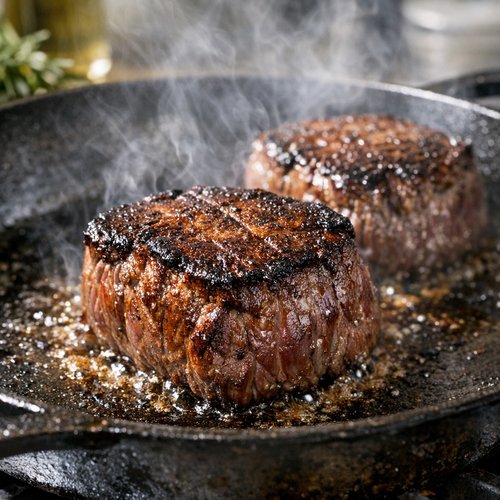
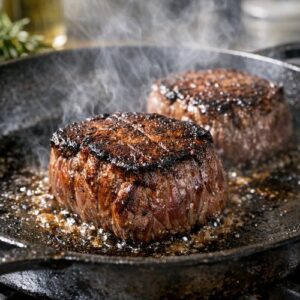
Place your beef in the pan and let it sit for about 2 minutes without moving it. Resist the urge to poke it or move it around — that first contact creates the brown crust. Then brown all sides aggressively: top, bottom, and all four long sides. Total searing time is usually 8-10 minutes for a properly sized center-cut tenderloin. You’re looking for deep mahogany brown on every surface.
Once it’s beautifully seared, place it on a clean wire rack and let it cool for 15 minutes. This cooling period is important: if you slather butter on the screaming-hot beef, it’ll immediately melt and slide off. You want it to coat and adhere.
Step 5: Preheat Your Oven to the Perfect Temperature
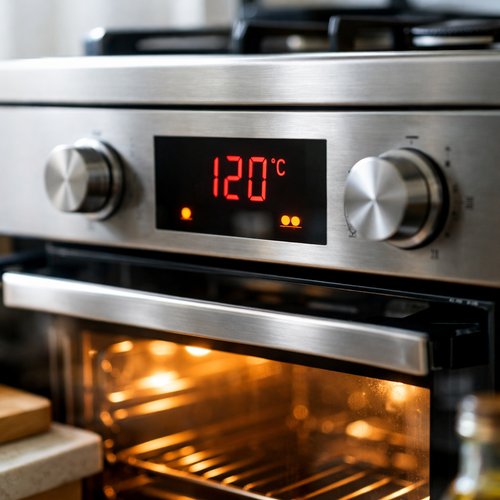
While your beef is cooling, preheat your oven to 120°C (250°F). This low, gentle heat is key to cooking beef tenderloin perfectly. Think of it this way: you’ve already created the flavorful crust with your sear. Now you’re gently bringing the interior to perfect medium-rare without overcooking the exterior. Works for both fan and conventional ovens.
Step 6: Apply the Herb Butter and Begin Roasting
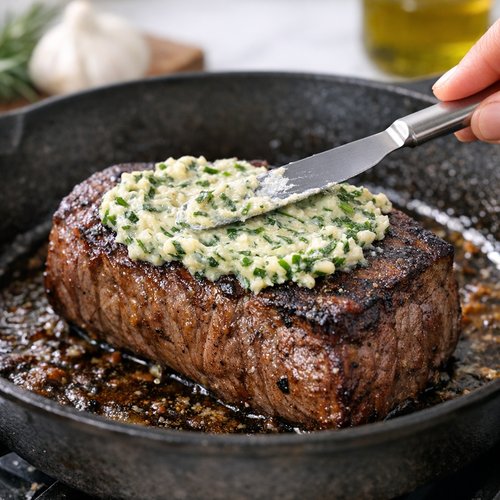
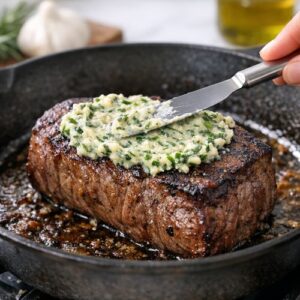
Place your cooled beef back in the same pan (no need to wash it — those browned bits are pure flavor). Using a butter knife or small spatula, spread about three-quarters of your herb butter onto the top and sides of the beef. Be generous — this is what creates that golden, glossy, appetizing finish that makes people reach for their cameras before they reach for their forks.
Place the pan in your preheated oven and roast for 15 minutes. After 15 minutes, carefully remove the pan (it’s hot!), turn the beef if needed, and spread the remaining herb butter onto the top and sides.
Continue roasting for another 25 to 35 minutes. You’re looking for an internal temperature of 53°C (127°F) for perfect medium-rare. Use an instant-read thermometer — this is your most important tool. Insert it into the thickest part of the beef without touching bone or the pan.
Step 7: Rest Your Beef (This Step Changes Everything)
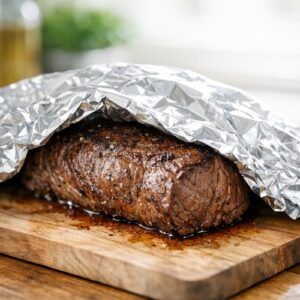
Remove your beef from the oven and place it on a cutting board. Do NOT skip the resting period — I cannot stress this enough. Cover it loosely with foil and let it rest for 10 minutes. During this time, the internal temperature will rise to 56-58°C (133-136°F) — perfect medium-rare.
More importantly, resting allows the juices to redistribute throughout the meat. If you slice immediately, all those delicious juices run out onto your plate instead of staying in the beef. When you rest it, those juices stay locked in, and your beef stays incredibly tender and juicy. This is the difference between good beef and spectacular beef.
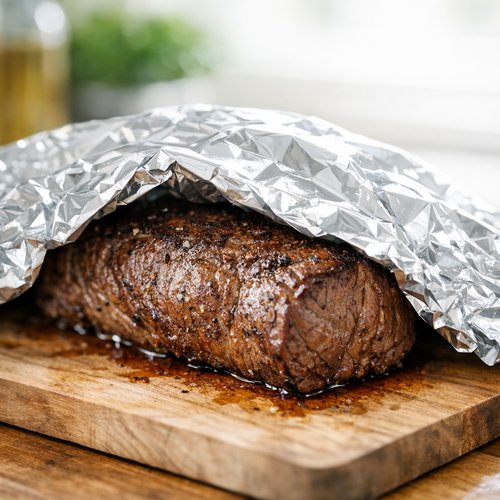
Step 8: Make Your Creamy Mushroom Sauce While Beef Rests
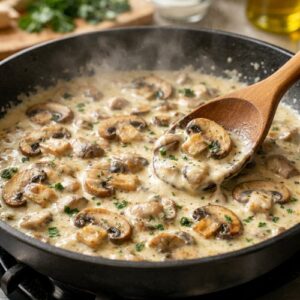
While your beef rests, let’s create the sauce that takes this dish from impressive to absolutely unforgettable. Heat a separate pan over medium-high heat. Add a drizzle of oil and sauté your sliced mushrooms until they’re golden and any released liquid has mostly evaporated. This takes about 5-6 minutes and creates deeper, richer mushroom flavor and color.
Add minced garlic and a fresh thyme sprig, stirring for about 30 seconds until fragrant. Pour in your marsala wine and let it reduce by half — this concentrates the flavor and creates that deep, wine-colored base for your sauce. This takes about 3-4 minutes.
Add your chicken stock and let that reduce slightly, about 2 minutes. Then lower heat to medium and stir in your heavy cream. Let it simmer gently for 2-3 minutes until slightly thickened and beautifully pale ivory in color. Taste and adjust seasoning with salt and pepper. If you want it thicker, simmer a bit longer. If it’s too thick, add a splash more stock.
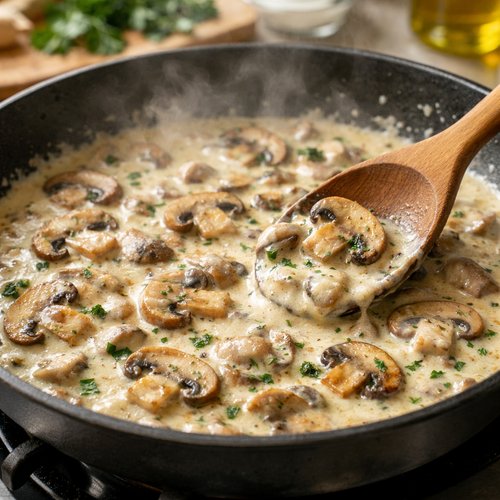
Step 9: Slice Your Beef and Arrange on Plates
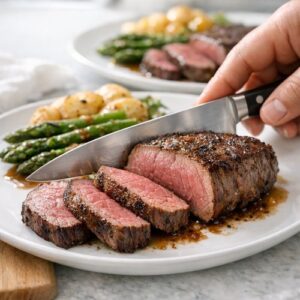
Using a sharp knife, slice your rested beef into thick slices — about 1.5 centimeters (¾ inch) thick. Thick slices look more luxurious and showcase that beautiful pink interior better than thin slices.
Arrange slices slightly overlapping on your plates, leaning them against each other to create height and visual interest. This isn’t flat plating — you’re creating dimension that makes the dish look restaurant-quality.
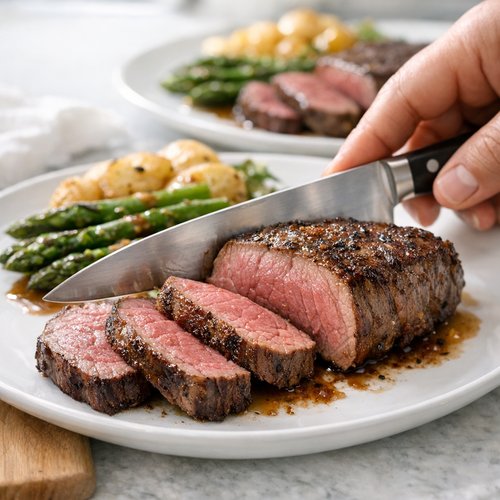
Step 10: Plate Your Sauce and Final Garnish
Spoon your creamy mushroom sauce around (not over) the beef slices, leaving some of the beautiful beef visible. The sauce should complement, not hide, your gorgeous protein.
Garnish with fresh parsley and a single thyme sprig if you’d like. Serve immediately while everything is warm.
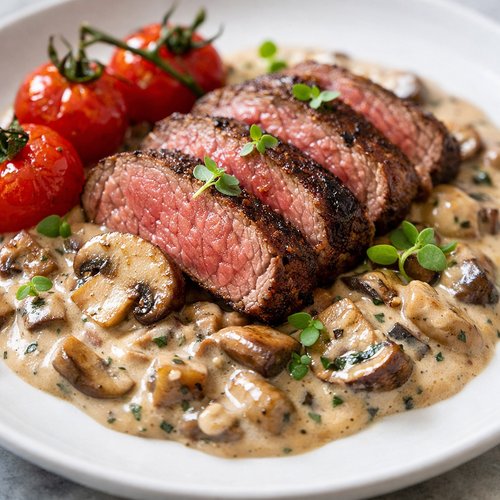
The Plating Masterclass
I want to share exactly how to plate this like you’ve trained under professional chefs, because plating is where good food becomes memorable food. This isn’t about being fussy — it’s about respecting the ingredient you’ve worked to cook perfectly.
- Create Height and Dimension — Lean your beef slices against each other rather than laying them flat. Stack them at a slight angle so the beautiful pink interior is visible. This creates a visual sense of elegance and luxury. Flat plating looks home-cooked. Angled, overlapping slices look restaurant-quality.
- Sauce Placement as Negative Space — Pour your creamy mushroom sauce around the beef in an artistic pool rather than covering it. I like to spoon sauce on one side of the plate, creating a swoosh or arc. This accomplishes two things: it looks intentional and professional, and it lets the gorgeous beef remain the focal point. The pale ivory sauce against the dark red beef creates beautiful color contrast.
- Garnish With Purpose — Fresh parsley adds a vibrant green note that signals freshness and brightness. A single thyme sprig tucked into the sauce adds elegance without clutter. Don’t over-garnish — every element should have a reason to be there. In my experience as a dietitian, garnishes also signal to your brain that this is fresh, nourishing food, not just calories. That visual cue actually impacts how your body processes the meal.
Photography Tips for This Dish
One of my favorite things about cooking is sharing it with the people I love — and in today’s world, that often means sharing through photos. Let me give you specific tips for capturing this beef fillet at its absolute best.
- Shoot Within 2 Minutes of Plating — This dish is most beautiful when everything is still steaming slightly and the beef is at peak color. The longer it sits, the more the juices darken the plate and the beef begins to cool. I always have my phone or camera ready before I plate the final dish. Good lighting matters more than a fancy camera.
- Use Natural Window Light From the Side — Position your plate so natural light hits it from a 45-degree angle. This illuminates the beautiful layers of the beef, makes the sauce look glossy and luxurious, and creates shadows that add dimension. Harsh overhead light washes out the beautiful pink color. Soft, directional light is your friend.
- Shoot Slightly Above the Plate (30-45 Degree Angle) — This angle shows off the height you’ve created with your stacked beef slices and lets the sauce be visible without obscuring the beef. It’s the most flattering angle for this particular dish. Play with 30 degrees for a more dramatic view or 45 degrees for a classic food photography look.
- Use a Plain, Contrasting Background — A white, cream, or dark gray plate shows off your beef beautifully. Busy backgrounds distract from your gorgeous main course. I use simple ceramic plates or even a white tile as my background. The simpler your background, the more stunning your beef looks.
- Capture the Sauce Movement — If you’re plating on camera or taking a video, capture the moment you spoon that creamy sauce around the beef. The glossy, luxurious movement of the sauce is incredibly appetizing and suggests flavor and richness that makes viewers almost able to taste it.
Seasonal Color Variations
Here’s something I love about this recipe: while the core elements stay the same, you can adapt the visual palette based on what’s in season and what colors are around you. This keeps the dish feeling fresh and current throughout the year.
Spring: Add fresh spring peas or asparagus tips to your mushroom sauce. The bright green adds life and signals springtime freshness. Alternatively, finish with fresh tarragon instead of parsley — it’s more delicate and feels spring-like.
Summer: Incorporate roasted cherry tomatoes into your sauce or serve the beef alongside a bright green salad with lemon vinaigrette. Add fresh basil as your garnish instead of parsley. The greenery and brightness feel summery and light despite the richness of the beef.
Fall: This is when mushroom sauce truly shines. Use a mix of cremini, shiitake, and oyster mushrooms for deeper, earthier tones. Substitute half the cream with a good beef stock for a slightly lighter, more savory sauce. The deeper brown tones of fall mushrooms feel appropriate for the season.
Winter: Stick with creamy mushroom sauce as is — it’s absolutely perfect for winter. Add a touch of truffle oil to the butter for luxury and earthiness. Garnish with crispy sage instead of fresh parsley for a more sophisticated, wintery feel. Roasted root vegetables on the side bring warm, earthy tones to the plate.
Can I Store Beef Fillet Recipe?
Yes, you can! And as a registered dietitian who always thinks about practical meal prep, I have specific strategies to keep your beef tender and beautiful even when reheated.
Storage: Wrap leftover cooked beef tightly in plastic wrap or transfer to an airtight container. Store in the refrigerator for up to 3 days. The sliced beef will keep better than the whole tenderloin since there’s more surface area for seasoning and sauce to coat.
Reheating: This is crucial for preserving tenderness. Never microwave sliced beef — it toughens the exterior while overheating the center. Instead, place slices on a plate, cover loosely with foil, and warm in a 120°C (250°F) oven for about 8-10 minutes, until just warmed through. The gentle, low heat prevents overcooking.
Sauce Storage: Store the creamy mushroom sauce separately in an airtight container for up to 3 days. Reheat gently in a saucepan over low heat, whisking occasionally. If it seems too thick, add a splash of chicken stock to restore the right consistency.
Freezing: Honestly? I don’t recommend freezing cooked beef tenderloin. The texture suffers when frozen and thawed. However, you can freeze the cooled beef wrapped tightly in plastic wrap for up to 1 month, then thaw overnight in the refrigerator and reheat gently. It won’t be quite as good as fresh, but it’s better than wasting good beef.
Presentation Note: When you reheat and plate leftover beef, warm your plates first. Cold plates make warm beef look unappetizing. A warm plate keeps everything beautiful and inviting.
Nutrition Information
Let me share the nutritional breakdown of this dish, because understanding what you’re eating helps you appreciate it even more. Per serving (based on 4 servings), you’re getting approximately:
- Calories: 520-580
- Protein: 48-52 grams (this is substantial, quality protein from beef)
- Fat: 28-32 grams (mostly from the herb butter and cream — healthy fats that support nutrient absorption)
- Carbohydrates: 4-6 grams (mainly from the mushrooms and wine reduction)
- Iron: 4.2 mg (about 23% of daily value — beef is one of the best sources of bioavailable iron)
- Zinc: 7.8 mg (about 71% of daily value — crucial for immune function and wound healing)
- B12: 2.1 mcg (about 35% of daily value — only found in animal products)
- Selenium: 38 mcg (about 68% of daily value — a powerful antioxidant)
From a nutritional standpoint, this meal is spectacularly balanced. You’re getting premium quality protein that contains all nine essential amino acids, plus critical micronutrients that many people are deficient in. The beef tenderloin is leaner than many other cuts, so even though it’s luxurious, it’s not as high in fat as you might expect.
Expert’s Nutritional Tip from My Practice: The combination of beef with the mushroom sauce is actually nutritionally clever. Beef provides heme iron (the kind our bodies absorb most efficiently), while mushrooms contain ergothioneine, a compound that may support cellular health. The vitamin C in the fresh parsley garnish enhances iron absorption even further. When you eat whole foods thoughtfully — even elegant restaurant meals — your body recognizes the nutritional value and processes it differently than processed alternatives. This is real food nourishing real bodies.
What to Serve Alongside for a Complete Visual Spread
Beef tenderloin is the star, so you want supporting players that complement without competing. Here’s how I think about a complete table:
- Garlic Mashed Potatoes or Creamy Cauliflower Purée — The pale ivory color echoes your sauce, creating visual harmony on the plate. The creamy texture complements the tender beef. If you make cauliflower purée, you get a lighter, lower-carb option that still feels luxurious.
- Roasted Asparagus or Green Beans — The vibrant green provides crucial color contrast and signals freshness. Roasting them until the tips are slightly caramelized adds visual interest and depth. Try serving them alongside a sophisticated salad for a lighter meal structure.
- A Fresh, Crisp Salad — Something like a classic Caesar salad provides textural contrast and a bright, acidic component that cuts through the richness of the beef and cream sauce. The dark greens and pale dressing create beautiful color variety on the table.
- A Simple Red Wine — Visually and flavor-wise, a Cabernet Sauvignon or Bordeaux blend complements this dish beautifully. The deep red color on the table adds elegance, and the tannins and structure of the wine pair perfectly with beef tenderloin and mushroom sauce.
- Crusty Bread or Dinner Rolls — For soaking up that incredible sauce. Warm bread with a crispy exterior and soft interior is the perfect textural contrast to everything else on the plate.
Expert’s Make-Ahead Guide from My Practice
As someone who works with families to create nourishing meals, I understand that life is busy. Here’s exactly how to prep this dish ahead so serving it feels effortless:
24 Hours Ahead: Season your beef tenderloin and place it on a rack in the refrigerator uncovered. This is the perfect do-ahead step — it actually improves the final product by dry-brining the meat.
4 Hours Ahead: Make your herb butter and refrigerate it in a small container. This saves you a step during cooking and ensures everything is ready to go.
2 Hours Before Serving: Remove your beef from the refrigerator so it comes to room temperature. This is your only time-sensitive step, but it’s absolutely worth it for even cooking.
30 Minutes Before Serving: Slice your mushrooms and have all sauce ingredients measured and ready. Your vegetables can be prepped if you’re serving them.
The Cook: Once you start cooking, it takes about 50-60 minutes from sear to rested and ready to slice. Plan your meal timing accordingly. If you want everything on the table at the same time, start your side dishes about 20 minutes after you put the beef in the oven.
Common Mistakes to Avoid
After years of cooking and helping others learn, I’ve noticed certain patterns in what trips people up. Here are the mistakes that most commonly result in less-than-perfect results, and how to avoid them:
- Skipping the Dry-Brine Step Because You’re Impatient — I get it. You want to cook dinner now, not tomorrow. But that 12-24 hour refrigeration genuinely improves your crust and seasoning. If you absolutely can’t do it, at least pat the beef dry and let it sit on a rack at room temperature for 30 minutes before cooking. Moisture is your enemy for browning.
- Not Letting the Beef Come to Room Temperature — I see this often, and it’s the fastest way to get a cold center with an overcooked exterior. Those 2 hours feel long, but they’re the difference between mediocre and magnificent. Set a timer. Don’t rush this.
- Applying Herb Butter to Piping Hot Beef — If your beef is still steaming when you butter it, the butter will melt instantly and slide off instead of coating. That cooling period after searing is essential. I always wait the full 15 minutes, even though I’m impatient to keep cooking.
- Skipping the Rest Period Because You’re Excited to Eat — This is the hardest part, but also the most important. Ten minutes seems short until you’re staring at a plate of beautiful beef and waiting. But that rest redistributes juices and makes your beef 100 times more tender. It’s worth the wait.

Beef Fillet Recipe
Ingredients
Method
- Pat your beef tenderloin completely dry with paper towels — this is crucial for creating that beautiful mahogany sear. Any moisture on the surface will steam instead of brown. Sprinkle salt and pepper generously all over the beef, making sure every surface gets seasoned. Place it on a wire rack set over a baking sheet and refrigerate uncovered for 12 to 24 hours. Why? I know this seems like an extra step, but here's the science: when beef sits uncovered in the fridge, the surface dries out slightly and the salt begins to dissolve and penetrate the meat. This creates more even seasoning and, crucially, that beautiful, even brown crust you see on restaurant-quality beef. If you're short on time, you can skip this, but trust me — your crust will thank you if you don't.
- This is where patience rewards you with perfect doneness. Remove your beef from the refrigerator exactly 2 hours before you plan to cook it. I set a timer on my phone so I don't forget. Cold meat cooks unevenly — the outside gets overdone before the inside reaches temperature. When beef comes to room temperature, it cooks evenly throughout, giving you that perfect rose-pink center. While it's coming to temperature, prep everything else: make your herb butter, slice your mushrooms, gather your liquids. In my experience, mise en place (having everything ready) is what separates stressed cooking from joyful cooking.
- In a small bowl, combine softened unsalted butter, finely grated garlic, finely chopped fresh thyme, salt, and pepper. Mix until well combined — you want an even distribution of herbs throughout. This is going to become the glossy, golden coating that makes your beef look restaurant-quality. Set it aside at room temperature so it stays spreadable. Pro tip from my kitchen: if your butter is too soft, it'll melt immediately when it hits the hot beef and you'll lose that beautiful coating. If it's too cold, it won't spread evenly. Room temperature is your sweet spot.
- Heat vegetable oil in an oven-safe, heavy-based pan (cast iron or stainless steel work beautifully) over high heat until it's just beginning to smoke. You want it hot enough that the beef sizzles aggressively the moment it hits the pan. This is non-negotiable for that beautiful crust. Place your beef in the pan and let it sit for about 2 minutes without moving it. Resist the urge to poke it or move it around — that first contact creates the brown crust. Then brown all sides aggressively: top, bottom, and all four long sides. Total searing time is usually 8-10 minutes for a properly sized center-cut tenderloin. You're looking for deep mahogany brown on every surface. Once it's beautifully seared, place it on a clean wire rack and let it cool for 15 minutes. This cooling period is important: if you slather butter on the screaming-hot beef, it'll immediately melt and slide off. You want it to coat and adhere.
- While your beef is cooling, preheat your oven to 120°C (250°F). This low, gentle heat is key to cooking beef tenderloin perfectly. Think of it this way: you've already created the flavorful crust with your sear. Now you're gently bringing the interior to perfect medium-rare without overcooking the exterior. Works for both fan and conventional ovens.

- Place your cooled beef back in the same pan (no need to wash it — those browned bits are pure flavor). Using a butter knife or small spatula, spread about three-quarters of your herb butter onto the top and sides of the beef. Be generous — this is what creates that golden, glossy, appetizing finish that makes people reach for their cameras before they reach for their forks. Place the pan in your preheated oven and roast for 15 minutes. After 15 minutes, carefully remove the pan (it's hot!), turn the beef if needed, and spread the remaining herb butter onto the top and sides. Continue roasting for another 25 to 35 minutes. You're looking for an internal temperature of 53°C (127°F) for perfect medium-rare. Use an instant-read thermometer — this is your most important tool. Insert it into the thickest part of the beef without touching bone or the pan.
- Remove your beef from the oven and place it on a cutting board. Do NOT skip the resting period — I cannot stress this enough. Cover it loosely with foil and let it rest for 10 minutes. During this time, the internal temperature will rise to 56-58°C (133-136°F) — perfect medium-rare. More importantly, resting allows the juices to redistribute throughout the meat. If you slice immediately, all those delicious juices run out onto your plate instead of staying in the beef. When you rest it, those juices stay locked in, and your beef stays incredibly tender and juicy. This is the difference between good beef and spectacular beef.
- While your beef rests, let's create the sauce that takes this dish from impressive to absolutely unforgettable. Heat a separate pan over medium-high heat. Add a drizzle of oil and sauté your sliced mushrooms until they're golden and any released liquid has mostly evaporated. This takes about 5-6 minutes and creates deeper, richer mushroom flavor and color. Add minced garlic and a fresh thyme sprig, stirring for about 30 seconds until fragrant. Pour in your marsala wine and let it reduce by half — this concentrates the flavor and creates that deep, wine-colored base for your sauce. This takes about 3-4 minutes. Add your chicken stock and let that reduce slightly, about 2 minutes. Then lower heat to medium and stir in your heavy cream. Let it simmer gently for 2-3 minutes until slightly thickened and beautifully pale ivory in color. Taste and adjust seasoning with salt and pepper. If you want it thicker, simmer a bit longer. If it's too thick, add a splash more stock.
- Using a sharp knife, slice your rested beef into thick slices — about 1.5 centimeters (¾ inch) thick. Thick slices look more luxurious and showcase that beautiful pink interior better than thin slices. Arrange slices slightly overlapping on your plates, leaning them against each other to create height and visual interest. This isn't flat plating — you're creating dimension that makes the dish look restaurant-quality.
- Spoon your creamy mushroom sauce around (not over) the beef slices, leaving some of the beautiful beef visible. The sauce should complement, not hide, your gorgeous protein. Garnish with fresh parsley and a single thyme sprig if you'd like. Serve immediately while everything is warm.
Notes
FAQs
How do I know when my beef is perfectly medium-rare without cutting into it?
Use an instant-read thermometer inserted into the thickest part of the meat. For medium-rare, you’re looking for 53°C (127°F). Remember that temperature will rise about 5 degrees during resting, so you want to pull it at 53°C, not wait for it to reach 56-58°C in the oven. It’s the most foolproof method and takes the guesswork out of cooking expensive beef. I’ve never had a thermometer steer me wrong.
Can I use a different cut of beef for this recipe?
Technically, yes, but beef tenderloin is genuinely the best choice for this preparation. It’s the most tender cut available, cooks evenly, and has that elegant appearance that makes the dish look special. If you use a different cut like ribeye or New York strip, you’ll need to adjust cooking time and temperature — they’re fattier cuts that behave differently. Stick with tenderloin for this recipe specifically. If you want to explore other cuts, try a beautiful boneless pork ribeye for a similar elegant presentation.
What do I do if my herb butter looks grainy or separated?
Your butter was probably too cold or your ingredients were much warmer. Make sure your butter is actually softened (not melted — there’s a difference) and everything is roughly room temperature before mixing. If it does separate, you can save it by slowly heating it over low heat while whisking vigorously, then letting it cool slightly before applying to your beef. But honestly, prevention is easier — just pay attention to temperature.
Can I make this recipe if I only have a regular skillet, not an oven-safe one?
You’ll need an oven-safe skillet for this specific recipe because you’re searing on the stovetop and then transferring directly to the oven. If you only have a regular skillet, you can sear in it, then transfer the beef to a roasting pan with sides for the oven cooking. It works, but you lose some of those gorgeous browned bits that flavor the final dish. Oven-safe skillets are inexpensive and worth having on hand.
What if I don’t have marsala wine for the sauce?
Marsala is ideal because of its slight sweetness and complex flavor, but you can substitute with a good dry white wine, red wine, or even beef broth. The sauce will taste slightly different — a dry white wine version will be more delicate, a red wine version will be deeper and more robust, and beef broth version will be more savory. Any of these work beautifully. Just avoid cooking wines with added salt. The quality of what you use matters because it becomes part of your sauce.
More Visually Stunning Recipes
- Best Beef and Ale Pie Recipe — Comfort food that’s equally impressive to look at
- Apricot Salmon Recipe — Another elegant protein dish with beautiful presentation
- Caulifl