Before diving into the heart of our strawberry scones, let’s talk about what can elevate this delightful treat. Picture this: a warm scone fresh from the oven, its buttery crust giving way to tender, berry-infused goodness. What could make this experience even better? Here are a few ideas to pair with your scones:
Clotted Cream: This rich, thick cream is the ultimate accompaniment. Spread it generously on your warm scone and savor the contrast between the sweet strawberry and the creamy goodness.
Fresh Berries: Serve alongside additional strawberries or a mix of berries. They add freshness and vibrancy. A quick berry compote can also add a splash of flavor.
Aromatic Tea: Think black tea, Earl Grey, or a refreshing herbal blend. The heat of the tea complements the scones beautifully.
Whipped Cream: A dollop of lightly sweetened whipped cream transforms your scone into a delightful dessert.
Lemon Curd: This zesty spread brings a tart counterpoint to the sweetness of the scones. It’s a classic combo you won’t want to miss.
Now that we have the perfect accompaniments, let’s get into all things scones.

What Are Strawberry Scones?
Strawberry scones are delightful pastries that combine the light, flaky texture of traditional scones with the sweetness of fresh strawberries. Originating from England, these baked treats are often enjoyed with tea.
They typically feature a crumbly exterior with a soft, tender interior enriched with cream and vibrant berries. Just imagining them makes my mouth water!
Why This Recipe Works
Here are some reasons why this strawberry scone recipe is a keeper:
Fresh Ingredients
Using fresh strawberries makes a world of difference. Their natural sweetness shines through in each bite. The added lemon zest brightens the flavors and balances the sweetness of the strawberries.
Perfect Texture
The combination of cold butter and heavy cream creates flaky layers. When baked, you get that glorious contrast between a crumbly exterior and a light, soft inside.
Easy to Follow
This recipe is straightforward and user-friendly. Even novice bakers will feel confident whipping up these scones.
Versatile and Adaptable
Feel free to swap the strawberries for other fruits or add nuts or chocolate chips. This recipe is flexible enough to cater to your cravings or pantry stock.
Ingredients You’ll Need To Make These Strawberry Scones
Here’s what you’ll need to gather before we start baking:
- 2 cups unbleached all-purpose flour
- 3 tablespoons organic cane sugar
- 1 tablespoon aluminum-free baking powder
- 1/2 teaspoon fine sea salt
- 1/4 teaspoon lemon zest
- 1/2 cup cold unsalted butter (8 tablespoons or 1 stick), cut into small cubes
- 1 cup diced ripe fresh strawberries
- 1 large egg, at room temperature
- 1/2 cup chilled heavy cream
- 1 teaspoon pure vanilla extract
- 1 tablespoon whole milk, for brushing the tops
- 1/2 tablespoon coarse sparkling sugar, for sprinkling
For the optional vanilla glaze:
- 2/3 cup sifted powdered sugar
- 1 tablespoon whole milk
- 1/8 teaspoon vanilla extract

How to Make These?
Let’s get baking! Follow these steps for scrumptious strawberry scones.
Step 1: Preheat the Oven
Start by preheating your oven to 400°F (200°C). A hot oven is essential for creating those fluffy, golden scones.
Step 2: Mix Dry Ingredients
In a large bowl, whisk together the flour, sugar, baking powder, salt, and lemon zest. The lemon zest adds a bright note that complements the sweet strawberries beautifully.
Step 3: Cut in the Butter
Add the cold, cubed butter to the flour mixture. Using a pastry cutter or your fingertips, work the butter into the flour until the mixture resembles coarse crumbs. This technique is vital for achieving a flaky scone texture.
Step 4: Add Strawberries
Gently fold in the diced strawberries. You want to do this carefully to avoid crushing them. Each piece should retain its shape.
Step 5: Combine Wet Ingredients
In a separate bowl, whisk together the egg, heavy cream, and vanilla extract. This creamy mixture will bring everything together.
Step 6: Mix the Dough
Pour the wet ingredients into the dry ingredients. Stir until just combined. The dough might look a bit messy—that’s okay! It should be soft and slightly sticky.
Step 7: Shape the Scones
Turn the dough out onto a lightly floured surface. Pat it into a circle about 1-inch thick. Cut the circle into wedges (like a pizza) or use a biscuit cutter for round shapes.
Step 8: Prepare for Baking
Place the scones on a lined baking sheet. Brush the tops with whole milk. This step helps achieve that lovely golden color. Sprinkle with coarse sugar for added sweetness and crunch.
Step 9: Bake
Slide the baking sheet into the oven. Bake for about 15-20 minutes, or until the tops are golden. The aroma will fill your kitchen!
Step 10: Optional Glaze
If you’d like to add a glaze, combine the powdered sugar, milk, and vanilla extract in a small bowl. Drizzle over the cooled scones.
Tips for Perfect Scones
Use Cold Ingredients: The colder your butter and cream, the better the scones will rise. Keep them in the fridge until you need them.
Don’t Overmix: When you combine wet and dry ingredients, mix until just combined. Overmixing leads to tough scones.
Chill the Dough: If time allows, chill the shaped scones for about 20 minutes before baking. This step improves texture.
Experiment with Add-ins: Feel free to add chocolate chips, different fruits, or nuts. The recipe is flexible!
Keep an Eye on Baking Time: Ovens vary. Check for doneness a few minutes before the recommended time to avoid over-baking.
Nutrition Information
For those concerned about health, let’s break it down. Each scone contains:
- Calories: Approximately 250
- Total Fat: 12g
- Saturated Fat: 7g
- Carbohydrates: 35g
- Fiber: 1g
- Sugars: 6g
- Protein: 3g
This is based on one scone and may vary depending on the size and specific ingredient brands used.
How to Store the Leftovers?
If you have leftover scones (which is unlikely, if we’re honest), store them in an airtight container at room temperature for up to 2 days. To keep them fresh longer, you can freeze them individually. Just wrap each scone tightly in plastic wrap and place in a freezer-safe bag. They can stay frozen for up to 3 months. When you’re ready, simply thaw and warm them in the oven.
Recommended Side Dishes for Strawberry Scones
Looking to round out your meal? Here are a few side dishes that pair perfectly with strawberry scones:
Greek Yogurt Parfait
A layered parfait with creamy Greek yogurt, fresh berries, and granola complements the scones nicely. It adds a nutritious touch and balances sweetness.
Fruit Salad
A light fruit salad bursting with seasonal fruits is refreshing. The bright colors and flavors provide a perfect contrast to the scones.
Smoothie
Blend a simple smoothie with bananas, spinach, and almond milk. It’s nutritious and creates an energizing boost, making your breakfast complete.
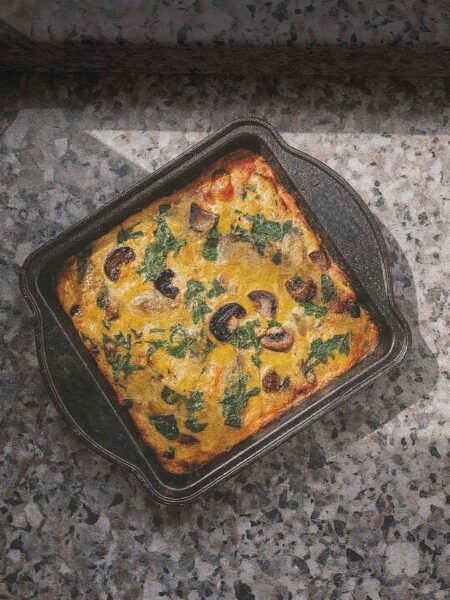
Vegetable Quiche
For a more substantial option, serve a slice of vegetable quiche. The savory notes from the eggs and veggies balance the sweetness of the scones.
Substitute Options for Ingredients
Can’t find what you need? No worries! Here are some substitutes:
All-Purpose Flour
If you have whole wheat flour, feel free to swap in part of it for a healthier option. Start with 50% whole wheat and adjust as needed.
Strawberries
Blueberries or raspberries can replace strawberries, or even a combination. Seasonal fruits work wonderfully.
Heavy Cream
If heavy cream isn’t available, use half-and-half or coconut cream for a dairy-free alternative.
Unsalted Butter
In a pinch, you can use margarine or vegan butter. The taste may subtly change, but they work well in baking.

Conclusion
Baking strawberry scones has become a treasured part of my kitchen routine. They offer a delightful experience, whether enjoyed alone, with friends, or as part of a spread. With their tender crumb and bursts of fresh strawberry flavor, I firmly believe these scones will capture hearts and taste buds, just as they did mine.
With simple ingredients, easy steps, and a bit of creativity, you can make a family favorite that’s sure to brighten any table. So, preheat that oven and get ready to share something truly special!
You’ll also like the following recipes!
Strawberry Scones – Simple Easy Meals
As I was rummaging through my pantry one day, I stumbled upon a carton of ripe strawberries. I could almost feel their sweetness begging to be turned into something incredible. That day was the day I fell in love with strawberry scones. They are not just baked goods; they are a fusion of freshness, comfort, and nostalgia. Each bite transports me back to bright summer mornings.
In this post, I’m thrilled to share my favorite strawberry scone recipe. It’s sure to become your go-to for brunch gatherings and quiet afternoons alike. Plus, it’s easy to make—perfect for beginners and seasoned bakers.

Ingredients
For the optional vanilla glaze:
Instructions
Step 1: Preheat the Oven
-
Start by preheating your oven to 400°F (200°C). A hot oven is essential for creating those fluffy, golden scones.
Step 2: Mix Dry Ingredients
-
In a large bowl, whisk together the flour, sugar, baking powder, salt, and lemon zest. The lemon zest adds a bright note that complements the sweet strawberries beautifully.
Step 3: Cut in the Butter
-
Add the cold, cubed butter to the flour mixture. Using a pastry cutter or your fingertips, work the butter into the flour until the mixture resembles coarse crumbs. This technique is vital for achieving a flaky scone texture.
Step 4: Add Strawberries
-
Gently fold in the diced strawberries. You want to do this carefully to avoid crushing them. Each piece should retain its shape.
Step 5: Combine Wet Ingredients
-
In a separate bowl, whisk together the egg, heavy cream, and vanilla extract. This creamy mixture will bring everything together.
Step 6: Mix the Dough
-
Pour the wet ingredients into the dry ingredients. Stir until just combined. The dough might look a bit messy—that’s okay! It should be soft and slightly sticky.
Step 7: Shape the Scones
-
Turn the dough out onto a lightly floured surface. Pat it into a circle about 1-inch thick. Cut the circle into wedges (like a pizza) or use a biscuit cutter for round shapes.
Step 8: Prepare for Baking
-
Place the scones on a lined baking sheet. Brush the tops with whole milk. This step helps achieve that lovely golden color. Sprinkle with coarse sugar for added sweetness and crunch.
Step 9: Bake
-
Slide the baking sheet into the oven. Bake for about 15-20 minutes, or until the tops are golden. The aroma will fill your kitchen!
Step 10: Optional Glaze
-
If you'd like to add a glaze, combine the powdered sugar, milk, and vanilla extract in a small bowl. Drizzle over the cooled scones.
Nutrition Facts
Servings 12
- Amount Per Serving
- Calories 250kcal
- % Daily Value *
- Total Fat 12g19%
- Saturated Fat 7g35%
- Total Carbohydrate 35g12%
- Dietary Fiber 1g4%
- Sugars 6g
- Protein 3g6%
* Percent Daily Values are based on a 2,000 calorie diet. Your daily value may be higher or lower depending on your calorie needs.
Note
- Use Cold Ingredients: The colder your butter and cream, the better the scones will rise. Keep them in the fridge until you need them.
- Don’t Overmix: When you combine wet and dry ingredients, mix until just combined. Overmixing leads to tough scones.
- Chill the Dough: If time allows, chill the shaped scones for about 20 minutes before baking. This step improves texture.
- Experiment with Add-ins: Feel free to add chocolate chips, different fruits, or nuts. The recipe is flexible!
- Keep an Eye on Baking Time: Ovens vary. Check for doneness a few minutes before the recommended time to avoid over-baking.


