Pickled cauliflower is a versatile and zesty side that pairs wonderfully with a variety of dishes. Its tangy acidity beautifully complements the savory flavors of grilled meats like juicy steaks, marinated chicken, or flavorful pork chops.
Adding pickled cauliflower to sandwiches and tacos introduces a satisfying crunch and a bright, acidic kick that balances the richness of meats and other fillings.
It also makes a delightful addition to cheese boards, providing a refreshing contrast to creamy cheeses and salty cured meats, making it a memorable crowd-pleaser for any gathering.

Why This Recipe Works
Balance of Flavors
The combination of apple cider vinegar, garlic, and spices creates a harmonious flavor profile. This pickled cauliflower is not overly sour, making it pleasant for various palates.
Crisp Texture
Using a whole head of cauliflower and quick pickling ensures you retain that satisfying crunch. Nobody wants soggy pickles; this recipe guarantees that crunchy bite every time.
Customizable Spice Blend
This recipe allows you the flexibility to tweak the spices. Want a kick of heat? Add chili flakes! Prefer a milder taste? Use fewer spices. You can play around and make it your own without much effort.
Quick Turnaround
No one wants to wait days for their pickled vegetables. This recipe can be enjoyed within a few hours after preparation. It’s the perfect solution for last-minute snacks or side dishes.
How Does It Taste Like?
Imagine biting into a piece of this pickled cauliflower. The first thing you notice is its satisfying crunch. Then, as you chew, the balanced acidity from the vinegar hits your palate, dancing harmoniously with the aromatic garlic.
The subtle sweetness from the brown sugar rounds everything out, compelling you to reach for another piece. It’s a taste that intrigues and delights, all while being simple and wholesome.
What Sets This Recipe Apart from Other Pickled Cauliflower Variations?
Many pickled vegetables tend to lean too heavily on vinegar or sugar, leading to an imbalanced flavor. However, my approach here incorporates a blend of spices and a careful ratio of vinegar to water, alongside just a hint of sweetness.
This mix provides a more complex flavor that elevates the simple cauliflower into something spectacular. Plus, the inclusion of garlic and black peppercorn adds depth that most variations overlook.
The Ingredients
To create this extraordinary pickled cauliflower, gather the following ingredients:
- 1 cup apple cider vinegar
- 1 teaspoon kosher salt
- 1 medium cauliflower head
- 1 tablespoon mixed pickling spices
- 1/2 teaspoon brown sugar
- 1 cup filtered water
- 1/2 teaspoon whole black peppercorns
- 1 small garlic clove, smashed

Instructions
Let’s break down the process step-by-step. Everyone can become a pickling pro!
Step 1: Prepare the Cauliflower
Start by removing the leaves and stem from your cauliflower. Cut it into florets. Rinse them under cold water and set aside. Make sure to treat each floret kindly; this is a special dish after all!
Step 2: Create the Brine
In a medium saucepan, combine the apple cider vinegar, filtered water, kosher salt, brown sugar, and pickling spices. Give it a stir.
Place the saucepan on the stove over medium heat and bring it to a simmer. Stir occasionally and allow the sugar and salt to dissolve completely. You’ll start to get a whiff of those mouthwatering scents.
Step 3: Add Garlic and Peppercorns
Once your brine reaches a gentle simmer, toss in the smashed garlic and whole black peppercorns. Let them steep for about a minute. This process infuses the brine with added flavor that greatly enhances the end product.
Step 4: Pack the Cauliflower
Now comes the fun part! Take your cauliflower florets and pack them snugly into clean, sterilized jars. Ensure there’s enough room for the brine to cover all the florets.
Step 5: Pour over the Brine
Once you’ve packed the jars, carefully pour the hot brine over the cauliflower. Pour it until the florets are completely submerged. If any pieces stick out, that’s okay—just make sure most of them are covered.
Step 6: Seal and Cool
Seal the jars with their lids. Let them cool to room temperature. Once they are cool enough, place them in the refrigerator. They’ll be ready to enjoy in just a few hours!
Notes
Tips to make the most out of your pickled cauliflower experience:
- Use Fresh Ingredients: The fresher your cauliflower and garlic, the better your pickles will taste. Avoid any wilting or browning!
- Adjust Spice Levels: Feel free to add or reduce the spiciness according to your preference with the peppercorns or other spices.
- Add Other Vegetables: If you have other produce lying around, like carrots or bell peppers, toss them in the mix. They will take on that lovely pickled flavor.
- Sterilize Your Jars: For food safety, ensure your jars are properly sterilized if you plan to store them for an extended time.
- Experiment with Time: While they can be consumed after a few hours, letting the mixture sit in the fridge for a few days will deepen the flavor.
How Do You Store This Pickled Cauliflower?
Once your pickled cauliflower is ready, store it in the refrigerator. It should last for up to 2 weeks, but trust me, it won’t last that long—everyone will want a taste! Make sure the florets remain submerged in the brine to maintain freshness. If they start popping up, you can press them down gently.
Sides for Pickled Cauliflower
If you’re wondering what else might complement a meal featuring pickled cauliflower, consider these side options:
Roasted Chickpeas
These crunchy delights are seasoned to perfection and offer a fantastic textural contrast to the pickled cauliflower. Toss them with your favorite spices and roast until crispy.
Fresh Green Salad
A salad filled with arugula, cherry tomatoes, and cucumbers brings brightness to the table. Drizzle with a light vinaigrette for an added zing.
Hummus and Pita
Serve the pickled cauliflower with a side of creamy hummus. The silky texture pairs nicely against the crunchy cauliflower, creating an enticing experience that’ll make you come back for more.
What Alternatives Can You Use for the Ingredients?
Sometimes, you might not have everything on hand. Luckily, there are alternatives! Here are some suggestions:
White Vinegar or Wine Vinegar
If you don’t have apple cider vinegar, white vinegar can be a stand-in. It will provide a sharper acidity, so consider adding a touch more sugar to balance.
Sea Salt
Kosher salt can be replaced with sea salt or table salt. Just be mindful of the measurement—table salt is finer and may require a smaller amount.
Honey or Agave
Instead of brown sugar, honey or agave can work well. These natural sweeteners add a unique flavor and are a great substitution for those watching their refined sugar intake.
Other Spices
Feel free to mix and match with spices you have on hand. Dill, coriander, or even mustard seeds can create exciting variations that keep things interesting.

Conclusion
There you have it—your guide to creating a scrumptious batch of pickled cauliflower that will liven up any meal. From its crunchy texture to its tangy flavors, this dish is sure to become a staple in your kitchen.
Quick to prepare, adaptable to your flavor preferences, and packed with goodness, pickled cauliflower delivers a punch that’s hard to beat.
Getting more confident in the kitchen is just a jar away! Share this recipe, pair it with your favorite dishes, and enjoy. Cheers to your pickled culinary adventure!
You’ll also like the following recipes!
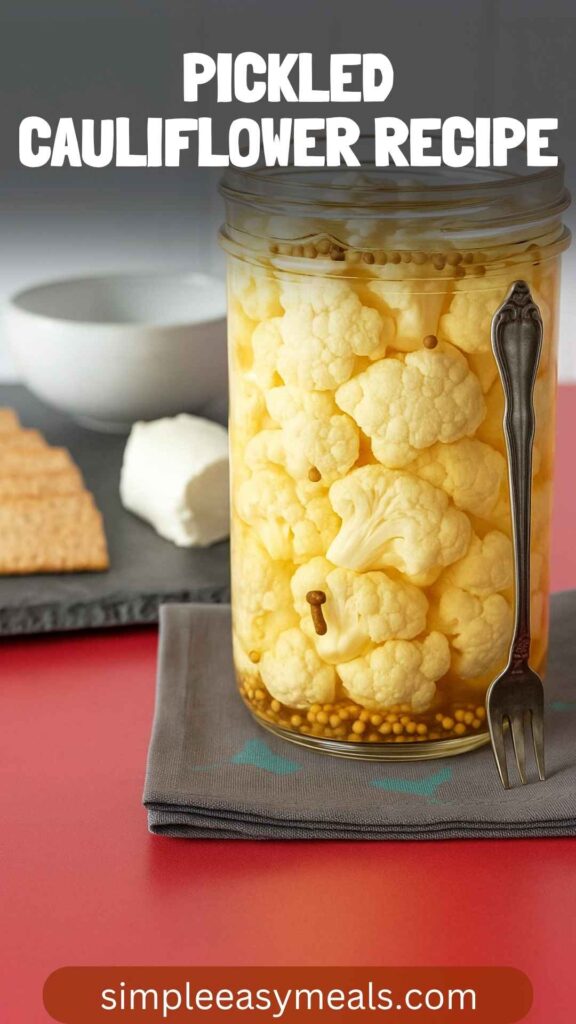
Pickled Cauliflower Recipe – Simple Easy Meals
Pickled cauliflower might just be one of the unsung heroes of the culinary world. This crunchy, tangy treat is perfect for sprucing up meals or adding character to boring snacks.
Growing up, my grandmother always had a jar of pickled veggies in the fridge, and I would sneak little bites when no one was looking.
Fast forward to today, and here I am, sharing my own recipe that brings that nostalgic crunch back into my life.
Not only is pickled cauliflower a delightful addition to any meal, but it’s also incredibly easy to prepare at home. Trust me, once you taste this, store-bought options will feel bland in comparison. So grab your jars, and let’s get started!
Ingredients
Instructions
Step 1: Prepare the Cauliflower
-
Start by removing the leaves and stem from your cauliflower. Cut it into florets. Rinse them under cold water and set aside. Make sure to treat each floret kindly; this is a special dish after all!
Step 2: Create the Brine
-
In a medium saucepan, combine the apple cider vinegar, filtered water, kosher salt, brown sugar, and pickling spices. Give it a stir.
-
Place the saucepan on the stove over medium heat and bring it to a simmer. Stir occasionally and allow the sugar and salt to dissolve completely. You’ll start to get a whiff of those mouthwatering scents.
Step 3: Add Garlic and Peppercorns
-
Once your brine reaches a gentle simmer, toss in the smashed garlic and whole black peppercorns. Let them steep for about a minute. This process infuses the brine with added flavor that greatly enhances the end product.
Step 4: Pack the Cauliflower
-
Now comes the fun part! Take your cauliflower florets and pack them snugly into clean, sterilized jars. Ensure there’s enough room for the brine to cover all the florets.
Step 5: Pour over the Brine
-
Once you’ve packed the jars, carefully pour the hot brine over the cauliflower. Pour it until the florets are completely submerged. If any pieces stick out, that’s okay—just make sure most of them are covered.
Step 6: Seal and Cool
-
Seal the jars with their lids. Let them cool to room temperature. Once they are cool enough, place them in the refrigerator. They’ll be ready to enjoy in just a few hours!
Nutrition Facts
Servings 12
- Amount Per Serving
- Calories 15kcal
- % Daily Value *
- Total Fat 0.1g1%
- Sodium 255mg11%
- Total Carbohydrate 2g1%
- Dietary Fiber 1g4%
- Sugars 1g
- Protein 1g2%
* Percent Daily Values are based on a 2,000 calorie diet. Your daily value may be higher or lower depending on your calorie needs.
Note
- Use Fresh Ingredients: The fresher your cauliflower and garlic, the better your pickles will taste. Avoid any wilting or browning!
- Adjust Spice Levels: Feel free to add or reduce the spiciness according to your preference with the peppercorns or other spices.
- Add Other Vegetables: If you have other produce lying around, like carrots or bell peppers, toss them in the mix. They will take on that lovely pickled flavor.
- Sterilize Your Jars: For food safety, ensure your jars are properly sterilized if you plan to store them for an extended time.
- Experiment with Time: While they can be consumed after a few hours, letting the mixture sit in the fridge for a few days will deepen the flavor.


