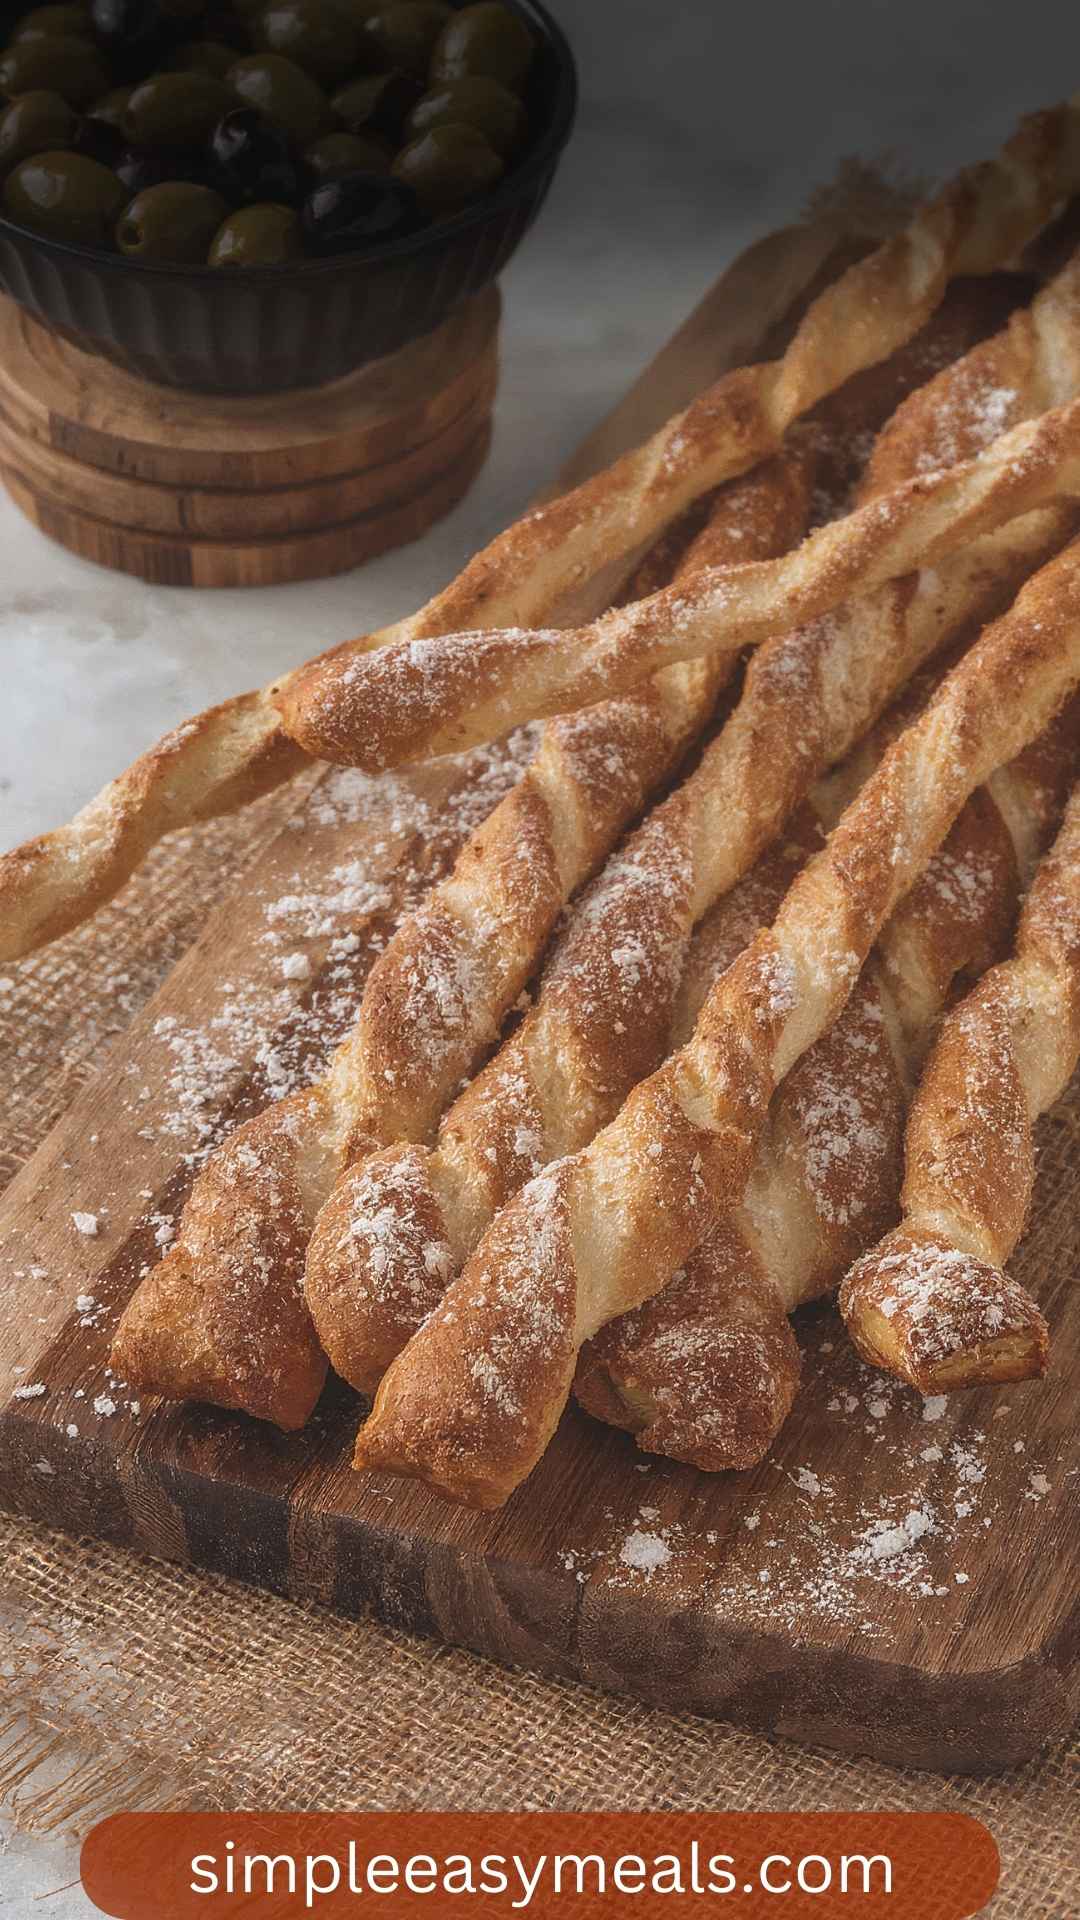
Before diving into the delightful world of grissini, let’s explore some perfect pairings for this crispy Italian breadstick. Visualize a warm summer day or a festive gathering. Picture your friends, seated around a table, each holding a glass of aromatic wine. Now, imagine a platter of grissini in front of them. These are not just breadsticks; they have the potential to elevate your appetizer game.
Think of grissini alongside a lush Caprese salad. The fresh basil, ripe tomatoes, and creamy mozzarella create a stunning visual contrast to the crunch of grissini. Then there’s the classic Italian charcuterie board. Pair the grissini with cheeses like Parmigiano-Reggiano or Gorgonzola, and let the flavors intermingle.
Alternatively, some marinated olives and roasted red peppers add a burst of savory goodness. Lastly, don’t forget a vibrant dip. Hummus or tzatziki can offer a refreshing counterpoint, making every bite a delightful experience.

What Is Grissini?
Grissini, also known as Italian breadsticks, are long, thin, crispy snacks. They originated in the region of Piemonte in northern Italy during the 14th century. Often enjoyed with dips or as a side with meals, their texture is usually crunchy and light. Made primarily from flour, water, yeast, and salt, grissini can be flavored in numerous ways. Some recipes call for herbs, spices, or even grated cheese.
These breadsticks serve various purposes. You can munch on them during cocktail hour or serve them as an elegant accompaniment to soup. They’re perfect for kids and adults alike, making them versatile for any occasion.
What Does It Taste Like?
Imagine taking a bite of a freshly baked grissini. The exterior is crisp, giving way to a light and airy interior. The taste is subtly savory, with notes of salt enhancing the experience. If garlic powder or herbs are added, the flavor profile becomes even more complex and exciting.
There’s something magical about the texture. Each bite offers a satisfying crunch followed by a tender crumb that melts in your mouth. Paired with a dip or enjoyed plain, the taste of grissini is simply irresistible.
Why This Recipe Works
I’m going to let you in on a little secret. This grissini recipe works for several compelling reasons, and I’m excited to share them with you.
1. Simple Ingredients: The beauty of this grissini recipe lies in its minimal ingredient list. You’ll need just a few pantry staples, making it easy to whip up on a whim. No fancy shopping trips are required!
2. Easy to Follow: The recipe is straightforward with clear, step-by-step instructions. Even if you’ve never made bread before, you’ll feel like a pro after following this guide.
3. Customizable Flavors: Want to spice things up? You’re in luck! This recipe allows for plenty of creativity. You can add your favorite herbs, spices, or even cheese to customize the flavor to your liking.
4. Versatile Serving Options: Grissini is the ultimate sidekick. Whether it’s with cheese and wine, salads, or soups, these breadsticks fit seamlessly into various meals. They can even be enjoyed on their own for a quick snack!
Ingredients For Grissini
Here’s what you’ll need for this delightful recipe:
- 2 ¼ cups all-purpose bread flour (280 grams)
- ¼ cup finely ground semolina flour
- 1 ½ teaspoons coarse sea salt (avoid fine table salt)
- 1 teaspoon active dry yeast
- 1 teaspoon raw honey or agave nectar
- ¾ cup warm water (177 ml)
- 1 tablespoon cold-pressed extra virgin olive oil
- 1 teaspoon garlic powder (optional; adds a touch of depth)

Step-by-Step Instructions
Step 1: Activate the Yeast
Start by gathering your ingredients. Warm the water until it’s comfortably warm, not hot. In a mixing bowl, combine the warm water, yeast, and raw honey or agave nectar. Stir gently, then allow it to sit for about 5 minutes. You should see bubbles forming as the yeast activates, magic in action!
Step 2: Combine Dry Ingredients
In a separate mixing bowl, mix the all-purpose bread flour, semolina flour, coarse sea salt, and garlic powder (if using). This blend gives your grissini that delightful flavor and texture.
Step 3: Mix Wet and Dry Ingredients
Once the yeast is activated, pour the yeast mixture into the bowl containing the dry ingredients. Add the extra virgin olive oil. Using a spoon or your hands, mix everything until it forms a rough dough.
Step 4: Knead the Dough
Transfer the dough to a lightly floured surface. Knead it for about 5-7 minutes. You’re looking for a smooth, elastic surface. If it’s too sticky, sprinkle a pinch of flour as you go.
Step 5: Let It Rise
Place your kneaded dough in a lightly oiled bowl. Cover it with a damp cloth or plastic wrap. Let it rise in a warm spot until it doubles in size, which usually takes about 1 hour. Patience is key here.
Step 6: Shape the Grissini
Once risen, punch down the dough to release the gas. Divide the dough into smaller, equal portions. Roll each portion into thin strips about 10 inches long. Try to keep them slender and uniform to ensure even cooking.
Step 7: Preheat the Oven
While you shape the grissini, preheat your oven to 400°F (200°C). Prepare a baking sheet by lining it with parchment paper for easy removal.
Step 8: Bake the Grissini
Arrange your rolled grissini on the baking sheet, making sure they are spaced apart. Bake in the preheated oven for 15-20 minutes. They should be golden brown and crispy. Keep an eye on them; ovens can be tricky!
Step 9: Cool and Serve
Once baked, remove the grissini from the oven and let them cool on a wire rack. This cooling process allows them to crisp up even more. When they’re cool enough to handle, serve them up with your favorite dips or as an appetizer.
Notes
Here are some handy tips for making grissini:
- Flour Variations: You can experiment with different flour types. Whole wheat flour adds a nutty flavor, while spelt flour gives a unique twist.
- Flavor Enhancements: Don’t hesitate to add herbs like rosemary or oregano to the dough for a flavorful kick.
- Storage: Grissini can be stored in an airtight container for up to a week. They can also be frozen for longer storage; just ensure they’re well-sealed.
- Even Shapes: When rolling out the dough, try to keep the thickness even to ensure all pieces bake at the same rate.
- Dipping Ideas: Serve your grissini with olive oil and balsamic vinegar for a quick and easy dip.
Nutrition Information
One serving of grissini (approximately 2 sticks) contains roughly:
- Calories: 130
- Protein: 4g
- Carbohydrates: 25g
- Fat: 2.5g
- Fiber: 1g
These values can vary based on the specific ingredients used. Enjoying these as part of a balanced diet offers a tasty, satisfying snack.
How to Store the Leftovers?
If you have any grissini left over, store them in an airtight container at room temperature. This keeps them crisp for about a week. If you want to extend their life, you can freeze them. Just pack them in a freezer bag, removing as much air as possible. When you’re ready to enjoy them, simply let them defrost at room temperature.
Sides for Grissini
Grissini is fantastic on its own, but they shine when paired with delightful sides. Here are a few suggestions:
1. Charcuterie Board: Craft a beautiful charcuterie board loaded with cured meats, cheeses, and fruit. The saltiness of the prosciutto complements the crunch of grissini wonderfully.
2. Italian Antipasto: A colorful antipasto platter with marinated vegetables, olives, and roasted red peppers can act as both an appetizer and a side dish.
3. Tomato Basil Soup: The crunch of grissini provides a perfect contrast to the creamy texture of a tomato basil soup. Dip away and savor the delightful combination!
4. Spinach and Artichoke Dip: This classic warm dip is perfect for pairing with grissini. The creamy texture combined with the crispy sticks makes for a comforting snack.
Alternative Choices to the Ingredients
If you find yourself lacking some of the key ingredients, don’t fret! Here are some alternatives:
1. Flour Alternatives: Instead of all-purpose flour, you can use equal parts of whole wheat flour for a healthier option.
2. Semolina Flour: If you don’t have semolina, you can skip it entirely or use more all-purpose flour. It will still work fine.
3. Sweetener Alternatives: If honey or agave nectar isn’t available, brown sugar or maple syrup are suitable substitutes.
4. Garlic Powder: Fresh minced garlic can replace garlic powder. Use about a clove to keep the flavor profile intact.

Conclusion
Grissini are not just breadsticks; they are a canvas for creativity, conversation, and enjoyment. Each bite takes you on a journey through Italy, connecting you to the heart of culinary traditions. Whether you’re entertaining guests or enjoying a quiet moment, grissini adds a touch of elegance and flavor.
With just a few ingredients and simple steps, you can craft these delightful treats at home. Experiment with different flavors, and perhaps, you’ll find your perfect combination. Now, go on, roll up your sleeves, and let’s get baking!
You’ll also like the following recipes!
Grissini – Simple Easy Meals
Hello there, fellow food lovers! Today, I’m excited to share a special recipe: grissini. You might be wondering, “What exactly are grissini?” Trust me. Once you try them, they’ll become a staple on your table. These thin, crunchy breadsticks pack a punch of flavor and versatility.
Originally from Italy, grissini have become a beloved snack and appetizer around the globe. But don’t be fooled by their simple appearance. These delightful breadsticks can complement various dishes and bring joy to any gathering. Whether you're entertaining friends or just enjoying a quiet night in, grissini is your go-to companion. Let’s embark on this culinary journey together!

Ingredients
Instructions
Step 1: Activate the Yeast
-
Start by gathering your ingredients. Warm the water until it’s comfortably warm, not hot. In a mixing bowl, combine the warm water, yeast, and raw honey or agave nectar. Stir gently, then allow it to sit for about 5 minutes. You should see bubbles forming as the yeast activates, magic in action!
Step 2: Combine Dry Ingredients
-
In a separate mixing bowl, mix the all-purpose bread flour, semolina flour, coarse sea salt, and garlic powder (if using). This blend gives your grissini that delightful flavor and texture.
Step 3: Mix Wet and Dry Ingredients
-
Once the yeast is activated, pour the yeast mixture into the bowl containing the dry ingredients. Add the extra virgin olive oil. Using a spoon or your hands, mix everything until it forms a rough dough.
Step 4: Knead the Dough
-
Transfer the dough to a lightly floured surface. Knead it for about 5-7 minutes. You’re looking for a smooth, elastic surface. If it’s too sticky, sprinkle a pinch of flour as you go.
Step 5: Let It Rise
-
Place your kneaded dough in a lightly oiled bowl. Cover it with a damp cloth or plastic wrap. Let it rise in a warm spot until it doubles in size, which usually takes about 1 hour. Patience is key here.
Step 6: Shape the Grissini
-
Once risen, punch down the dough to release the gas. Divide the dough into smaller, equal portions. Roll each portion into thin strips about 10 inches long. Try to keep them slender and uniform to ensure even cooking.
Step 7: Preheat the Oven
-
While you shape the grissini, preheat your oven to 400°F (200°C). Prepare a baking sheet by lining it with parchment paper for easy removal.
Step 8: Bake the Grissini
-
Arrange your rolled grissini on the baking sheet, making sure they are spaced apart. Bake in the preheated oven for 15-20 minutes. They should be golden brown and crispy. Keep an eye on them; ovens can be tricky!
Step 9: Cool and Serve
-
Once baked, remove the grissini from the oven and let them cool on a wire rack. This cooling process allows them to crisp up even more. When they’re cool enough to handle, serve them up with your favorite dips or as an appetizer.
Nutrition Facts
Servings 20
- Amount Per Serving
- Calories 130kcal
- % Daily Value *
- Total Fat 2.5g4%
- Total Carbohydrate 25g9%
- Dietary Fiber 1g4%
- Protein 4g8%
* Percent Daily Values are based on a 2,000 calorie diet. Your daily value may be higher or lower depending on your calorie needs.
Note
- Flour Variations: You can experiment with different flour types. Whole wheat flour adds a nutty flavor, while spelt flour gives a unique twist.
- Flavor Enhancements: Don’t hesitate to add herbs like rosemary or oregano to the dough for a flavorful kick.
- Storage: Grissini can be stored in an airtight container for up to a week. They can also be frozen for longer storage; just ensure they're well-sealed.
- Even Shapes: When rolling out the dough, try to keep the thickness even to ensure all pieces bake at the same rate.
- Dipping Ideas: Serve your grissini with olive oil and balsamic vinegar for a quick and easy dip.


