There’s something undeniably nostalgic about biting into a perfectly toasted grilled cheese panini. It takes me back to summer afternoons spent with friends, laughing and enjoying simple pleasures. On a busy day, it can be the go-to comfort food.
The rich, buttery taste combined with melted cheese creates happiness in every bite. But what exactly makes a grilled cheese panini special? Let’s dive deep into this delightful sandwich, exploring everything from its history to how you can craft the perfect version at home.

What is a Grilled Cheese Panini Sandwich?
At its core, a grilled cheese panini is a sandwich that brings together layers of cheese, often melted to perfection, tucked between slices of bread. What sets the panini apart from its traditional grilled cheese cousin? It’s all in the bread and the cooking technique.
A panini typically uses a thicker bread, like ciabatta or focaccia, and is pressed and grilled in a panini maker or on a skillet. This not only toasts the bread but creates an iconic crispy crust, allowing for an explosion of flavors and textures that dance on your palate.
How Does It Taste Like?
Imagine the first bite of crispy bread giving way to a melting pool of cheese. That sensation? Pure magic. The taste is rich, savory, and incredibly satisfying. Depending on the type of cheese used, you might experience hints of nuttiness from Gruyère or a sharp tang from cheddar.
Add in a sprinkle of garlic powder or fresh herbs, and you elevate the flavor profile even further. That juicy, warm interior coupled with a satisfying crunch on the outside makes every bite a delightful experience.
Why You’ll Love This?
What’s not to love? It’s comforting yet sophisticated, easy to prepare, and oh so satisfying. You can customize it to fit any taste preference, whether you prefer sharp cheeses, bold herbs, or even a hint of sweetness from caramelized onions.
Plus, it can be ready in under 30 minutes! Great for busy nights or serving up at casual gatherings, you’ll find yourself coming back to this recipe time and time again.
Ingredients
You’ll need the following ingredients to create your own grilled cheese panini:
- 1 tablespoon softened salted butter (or mayonnaise for a twist)
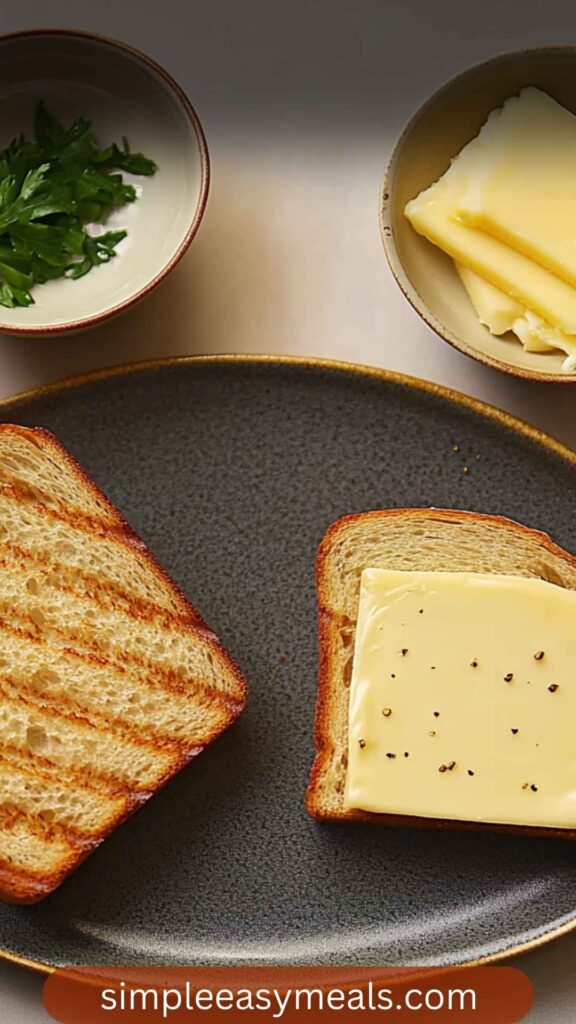
- 2 slices of thick, hearty bread (think ciabatta or sourdough)
- 1/2 teaspoon garlic powder (for an extra savory note)
- 2 slices of your favorite cheese (cheddar, mozzarella, or Gruyère work beautifully)
- 1 teaspoon fresh parsley, chopped (for a fresh, herbal touch)
Step by Step Directions
Step 1: Prep Your Ingredients
Gather all your ingredients. Soften the butter if you’re using it, or have your mayonnaise ready. I usually let the butter sit out while I chop parsley.
Step 2: Butter the Bread
Spread butter or mayonnaise generously on one side of each slice of bread. Don’t skimp on this; the butter creates that golden crispy crust!
Step 3: Layer Your Cheese
On the side without the butter, sprinkle garlic powder evenly. Place your cheese slices directly on the unbuttered side of one bread slice.
Step 4: Add Parsley
Sprinkle the chopped fresh parsley over the cheese. The aroma alone at this point is enough to make your mouth water.
Step 5: Top It Off
Now, take the second slice of bread and place it on top of the cheese, unbuttered side facing the cheese.
Step 6: Heat It Up
Preheat your pan or panini press over medium heat. Carefully place the assembled sandwich onto the grill or skillet.
Step 7: Grill
Cook for about 4-5 minutes on one side until golden brown. Press down slightly with a spatula to ensure even grilling.
Step 8: Flip and Finish
Carefully flip the sandwich, cooking the other side until it is also golden brown and the cheese has melted into a gooey format. This should take another 3-4 minutes.
Step 9: Serve
Remove the sandwich and let it sit for a minute. Cut it in half to reveal that melted goodness, and then serve hot.
Tips on Making Grilled Cheese Panini Sandwich
- Use a Mix of Cheeses: Combining different types of cheese can create a more complex flavor profile. Think cheddar with mozzarella or add a slice of creamy brie.
- Use Thin Slices of Bread: Ensure your bread is even in thickness. This ensures even cooking and a crunchy texture.
- Experiment with Add-Ins: Consider adding roasted vegetables, slices of avocado, or even a touch of pesto for a gourmet twist.
- Mind the Heat: Don’t rush it. Cooking on a medium heat allows the cheese to melt perfectly without burning the bread.
- Let it Rest: Allow your grilled cheese to rest after cooking. This lets the flavors settle and makes for an easier eat.
Nutrition Information
A standard grilled cheese panini contains about 350 calories, though this can vary based on bread and cheese choices. You’ll get protein from cheese and carbs from bread.
However, it can become less healthy with too much butter or high-calorie add-ins. Consider using whole grain bread for added fiber or low-fat cheese to cut down calories.
How Do You Store This Grilled Cheese Panini Sandwich?
If you have leftovers (which is rare, but it can happen), allow the sandwich to cool completely. Wrap it tightly in foil or place it in an airtight container. It can stay fresh in the fridge for about 1-2 days. To reheat, a skillet is often the best method to regain that crispy texture.
What Other Substitute Can You Use in Grilled Cheese Panini Sandwich?
- Bread Options: You can swap out the traditional bread with gluten-free options like rice bread or a cauliflower-based bread for a healthier alternative.
- Cheese Variations: Instead of standard cheese, try using vegan cheese or nut-based cheeses for lactose intolerance issues.
- Spreads: Swap butter for olive oil or flavored oils like truffle oil for a taste upgrade.
- Add Greens: Spinach or arugula can be added for a nutritious crunch. Just layer them in before grilling.
- Fruits: Consider adding thin slices of apple or pears for a refreshing twist that pairs well with sharp cheese.

Conclusion
Creating a grilled cheese panini sandwich is more than just cooking; it’s an experience full of warmth, flavor, and nostalgia. The simple combination of bread and cheese yields delightful results. You can always make it your own, customizing it based on what you have on hand and what tickles your taste buds. I’d encourage you to experiment with flavors, textures, and ingredients.
Each bite has the potential to tell a story, whether it’s of a summer picnic or a cozy family dinner. So fire up that skillet, and let your culinary creativity flow. Enjoy this timeless dish in whatever shape or form it takes!
You’ll also like the following recipes!
- Sourdough Grilled Cheese Copycat Recipe
- How to Make Pizza Grilled Cheese Sandwich
- Best Lobster Grilled Cheese Recipe
Grilled Cheese Panini Sandwich Recipe – Simple Easy Meals
When I think about enjoying a grilled cheese panini, my mind wanders to the ideal companions for this crispy, gooey goodness. You might want to consider a hearty tomato soup, which offers a warm, comforting contrast. A side of mixed greens with a light vinaigrette can provide a refreshing crunch.
For a bit of zing, a side of pickles could elevate the flavors beautifully. If you lean towards snacks, some crispy potato chips or sweet potato fries can add an engaging bite. Pair it with a cold beverage, perhaps an iced tea or lemonade, and you have a meal fit for any occasion.

Ingredients
Instructions
Step 1: Prep Your Ingredients
-
Gather all your ingredients. Soften the butter if you’re using it, or have your mayonnaise ready. I usually let the butter sit out while I chop parsley.
Step 2: Butter the Bread
-
Spread butter or mayonnaise generously on one side of each slice of bread. Don’t skimp on this; the butter creates that golden crispy crust!
Step 3: Layer Your Cheese
-
On the side without the butter, sprinkle garlic powder evenly. Place your cheese slices directly on the unbuttered side of one bread slice.
Step 4: Add Parsley
-
Sprinkle the chopped fresh parsley over the cheese. The aroma alone at this point is enough to make your mouth water.
Step 5: Top It Off
-
Now, take the second slice of bread and place it on top of the cheese, unbuttered side facing the cheese.
Step 6: Heat It Up
-
Preheat your pan or panini press over medium heat. Carefully place the assembled sandwich onto the grill or skillet.
Step 7: Grill
-
Cook for about 4-5 minutes on one side until golden brown. Press down slightly with a spatula to ensure even grilling.
Step 8: Flip and Finish
-
Carefully flip the sandwich, cooking the other side until it is also golden brown and the cheese has melted into a gooey format. This should take another 3-4 minutes.
Step 9: Serve
-
Remove the sandwich and let it sit for a minute. Cut it in half to reveal that melted goodness, and then serve hot.
Nutrition Facts
Servings 1
- Amount Per Serving
- Calories 323kcal
- % Daily Value *
- Total Fat 25.2g39%
- Saturated Fat 14.2g71%
- Cholesterol 58mg20%
- Sodium 1368mg57%
- Total Carbohydrate 8g3%
- Sugars 6g
- Protein 17g34%
* Percent Daily Values are based on a 2,000 calorie diet. Your daily value may be higher or lower depending on your calorie needs.
Note
- Use a Mix of Cheeses: Combining different types of cheese can create a more complex flavor profile. Think cheddar with mozzarella or add a slice of creamy brie.
- Use Thin Slices of Bread: Ensure your bread is even in thickness. This ensures even cooking and a crunchy texture.
- Experiment with Add-Ins: Consider adding roasted vegetables, slices of avocado, or even a touch of pesto for a gourmet twist.
- Mind the Heat: Don’t rush it. Cooking on a medium heat allows the cheese to melt perfectly without burning the bread.
- Let it Rest: Allow your grilled cheese to rest after cooking. This lets the flavors settle and makes for an easier eat.


