When I think of comfort foods, my mind often drifts to two classics: tomato soup and grilled cheese. Pairing them is a game-changer. The gooeyness of the cheese fuses beautifully with the acidity of a well-seasoned tomato soup.
But not just any grilled cheese will do. Today, I’ll take you on a delicious journey through my personal take on Gordon Ramsay’s grilled cheese, which adds some exciting twists to a beloved staple.
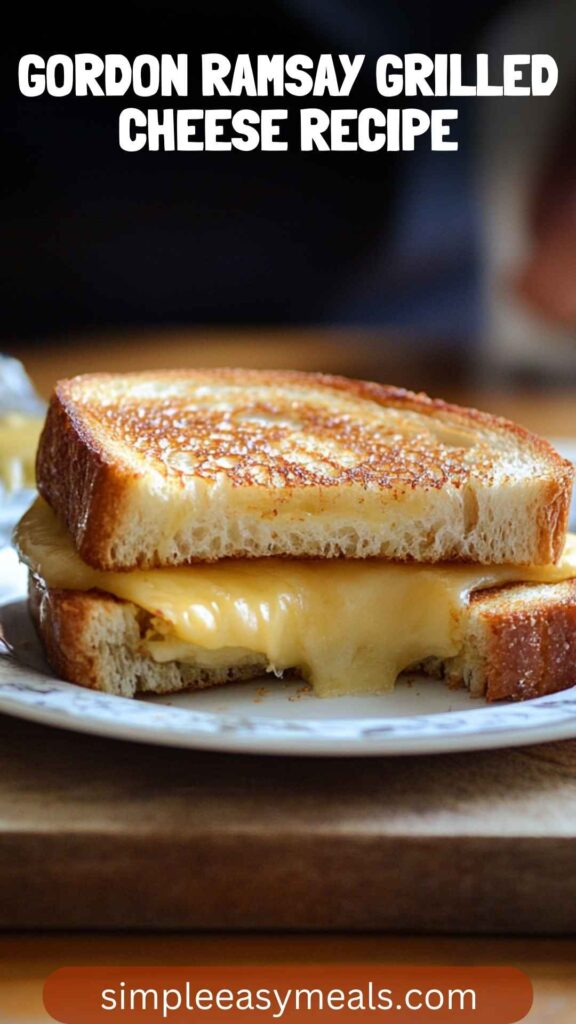
What is Gordon Ramsay Grilled Cheese?
This isn’t your average grilled cheese sandwich. Gordon Ramsay’s grilled cheese features a delightful blend of cheeses, enhanced with some unique ingredients like spicy kimchi and fresh seasonings. It’s a culinary medley that showcases how simple ingredients can elevate comfort food to gourmet levels.
I remember the first time I tried it; the balance of flavors was unlike anything I had tasted before. Each bite is a celebration of grace and strength in perfect harmony.
The Ingredients
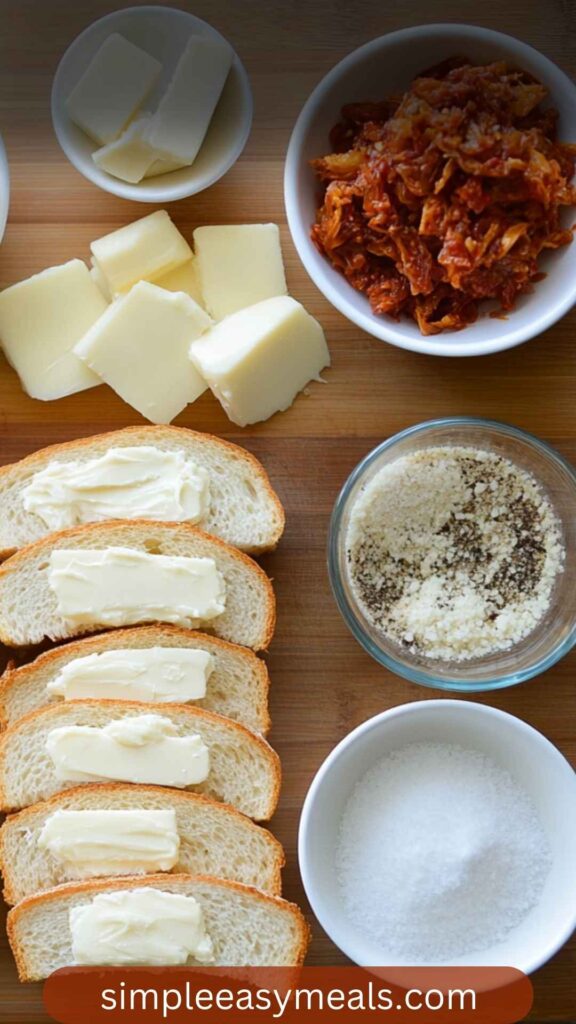
To create this masterpiece, gather a few simple yet impactful ingredients:
- 2 Thick Slices of Hearty Country Bread
- Romano Cheese, thinly sliced to suit the bread size (approximately 4 slices, depending on bread size)
- Asiago Cheese, cut to match bread slices (about 4 slices, depending on bread size)
- Spicy Kimchi, roughly chopped
- Unsalted Butter
- Extra Virgin Olive Oil
- Sea Salt, to taste
- Freshly Ground Black Pepper, to taste
- Garlic Powder
How to Make Gordon Ramsay Grilled Cheese
Cooking is as much about the process as it is about the result. Let’s dive into the steps that will transform these ingredients into a velvety sandwich.
Step 1: Prepare the Bread
Start by taking two thick slices of hearty country bread. This is the canvas for our masterpiece. Lightly butter one side of each slice.
This step ensures that they will brown perfectly and develop a crispiness that is essential for a great grilled cheese.
Step 2: Layer the Cheese
Now, let’s coat that beautifully buttered side with slices of Romano cheese. Follow this with a layer of Asiago cheese.
Don’t skimp; these cheeses are the stars of the show, and they need space to shine. The goal is to create a cheese wall that is melty and indulgent.
Step 3: Add the Kimchi
Next, take the spicy kimchi and sprinkle it over the cheese layers. The unique heat from the kimchi contrasts with the rich, creamy cheeses. It’s a surprising twist that elevates this classic dish.
Step 4: Season It Up
Sprinkle a bit of sea salt, freshly ground black pepper, and garlic powder over your layered ingredients. This step is crucial; it rounds out the flavors and brings everything together.
Step 5: Top It Off
Now, place the second slice of bread on top, buttered side facing out. It’s time to get ready for the heat.
Step 6: Heat Your Pan
Place a skillet on medium heat and add a teaspoon of extra virgin olive oil. You want enough oil to create a non-stick surface and complement the butter’s flavor.
Step 7: Grill to Perfection
Carefully place your sandwich in the hot skillet. Cook for about 3-4 minutes or until golden brown. Be patient and avoid the urge to flip too early.
Step 8: Flip and Finish
Using a spatula, gently flip the sandwich over. Cook the other side for another 3-4 minutes, pressing down slightly for even grilling. You’ll witness the magic happen as the cheese melts and the bread crisps up beautifully.
Step 9: Serve Hot
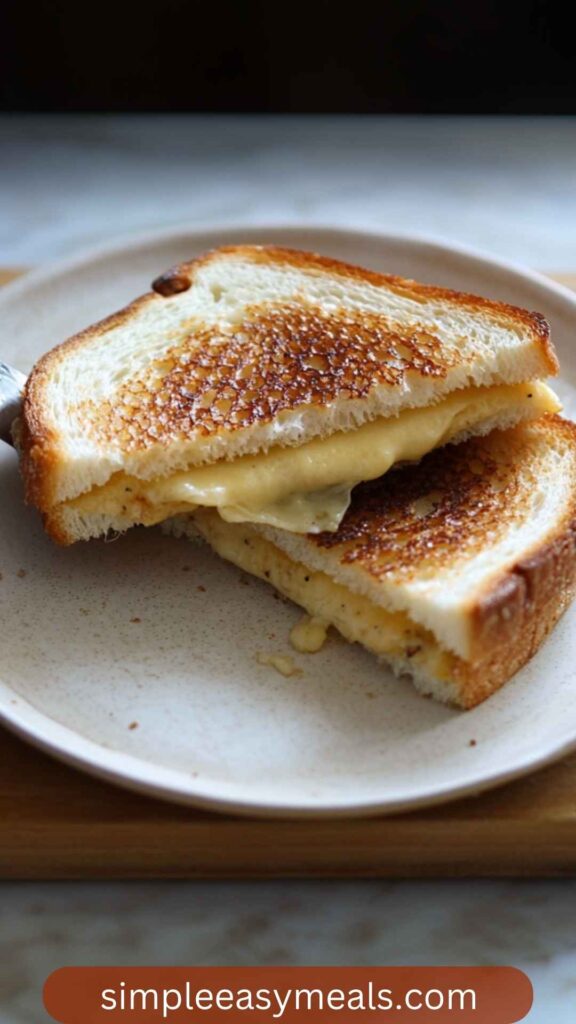
Once both sides are golden and the cheese is gooey, remove the sandwich from the skillet. Let it rest for a minute—this means less risk of cheese dribbling everywhere when you take that first heavenly bite.
Notes
To help you navigate this delicious adventure, here are some handy tips:
- Use Quality Ingredients: The better the bread and cheese, the more delicious your grilled cheese will be.
- Don’t Rush: Medium heat is crucial. High heat may burn the bread while leaving the cheese unmelted.
- Experiment with Cheese: Mix different cheese varieties for new flavors. Cheddar and mozzarella also work great.
- Stale Bread Works: Stale bread holds up well during grilling, so don’t throw it away!
- Mind the Kimchi: Adjust the amount to your heat preference. Go light if you’re uncertain.
Storage Tips
If you find yourself with leftovers (though I doubt it!), here’s how to store them:
- Refrigerate Promptly: Wrap the sandwich tightly in foil or store it in an airtight container.
- Consume Within 2 Days: For the best experience, eat it within two days.
- Reheat Gently: If reheating, use a skillet on low heat to avoid rubbery cheese.
Serving Suggestions
This grilled cheese pairs wonderfully with a range of sides. Here are five suggestions to enhance your meal:
- Tomato Basil Soup: A classic duo. The soup’s acidity complements the richness of the cheese, creating a match made in heaven.
- Picked Vegetables: Their crunch and acidity balance the sandwich’s creaminess. Try carrots or radishes!
- Simple Green Salad: A fresh salad with a tangy vinaigrette adds brightness and balance.
- Sweet Potato Fries: Their sweetness contrasts the savory flavors beautifully, making for a cozy comfort food experience.
- Crisp Apples: For a surprising twist, serve fresh apple slices. The sweetness cuts through the cheese like a knife.
What Other Substitutes Can I Use in Gordon Ramsay Grilled Cheese?
If you’re looking for alternatives, consider these options:
- Whole Wheat Bread: Offers more fiber and a slightly nuttier flavor.
- Dairy-Free Cheese: Perfect for lactose intolerant or vegan friends. Look for brands that melt well.
- Avocado: Add slices for creaminess and healthy fats.
- Sriracha: Replace kimchi with a drizzle for a spicy kick.
- Spinach: A handful of fresh spinach adds nutrition and color without overpowering.
Conclusion
Gordon Ramsay’s grilled cheese is a delightful twist on a classic. It combines unique flavors and textures, making it more than just a quick meal.
If you’re a food enthusiast like I am, you’ll appreciate how the simple addition of kimchi can elevate your sandwich to new heights.
It’s easy, satisfying, and perfect for any occasion. So, grab your heels and give it a try.
Whether it’s paired with a homemade soup or simply enjoyed on its own, this grilled cheese is sure to impress. Trust me, once you take that first bite, you won’t look back. Happy cooking!
You’ll also like the following recipes!
- Disneyland Grilled Cheese Copycat Recipe
- How to Make Birria Grilled Cheese
- Best Capital Grille Lobster Mac And Cheese Recipe
Gordon Ramsay Grilled Cheese Recipe – Simple Easy Meals
When I think of comfort foods, my mind often drifts to two classics: tomato soup and grilled cheese. Pairing them is a game-changer. The gooeyness of the cheese fuses beautifully with the acidity of a well-seasoned tomato soup.
But not just any grilled cheese will do. Today, I'll take you on a delicious journey through my personal take on Gordon Ramsay's grilled cheese, which adds some exciting twists to a beloved staple.

Ingredients
Instructions
Step 1: Prepare the Bread
-
Start by taking two thick slices of hearty country bread. This is the canvas for our masterpiece. Lightly butter one side of each slice.
This step ensures that they will brown perfectly and develop a crispiness that is essential for a great grilled cheese.
Step 2: Layer the Cheese
-
Now, let’s coat that beautifully buttered side with slices of Romano cheese. Follow this with a layer of Asiago cheese.
Don't skimp; these cheeses are the stars of the show, and they need space to shine. The goal is to create a cheese wall that is melty and indulgent.
Step 3: Add the Kimchi
-
Next, take the spicy kimchi and sprinkle it over the cheese layers. The unique heat from the kimchi contrasts with the rich, creamy cheeses. It's a surprising twist that elevates this classic dish.
Step 4: Season It Up
-
Sprinkle a bit of sea salt, freshly ground black pepper, and garlic powder over your layered ingredients. This step is crucial; it rounds out the flavors and brings everything together.
Step 5: Top It Off
-
Now, place the second slice of bread on top, buttered side facing out. It’s time to get ready for the heat.
Step 6: Heat Your Pan
-
Place a skillet on medium heat and add a teaspoon of extra virgin olive oil. You want enough oil to create a non-stick surface and complement the butter's flavor.
Step 7: Grill to Perfection
-
Carefully place your sandwich in the hot skillet. Cook for about 3-4 minutes or until golden brown. Be patient and avoid the urge to flip too early.
Step 8: Flip and Finish
-
Using a spatula, gently flip the sandwich over. Cook the other side for another 3-4 minutes, pressing down slightly for even grilling. You’ll witness the magic happen as the cheese melts and the bread crisps up beautifully.
Step 9: Serve Hot
-
Once both sides are golden and the cheese is gooey, remove the sandwich from the skillet. Let it rest for a minute—this means less risk of cheese dribbling everywhere when you take that first heavenly bite.
Nutrition Facts
Servings 1
- Amount Per Serving
- Calories 206kcal
- % Daily Value *
- Total Fat 8.6g14%
- Saturated Fat 4.8g24%
- Cholesterol 19mg7%
- Sodium 749mg32%
- Total Carbohydrate 23g8%
- Dietary Fiber 1g4%
- Sugars 5g
- Protein 9g18%
* Percent Daily Values are based on a 2,000 calorie diet. Your daily value may be higher or lower depending on your calorie needs.
Note
- Use Quality Ingredients: The better the bread and cheese, the more delicious your grilled cheese will be.
- Don’t Rush: Medium heat is crucial. High heat may burn the bread while leaving the cheese unmelted.
- Experiment with Cheese: Mix different cheese varieties for new flavors. Cheddar and mozzarella also work great.
- Stale Bread Works: Stale bread holds up well during grilling, so don’t throw it away!
- Mind the Kimchi: Adjust the amount to your heat preference. Go light if you're uncertain.


