
Creamy Black Pepper Sauce Recipe
 By
By This post contains affiliate links. As an Amazon Associate I earn from qualifying purchases.
Getting kids to embrace a sophisticated creamy black pepper sauce feels impossible—until you realize this isn’t just a fancy steakhouse condiment. This is a 30-minute game-changer that transforms simple proteins into restaurant-quality dinners your whole family will devour. I’ve watched picky eaters come alive when they taste the subtle heat of cracked pepper balanced with rich, luxurious cream. When you pair this with proteins like our Boneless Chicken Breast Recipe, you’ve got weeknight magic on your plate.
Creamy Black Pepper Sauce Recipe the Whole Family Will Actually Eat (Picky Eaters Included)
I remember the first time my grandmother made a version of this sauce during a family dinner when I was about eight years old. She let me taste a tiny spoonful before she poured it over her steak, and I was completely mesmerized. The creaminess, the gentle pepper warmth, the brightness from the lemon—it felt grown-up and luxurious, yet approachable. That moment stuck with me through culinary school and into my practice as a registered dietitian. I realized that when we introduce our kids to real food flavors prepared with love, they develop a genuine appreciation for cooking and eating well.
Years later, when I started creating family-friendly recipes, this sauce was one of the first I perfected. Parents tell me their teenagers now request it by name. Six-year-olds ask for “seconds, please.” And here’s the beautiful part: they’re not eating something loaded with mystery ingredients or excess sodium—they’re enjoying a nutritionally honest sauce made from real, whole foods that support their growth and energy.
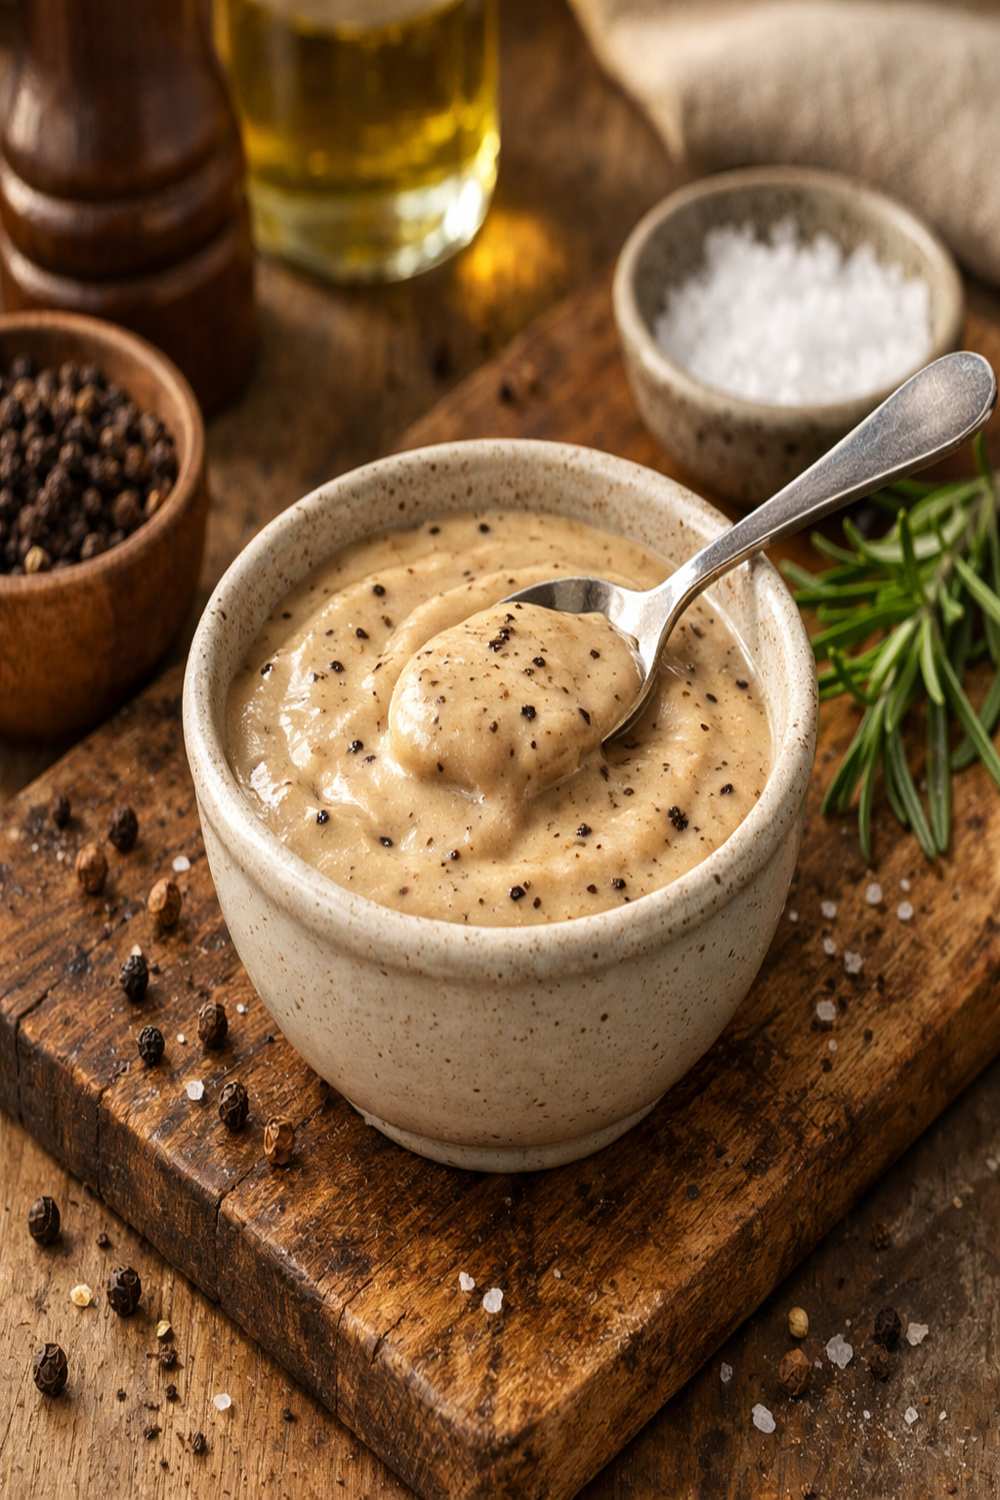
Why Kids Love This Version
This sauce works because it respects your kids’ developing palates while introducing them to sophisticated flavors. Unlike heavily spiced or intensely hot sauces, this version lets the sweetness of caramelized onion shine through, with just enough peppery warmth to feel interesting without being intimidating. The lemon juice adds brightness that kids instinctively recognize as “fresh,” and the cream creates a luxurious texture that makes every bite feel special.
- Subtle heat without overwhelm – The black pepper is toasted gently, which mellows its sharpness and creates a warm, inviting flavor rather than a harsh bite. Kids who think they don’t like pepper often love this version because they’re tasting pepper for the first time as a flavor enhancer, not a challenge.
- Creamy comfort meets sophisticated taste – The heavy cream appeals to kids’ love of rich textures while introducing them to restaurant-quality cooking techniques. They feel like they’re eating something special, which makes them more willing to try new protein options alongside it.
- Control and customization opportunities – Because this sauce is made fresh in about 15 minutes, kids can watch the transformation happen. They see the onions soften, smell the pepper toast, watch the cream turn golden—this engagement builds excitement and investment in eating the final dish.
How to Get Kids Involved in Making This
One of my favorite aspects of this recipe is how accessible it becomes at different developmental stages. Your toddler, elementary schooler, and teenager can all participate meaningfully—which means everyone leaves the kitchen feeling proud and connected to the meal.
- Ages 3-5: The Chopping Supervisor and Smell Tester – Little ones can safely handle the bay leaf and thyme sprigs (large enough to not be choking hazards) and add them to the pan under your supervision. They can also be your official “smell testers” at each stage—”Does this smell spicy yet?” and “Sniff this—do you smell the lemon?” This builds sensory awareness and makes them feel like real cooks.
- Ages 6-9: The Mise En Place Master and Juice Presser – School-age children can handle the measuring and prep work with supervision. Let them measure the cream, squeeze the lemon juice (a hand juicer makes this safe and fun), and measure the salt. They can also stir the sauce gently once it’s simmering, building confidence with basic cooking skills.
- Ages 10+: The Head Chef in Training – Older kids can take the lead with adult supervision. They can chop the red onion and garlic (with a sharp knife and proper technique), crack the black pepper into a grinder or mortar and pestle, toast the pepper in the pan, and manage the simmering time. This is where they start understanding how heat, timing, and technique create professional results.
The Ingredients – Hidden Nutrition, Visible Deliciousness
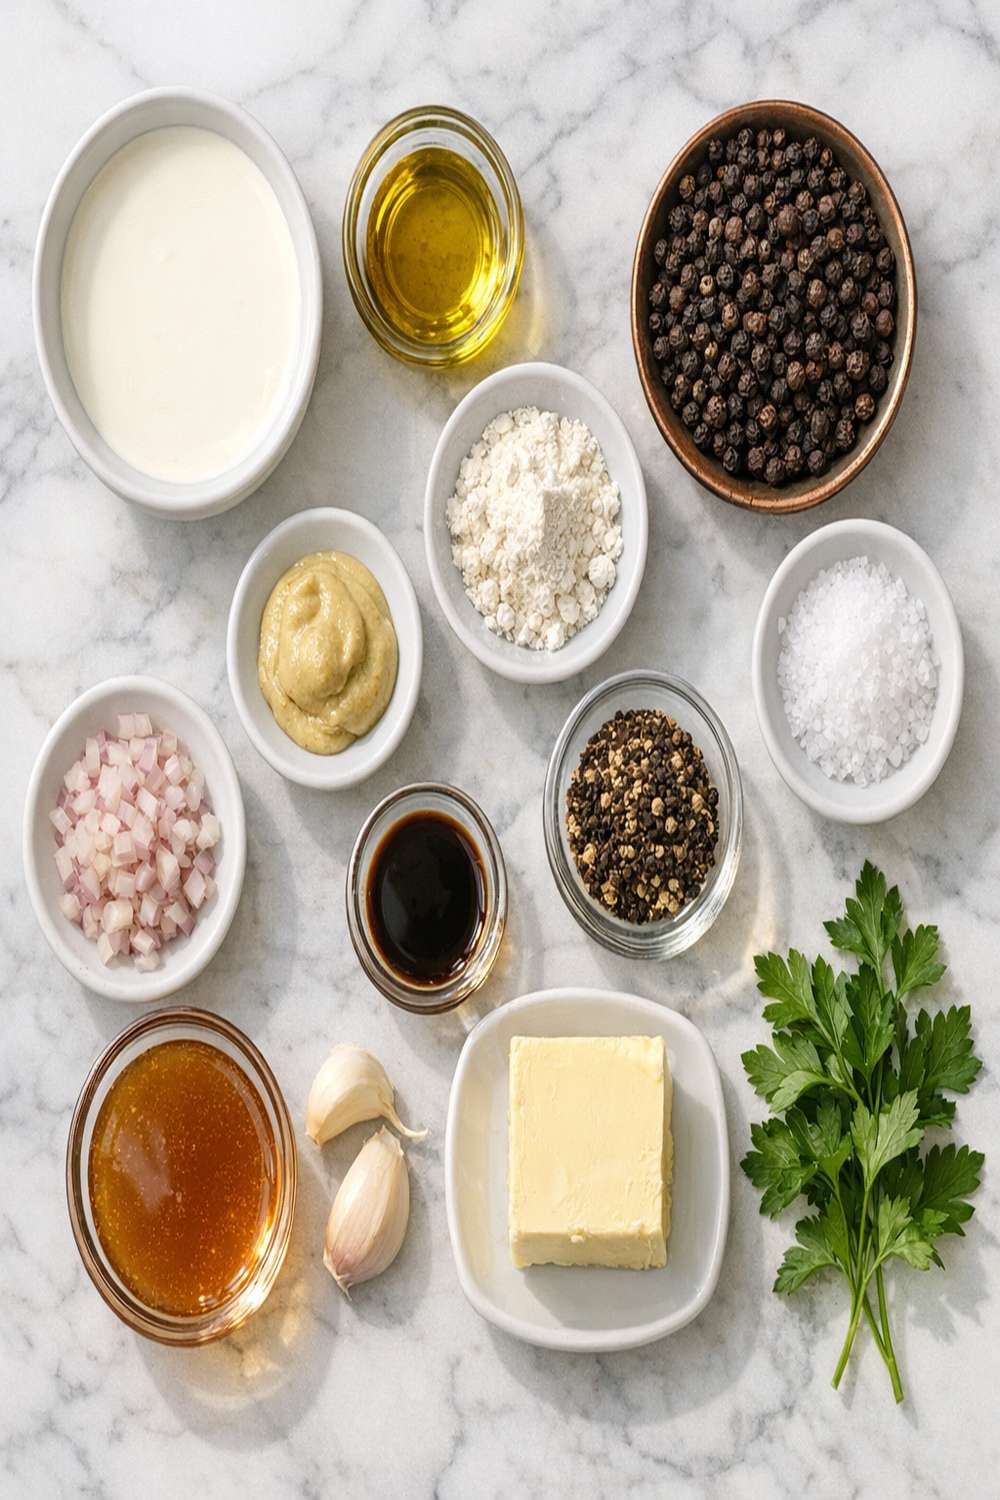
What I love about this sauce from a nutritional standpoint is that every single ingredient serves a purpose—there’s no filler, no excessive sodium, no mystery additives. The red onion brings natural sweetness and prebiotic fiber that supports healthy digestion. The garlic contains allicin, a compound with powerful immune-supporting properties. The cream provides fat-soluble vitamins (A, D, E, K) that help nutrient absorption throughout your child’s body. And that black pepper? It contains piperine, which actually increases the bioavailability of turmeric and other nutrients when eaten together—making this a truly functional sauce, not just a tasty one.
- sea salt (to taste, usually ¼ to ½ teaspoon, added gradually so you don’t overdo it)
- ¼ teaspoon white pepper (optional but recommended; it adds subtle heat without the visual “specks” that some kids find off-putting)
- juice of 1 fresh lemon (about 3 tablespoons; the brightness balances the richness perfectly)
- 3 sprigs fresh thyme (adds herbaceous complexity that kids recognize as “fancy”)
- 2 cups heavy whipping cream (full-fat, because the fat carries flavor and creates that luxurious mouthfeel)
- 1 medium red onion (finely chopped into small, uniform pieces so they cook evenly and become sweet)
- 1 bay leaf (dried or fresh, adds depth without overwhelming flavor)
- 3 garlic cloves (minced finely; fresh garlic makes all the difference in both flavor and nutritional benefit)
- 2 tablespoons freshly cracked black pepper (whole peppercorns ground fresh, not pre-ground—the volatile oils make a huge difference)
- 2 tablespoons unsalted butter (use a quality butter; the better the ingredient, the better the sauce)
How to Make Creamy Black Pepper Sauce Recipe for the Whole Family
This is where the magic happens—not just in the flavors developing, but in the memories you’re creating together. Cooking with your kids teaches them that good food comes from simple ingredients, time, and attention. It shows them that “fancy” doesn’t mean complicated. And it builds their confidence in the kitchen, which translates to better food choices throughout their lives. Let’s make this together!
Step 1: Melt the Butter and Build Your Aromatics Base
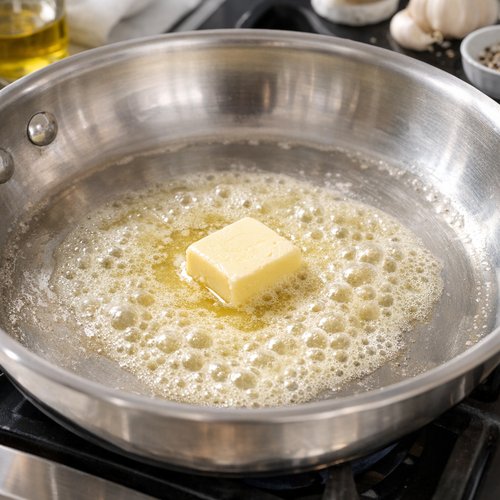
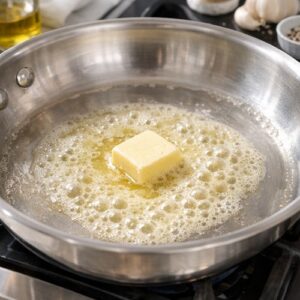
Start by placing your skillet over medium heat and adding the unsalted butter. Let it melt completely—this should take about 1 minute. You’ll notice it will start to foam slightly, which means the water content is cooking off and the milk solids are beginning to brown. Keep the heat at medium; if it’s too high, your butter will brown too quickly and taste bitter. Once it’s melted and foamy, add your finely chopped red onion. This is where kids aged 10+ can take the lead if they helped with the chopping!
Stir the onion into the butter, making sure every piece gets coated. Let it cook undisturbed for about 3-4 minutes. You’re looking for the onion to become translucent and just beginning to soften at the edges. This process, called sweating the onion, releases its natural sugars and creates a sweet, caramelized base for your sauce. Younger kids love watching this transformation—it’s like magic.
Step 2: Add Garlic and Toast the Spices
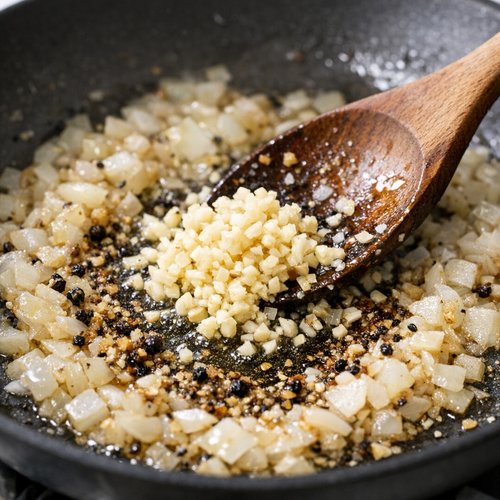
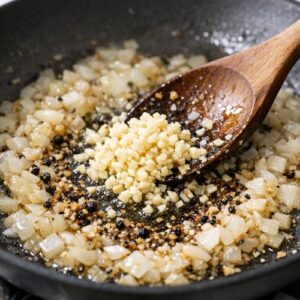
Once your onion has softened, add the minced garlic and stir constantly for about 30 seconds. You want to hear the sizzle and smell that gorgeous garlic aroma—that’s how you know it’s releasing its flavor compounds. Be careful not to let the garlic brown, as burnt garlic tastes bitter and unpleasant. This is a quick step, so keep your attention focused here.
Now comes the fun part: add your freshly cracked black pepper to the pan. You’ll immediately notice the pepper begins to toast and release its aromatic oils—the smell is incredible and definitely gets kids’ attention! Let it toast for about 45 seconds to 1 minute, stirring gently. You want to hear subtle popping sounds and smell that warm, peppery aroma. This toasting process mellows the pepper’s sharpness and creates that sophisticated, rounded flavor that makes this sauce special.
Step 3: Introduce the Herbs for Layered Flavor
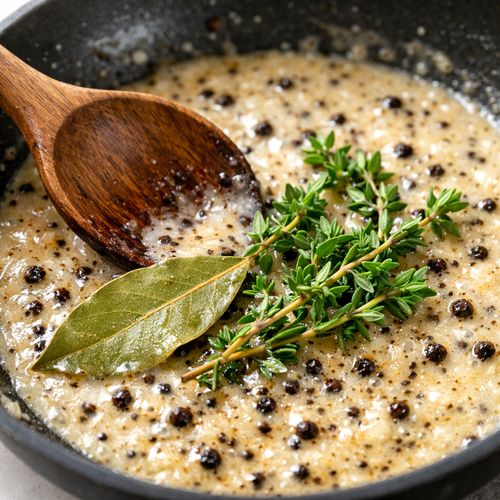
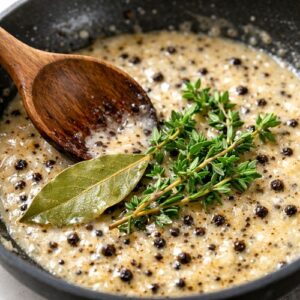
Once the pepper is fragrant, add your bay leaf and fresh thyme sprigs to the pan. Stir everything together for about 15-20 seconds so the herbs toast slightly and release their essential oils. The bay leaf will infuse the entire sauce with subtle depth, while the thyme adds an herbal note that makes people say “what IS that flavor?”—which is your moment to teach them about cooking with fresh herbs.
If you have kids helping, this is a safe step for even younger ones (ages 6+) to participate in if they’re comfortable near the heat source. They can drop the herbs in carefully while you manage the pan.
Step 4: Pour in the Cream and Begin Your Simmer
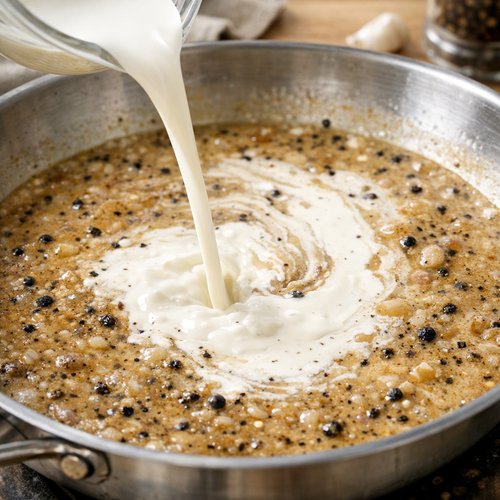
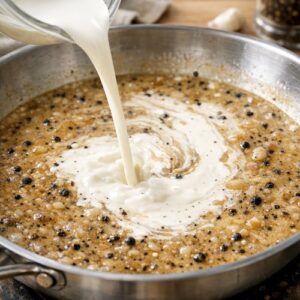
Turn your heat down to medium-low before you add the cream—this is important. If your pan is too hot, the cream can separate or scorch, creating a grainy texture rather than a silky one. Slowly pour in your heavy whipping cream while stirring gently and constantly. You’ll see the cream begin to incorporate with all those wonderful browned bits and herbs, turning into a pale golden color.
Once all the cream is in, let the mixture come to a gentle simmer—you’re looking for tiny bubbles forming around the edges, not a rolling boil. This is where patience matters. Let it simmer gently, stirring occasionally, for about 10-12 minutes. This simmering time allows the sauce to reduce slightly (thickening it naturally), lets the flavors marry together, and gives those beautiful aromatics time to fully infuse the cream.
Step 5: Season and Finish with Brightness
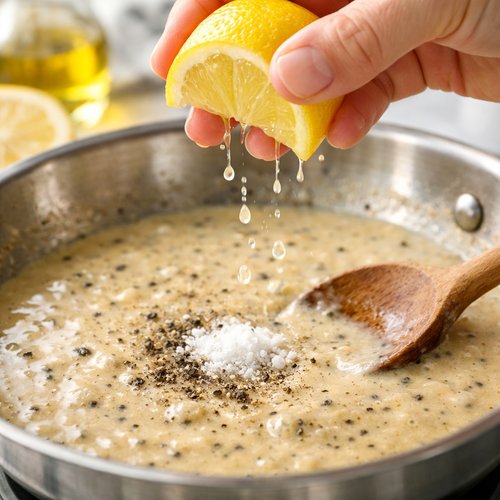
After your sauce has simmered and thickened slightly, it’s time for the final magic: lemon juice and salt. Squeeze your fresh lemon juice into the sauce and stir well. You’ll immediately notice the cream takes on a warmer, more golden tone, and the flavor becomes more vibrant and alive. The lemon doesn’t taste sour—it tastes like brightness and freshness, which is the secret to making rich sauces feel balanced rather than heavy.
Now taste your sauce (carefully, as it’s hot!). Season with sea salt gradually, adding just ¼ teaspoon at a time and tasting between additions. You’re not looking for it to taste salty—you’re looking for the flavors to suddenly feel more vivid and complete. This is a perfect teaching moment for kids: salt doesn’t make food taste salty; it makes food taste like itself, just more so.
Remove from heat and take out the bay leaf and thyme sprigs (they’ve done their job!). If your sauce is thinner than you’d like, you can return it to low heat for another 2-3 minutes of simmering. If it’s thicker than you want, simply stir in a tablespoon of cream to loosen it up.
Expert’s Nutritional Tip
Here’s something I always share with parents in my nutrition practice: the combination of black pepper and fat (in this case, cream and butter) creates the optimal environment for nutrient absorption. Piperine, the active compound in black pepper, increases the bioavailability of fat-soluble vitamins by up to 30%. This means when you serve this sauce with protein and vegetables, you’re literally making those nutrients more accessible to your child’s body. It’s elegant simplicity meeting nutritional science—exactly what real food should be.
Customization Station: Let Everyone Build Their Own
One of my most effective strategies for managing picky eaters is giving them control and choice—not over whether they eat, but over how they eat. This sauce is perfect for a customization approach because it’s versatile enough to pair with many proteins and sides, yet simple enough that variations feel manageable rather than chaotic.
- The Protein Choice – Set out your protein options: grilled chicken breast, pan-seared steak, baked fish, or even roasted tofu for variety. Let each family member choose their protein, knowing they’ll all get the same creamy pepper sauce. This gives picky eaters autonomy while keeping the meal unified. One child might choose chicken, another might choose fish, but you’re only making one sauce for everyone.
- The Vegetable Pairing – Offer 2-3 vegetable options alongside the sauce. This might be roasted asparagus, steamed broccoli, or sautéed spinach. Let kids choose which vegetable to pair with their protein. They feel in control, they’re getting vegetables, and they’re more likely to eat them because they made the decision.
- The Sauce Application – Here’s my favorite trick: serve the sauce on the side in a small ramekin rather than pouring it directly on the protein. Kids who are hesitant about “saucy” food can dip their protein, controlling the amount. Kids who love it can pour generously. Everyone wins, and cleanup is exactly the same.
Scaling for Different Family Sizes
The beauty of this recipe is that it scales incredibly smoothly. The ratio stays consistent, so you can make this for two people or for eight without changing the technique—you’re just adjusting quantities.
For 2 people (one fancy dinner night): Use 1 tablespoon butter, ½ medium red onion, 1 clove garlic, 1 tablespoon black pepper, ½ bay leaf, 1 sprig thyme, 1 cup cream, juice of ½ lemon, and salt to taste. This makes about 1 cup of sauce—enough for two 4-ounce portions of protein with sauce pooled on the plate.
For 4 people (typical family dinner): This is exactly our recipe as written—2 tablespoons butter, 1 red onion, 3 garlic cloves, 2 tablespoons pepper, 1 bay leaf, 3 sprigs thyme, 2 cups cream, 1 lemon, salt to taste. This yields about 2 cups of sauce, giving you ½ cup per person.
For 6-8 people (family gathering or meal prep): Double the recipe exactly—4 tablespoons butter, 2 red onions, 6 garlic cloves, 4 tablespoons black pepper, 2 bay leaves, 6 sprigs thyme, 4 cups cream, 2 lemons, salt to taste. This makes about 4 cups of sauce. Use a larger skillet (12-14 inches) and increase your simmering time to 15-18 minutes so the sauce reduces properly and flavors marry fully.
Make-Ahead Guide: Prep Like a Professional
As a registered dietitian who works with busy families, I can tell you that having components prepped ahead transforms a weeknight. This sauce is incredibly amenable to advance preparation, which means you can have restaurant-quality dinner on the table in under 15 minutes on your busiest evenings.
Three Days Ahead (The Prep Work): Chop your red onion and store it in an airtight container in the refrigerator. Mince your garlic and store in a small container (or freeze it in ice cube trays if you’re doing this more than one day ahead). Squeeze your lemon juice and store it in a small jar. Having these components ready means sauce-making becomes a 10-minute assembly rather than a 30-minute project.
The Morning Of (Smart Planning): Pull your cream out of the refrigerator about 20 minutes before you plan to cook so it reaches room temperature slightly. Cold cream can shock your hot pan and create texture issues. This seems like a small detail, but it’s the difference between a silky, luxurious sauce and one that feels slightly grainy.
Already Made the Sauce? (Storage and Reheating): Store your finished sauce in an airtight container in the refrigerator for up to 4 days. When reheating, do it gently over low heat, stirring frequently and adding a splash of cream if it’s thickened too much. The sauce will be thicker when cold, which is completely normal—the fat solidifies slightly. Gentle heat will restore its pourable consistency perfectly.
Can I Store Creamy Black Pepper Sauce Recipe?
Yes! This sauce is actually one of my favorite make-ahead recipes because it tastes even better the next day after the flavors have married together overnight. Here’s exactly how I manage storage in my own kitchen.
Refrigerator Storage: Transfer your cooled sauce to an airtight glass container (I love using mason jars for this) and refrigerate for up to 4 days. The sauce will thicken as it cools because the fat solidifies—this is completely normal and actually makes it perfect for lunchbox containers. The thicker consistency means it won’t leak through lunch bags, and it spreads beautifully over proteins.
Freezing for Later: This sauce freezes beautifully for up to 3 months. I recommend freezing it in ice cube trays (about 2 tablespoons per cube), then popping the frozen cubes into freezer bags. This way, you can thaw exactly the amount you need. It’s perfect for those nights when you want a fancy dinner but don’t have time to cook from scratch. Simply thaw in the refrigerator overnight or quickly in a saucepan over low heat.
Lunchbox Hack: Pack leftover sauce in small containers next to your protein and vegetables for the next day’s lunch. Kids actually get excited about having “fancy sauce” in their lunchbox—it makes them feel special, and their friends are always asking what that delicious smell is!
Common Mistakes to Avoid (So Your Sauce Is Perfect Every Time)
In my years teaching families to cook, I’ve seen the same handful of mistakes derail this sauce. Here’s how to avoid them:
Mistake #1: Cooking Over Too-High Heat – This is the biggest culprit. If your heat is too high, the cream will separate into grainy-looking curds rather than staying silky and smooth. Remember: this sauce is made at medium and medium-low heat. Patience creates perfection.
Mistake #2: Using Pre-Ground Pepper – I know it seems like a small detail, but pre-ground pepper loses its volatile oils within weeks of grinding. Using freshly cracked peppercorns makes the difference between a good sauce and a transcendent one. If you don’t have a pepper grinder, they’re inexpensive, and your kids will actually enjoy using them.
Mistake #3: Skipping the Lemon Juice or Adding It Wrong – Some home cooks add lemon at the beginning with the other aromatics. Don’t do this. The acid can cause the cream to break or separate. Always add lemon juice at the very end, and add it slowly while stirring. It brings brightness without any risk of texture issues.
Mistake #4: Not Tasting and Adjusting Before Serving – Every stove is different, every cream has slightly different water content, and every palate prefers flavors at slightly different intensities. Taste your sauce before serving and adjust the salt, pepper, or lemon juice to your preference. This five-second habit transforms good sauce into personal perfection.
Seasonal Variations: Adapting This Recipe Year-Round
One of the things I love about this recipe is that while the base stays consistent, you can play with flavor profiles seasonally, keeping your family engaged and interested year-round.
Spring Version: Add fresh tarragon or dill in place of some of the thyme. Include a touch of Dijon mustard (about ½ teaspoon) for brightness. This version is gorgeous with spring lamb or delicate fish like halibut or sole. The herbaceous notes feel lighter and more refreshing.
Summer Version: Reduce the thyme slightly and add fresh basil at the very end (so it doesn’t lose its bright flavor). A pinch of garlic powder isn’t necessary since you’re using fresh garlic, but a touch of lemon zest adds wonderful complexity. This is perfect with grilled chicken or summer vegetables.
Fall Version: Add a tiny pinch of nutmeg and ground sage to the cream as it simmers. This creates a warmer, more autumnal sauce that’s absolutely stunning with roasted pork or mushrooms. The spices make it feel cozy without being heavy.
Winter Version: Add a splash of brandy or cognac if cooking for adults (let it simmer for 2 minutes so the alcohol cooks off), or simply add a touch of horseradish for a gentle kick. This version is magnificent with beef or rich game meats. The bold flavors match winter’s heavier proteins perfectly.
Nutrition Information
Based on USDA nutritional data, each ½-cup serving of this sauce (which is a typical serving size for two people sharing) contains approximately 270 calories, 28 grams of fat (primarily from the cream and butter), 3 grams of carbohydrates, 2 grams of protein, and negligible fiber. The sodium content is approximately 150 milligrams when salted to taste, making it appropriate for a family meal without excessive sodium intake.
What matters more than the numbers, though, is what this sauce does nutritionally. The fat-soluble vitamins in the cream and butter (vitamins A, D, E, and K) are essential for your child’s bone development, immune function, and vision. The black pepper provides piperine, which research shows increases the absorption of curcumin from turmeric by up to 2000% when eaten together—making this a sauce that actually enhances nutrient bioavailability throughout your meal. The garlic provides allicin, a sulfur compound with demonstrated immune-supporting properties. The onion provides quercetin and other polyphenols associated with anti-inflammatory benefits.
Most importantly, this sauce teaches your children that real food—butter, cream, garlic, pepper—is not something to fear. It shows them that restaurant-quality meals don’t require artificial flavors, excessive sodium, or mystery ingredients. That’s a nutritional lesson worth far more than any individual micronutrient.
What to Serve Alongside for a Complete Family Meal
This sauce is versatile enough to pair with countless proteins and vegetables, but some combinations are particularly magical. Here are my family favorites that turn this sauce into a complete, balanced meal.
Start with your protein choice—this sauce pairs beautifully with Boneless Chicken Breast Recipe prepared simply with just salt and pepper so the sauce can shine. It’s equally stunning with a simple grilled steak, pan-seared fish, or even a thick portobello mushroom cap for vegetarian meals. The sauce is rich enough to stand alongside any protein without competing.
- Roasted asparagus or Lemon Broccolini Recipe – The brightness of lemon in the vegetable echoes the lemon in the sauce, creating a cohesive flavor profile. Kids recognize these as vegetables but feel excited because they’re prepared simply and taste delicious, not steamed into submission.
- Creamy mashed potatoes or cauliflower puree – The starchy base soaks up the sauce beautifully. Using cauliflower instead of potatoes occasionally sneaks in extra vegetables while maintaining that comfort-food appeal kids love.
- Simple green salad with light vinaigrette – The acid in the dressing cuts through the richness of the sauce, creating balance on the plate. A simple salad of mixed greens with a squeeze of lemon juice and quality olive oil is all you need.
- Butternut Squash Spinach Recipe – The sweetness of roasted squash complements the peppery heat of the sauce beautifully, and the spinach adds iron and minerals. This combination feels restaurant-quality while being completely family-friendly.

Creamy Black Pepper Sauce Recipe
Ingredients
Method
- Start by placing your skillet over medium heat and adding the unsalted butter. Let it melt completely—this should take about 1 minute. You'll notice it will start to foam slightly, which means the water content is cooking off and the milk solids are beginning to brown. Keep the heat at medium; if it's too high, your butter will brown too quickly and taste bitter. Once it's melted and foamy, add your finely chopped red onion. This is where kids aged 10+ can take the lead if they helped with the chopping! Stir the onion into the butter, making sure every piece gets coated. Let it cook undisturbed for about 3-4 minutes. You're looking for the onion to become translucent and just beginning to soften at the edges. This process, called sweating the onion, releases its natural sugars and creates a sweet, caramelized base for your sauce. Younger kids love watching this transformation—it's like magic.
- Once your onion has softened, add the minced garlic and stir constantly for about 30 seconds. You want to hear the sizzle and smell that gorgeous garlic aroma—that's how you know it's releasing its flavor compounds. Be careful not to let the garlic brown, as burnt garlic tastes bitter and unpleasant. This is a quick step, so keep your attention focused here. Now comes the fun part: add your freshly cracked black pepper to the pan. You'll immediately notice the pepper begins to toast and release its aromatic oils—the smell is incredible and definitely gets kids' attention! Let it toast for about 45 seconds to 1 minute, stirring gently. You want to hear subtle popping sounds and smell that warm, peppery aroma. This toasting process mellows the pepper's sharpness and creates that sophisticated, rounded flavor that makes this sauce special.
- Once the pepper is fragrant, add your bay leaf and fresh thyme sprigs to the pan. Stir everything together for about 15-20 seconds so the herbs toast slightly and release their essential oils. The bay leaf will infuse the entire sauce with subtle depth, while the thyme adds an herbal note that makes people say "what IS that flavor?"—which is your moment to teach them about cooking with fresh herbs. If you have kids helping, this is a safe step for even younger ones (ages 6+) to participate in if they're comfortable near the heat source. They can drop the herbs in carefully while you manage the pan.
- Turn your heat down to medium-low before you add the cream—this is important. If your pan is too hot, the cream can separate or scorch, creating a grainy texture rather than a silky one. Slowly pour in your heavy whipping cream while stirring gently and constantly. You'll see the cream begin to incorporate with all those wonderful browned bits and herbs, turning into a pale golden color. Once all the cream is in, let the mixture come to a gentle simmer—you're looking for tiny bubbles forming around the edges, not a rolling boil. This is where patience matters. Let it simmer gently, stirring occasionally, for about 10-12 minutes. This simmering time allows the sauce to reduce slightly (thickening it naturally), lets the flavors marry together, and gives those beautiful aromatics time to fully infuse the cream.
- After your sauce has simmered and thickened slightly, it's time for the final magic: lemon juice and salt. Squeeze your fresh lemon juice into the sauce and stir well. You'll immediately notice the cream takes on a warmer, more golden tone, and the flavor becomes more vibrant and alive. The lemon doesn't taste sour—it tastes like brightness and freshness, which is the secret to making rich sauces feel balanced rather than heavy. Now taste your sauce (carefully, as it's hot!). Season with sea salt gradually, adding just ¼ teaspoon at a time and tasting between additions. You're not looking for it to taste salty—you're looking for the flavors to suddenly feel more vivid and complete. This is a perfect teaching moment for kids: salt doesn't make food taste salty; it makes food taste like itself, just more so. Remove from heat and take out the bay leaf and thyme sprigs (they've done their job!). If your sauce is thinner than you'd like, you can return it to low heat for another 2-3 minutes of simmering. If it's thicker than you want, simply stir in a tablespoon of cream to loosen it up.

FAQs
Can I Make This Sauce Without Heavy Cream? What Are Good Substitutes?
You can, though the results will differ slightly. The best substitute is half-and-half (equal parts cream and whole milk), which creates a slightly lighter sauce but maintains creaminess. Use the same amount and follow the same technique. You can also use Greek yogurt (add it at the very end, off the heat, so it doesn’t curdle), but this creates a tangier flavor that some families love and others find too tart. My recommendation? Try the full-cream version first so you know what you’re working with, then experiment with alternatives once you’re familiar with the baseline technique. This teaches your kids that cooking is about understanding how ingredients behave, not just following rules.
My Child Hates Visible Pepper Specks. Can I Still Make This?
Absolutely! Use white peppercorns instead of black. They create the same peppery heat and flavor but dissolve into the sauce, leaving no visible specks. Alternatively, you can strain the finished sauce through a fine-mesh strainer to remove the pepper solids, though you’ll lose some intensity. My favorite solution? Toast the peppercorns in a spice grinder until very finely ground, almost powder-like. This distributes the flavor throughout the sauce without creating obvious specks. Many kids who refuse “chunky” sauces find this version perfectly acceptable, and they’re getting all the same nutritional benefits.
What If I Don’t Have Fresh Thyme? Are Dried Herbs Okay?
Yes, but use less. Dried herbs are more concentrated than fresh—use 1 teaspoon dried thyme instead of 3 sprigs fresh. The flavor will be slightly less delicate but entirely respectable. You can also use dried rosemary (start with just ½ teaspoon), oregano, or even a pinch of Italian seasoning. The bay leaf is less negotiable—it creates a specific depth that’s harder to replicate. If you don’t have it, use a strip of lemon zest instead for brightness rather than depth.
Can I Make This Sauce Ahead and Reheat It? Will It Separate or Break?
This is my favorite question because the answer is so reassuring for busy families. Yes, absolutely make it ahead! Store it in the refrigerator in an airtight container for up to 4 days. When reheating, do it gently over low heat, stirring frequently. The sauce will thicken as it cools (the fat solidifies), and it will loosen up again as it reheats. If it seems too thick, simply add a splash of cream or whole milk while stirring. The key is gentle heat and patience—never use high heat to reheat, which can cause separation. I often make this sauce in the morning and reheat it at dinner, or make a double batch and serve it twice in one week.
How Can I Make This Recipe Less Rich for Kids Who Find Heavy Foods Uncomfortable?
Create a hybrid version using three-quarters cream and one-quarter whole milk or half-and-half. This reduces richness by about 30% while maintaining creaminess and mouthfeel. Alternatively, reduce the total amount of cream from 2 cups to 1.5 cups and add ½ cup chicken or vegetable stock. This creates a lighter sauce that’s still creamy and flavorful but feels less heavy. Some kids have sensitive digestive systems or prefer lighter foods—honoring that preference while still teaching them to enjoy well-made sauces is important. This adjustment lets you do exactly that.
More Family-Friendly Recipes
- Boneless Pork Ribeye Recipe – Perfectly paired with this creamy black pepper sauce for a restaurant-quality family dinner that comes together in minutes.
- Air Fryer Grouper Recipe – A lighter protein option that becomes elegant and special when served with a generous pour of this sophisticated sauce.
- Brie And Bacon Recipe – A rich appetizer that pairs beautifully with this sauce for entertaining or special family meals.
Conclusion: Building Food Memories One Sauce at a Time
This creamy black pepper sauce has become more than just a recipe in my kitchen and in the kitchens of hundreds of families I’ve worked with. It’s a moment—a pause in our busy weeks where we slow down, involve our kids in creating something genuinely delicious, and show them that good food doesn’t have to be complicated or mysterious. It’s butter, onion, garlic, pepper, cream, and time. It’s the same things my grandmother used decades ago, the same things you can make tonight.
When your child tastes this sauce for the first time and their eyes light up, when they ask to make it again, when they start requesting it by name at dinner—you’ll understand why I became a dietitian. It’s not just about nutrition (though that matters). It’s about creating a relationship with real food that will serve them for their entire lives. It’s about showing them that they can make something that tastes like a restaurant created it, with their own two hands, in their own kitchen, in under 30 minutes.
That’s the magic of cooking together. That’s the power of food to build memories and shape how our kids relate to eating and nourishment for decades to come. I hope you find joy in every recipe!