
Cheesy Mashed Potato Recipe
 By
By This post contains affiliate links. As an Amazon Associate I earn from qualifying purchases.
Getting kids to eat a big bowl of creamy, cheesy mashed potatoes feels impossible—until you try this approach. I’ve watched countless parents struggle to get their children excited about dinner, only to see their faces light up when they taste these golden, melted-cheese-topped potatoes. As a registered dietitian, I know that the secret isn’t just about flavor; it’s about creating a dish that feels familiar, looks appetizing, and tastes like a warm hug. Whether you’re meal prepping for the week or preparing a quick weeknight dinner, this recipe works beautifully. And if you’re looking for other cheesy comfort foods the whole family will love, my my weeknight pasta is another guaranteed winner!
Cheesy Mashed Potato Recipe the Whole Family Will Actually Eat (Picky Eaters Included)
I remember the first time I made this recipe for my own family gathering years ago. My cousin brought her three-year-old, who was known for eating only plain foods—no sauces, no “mixed up stuff,” as she called it. I was nervous serving anything beyond plain mashed potatoes. But something magical happened when she saw that beautiful golden cheese melted on top. She dug right in, and her mom turned to me with tears in her eyes. That moment reminded me why I became a dietitian: food has the power to connect us, nourish us, and create memories that last a lifetime.
Why Kids Love This Version
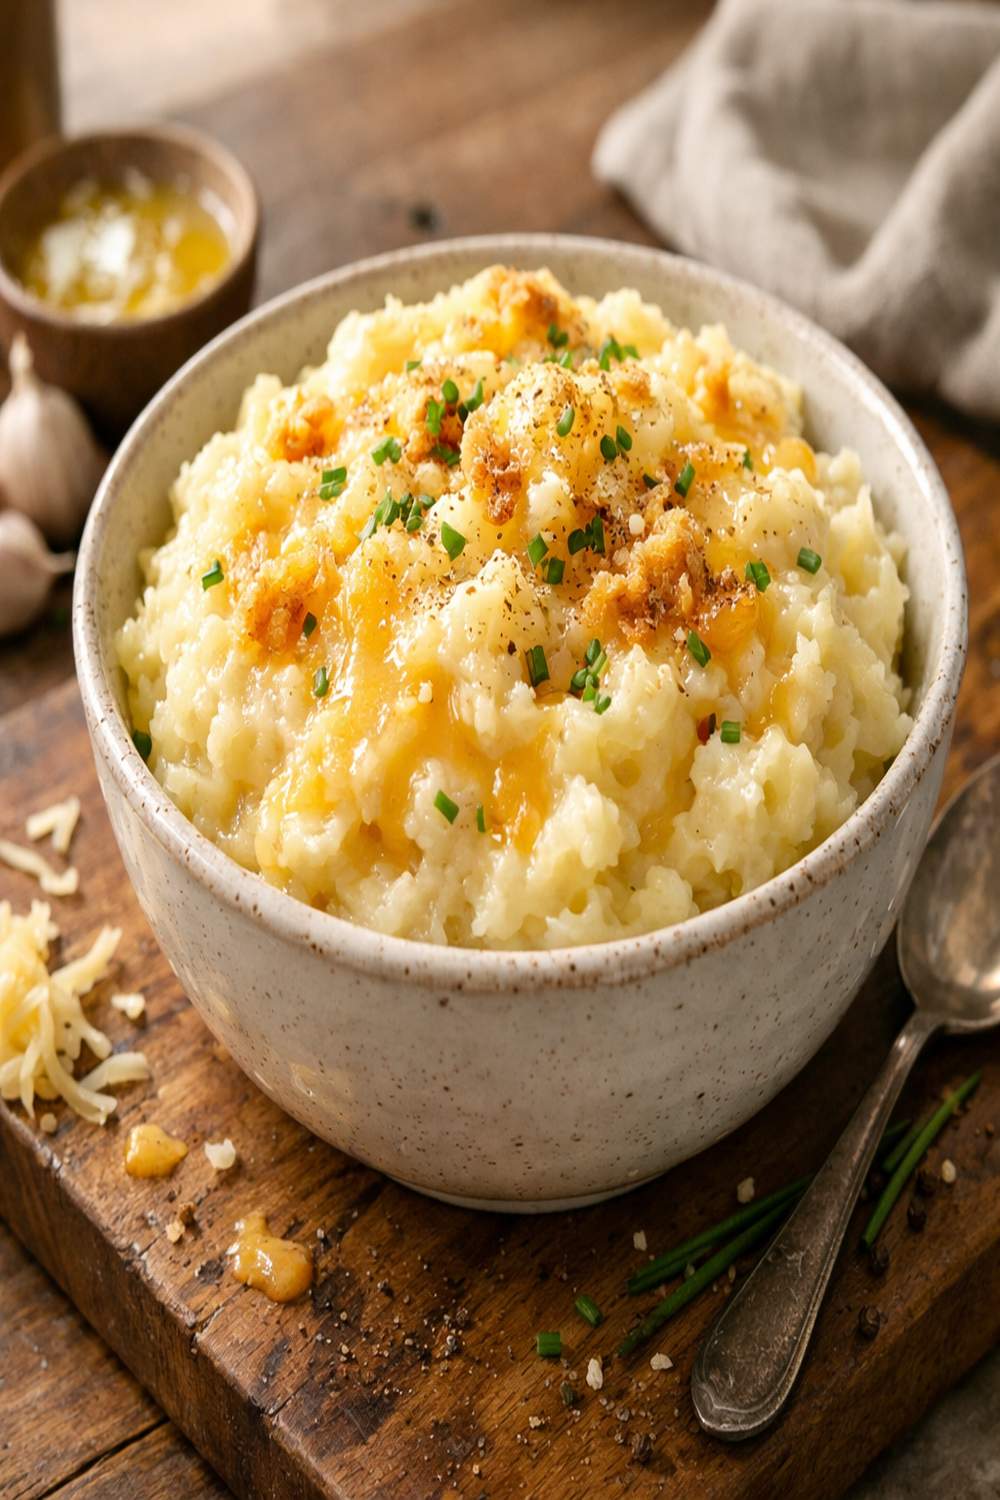
This isn’t just mashed potatoes with cheese stirred in randomly. This version has layers of flavor, a creamy-yet-fluffy texture that melts on the tongue, and that irresistible golden-brown cheese on top that kids find absolutely irresistible. The combination of three different cheeses creates depth without being overwhelming, and the garlic is subtle enough that even texture-sensitive eaters won’t detect it—but they’ll definitely taste why these potatoes are so delicious.
- The Creamy, Fluffy Texture – children respond beautifully to foods they can easily mash with their spoon or fork, and this recipe never feels heavy or gluey, which is the number one complaint about homemade mashed potatoes
- The Visible Cheese Factor – kids eat with their eyes first, and that melted white cheddar on top signals “this is special” in a way plain mashed potatoes never can
- The Familiar Comfort Factor – potatoes are a safe food for most picky eaters, so adding cheese feels like a delicious upgrade rather than an intimidating new experience
- The Temperature Retention – because this dish holds its heat beautifully, kids can eat at their own pace without the potatoes getting cold and unappetizing halfway through the meal
How to Get Kids Involved in Making This
One of my favorite discoveries as both a dietitian and a parent is that children are far more willing to eat foods they’ve helped create. Cooking together builds confidence, teaches real-life skills, and creates those precious kitchen memories I treasure from my own childhood cooking with my mother and grandmother. Here’s how to involve every age group:
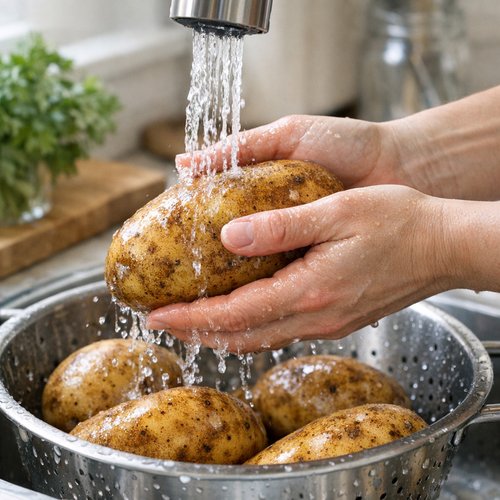
- Ages 3-5: The Potato Washer – give your little one a small bowl of water and let them gently rinse the potatoes under your supervision while sitting at a stool beside you; they feel like real helpers, and you get genuinely useful assistance
- Ages 6-9: The Cheese Grater and Measurer – older kids can help grate the softer cheeses and measure out the butter, sour cream, and other ingredients into bowls; this builds math skills and kitchen confidence simultaneously
- Ages 10+: The Actual Cook – teenagers can handle almost every step with light supervision, from peeling potatoes to operating the hand mixer and deciding when the potatoes are “fork tender enough”
The Ingredients – Hidden Nutrition, Visible Deliciousness
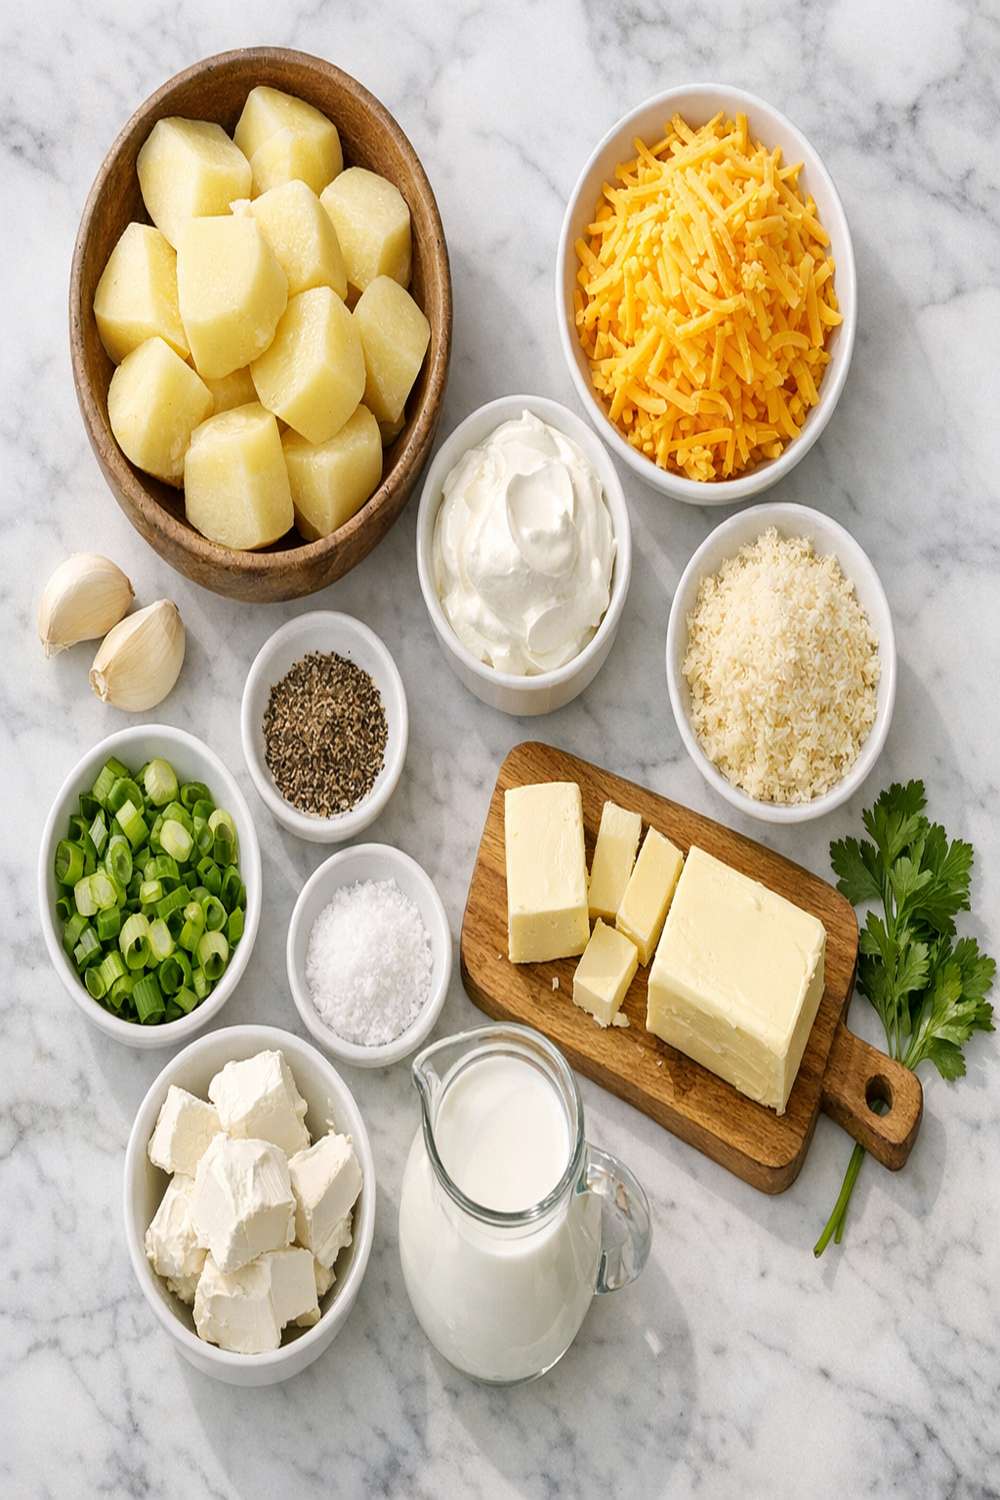
I designed this recipe to deliver serious nutritional value without compromising on the indulgent, comforting taste that makes it irresistible. Potatoes often get unfairly dismissed as “unhealthy,” but the truth is they’re packed with potassium for growing bodies, vitamin B6 for brain development, and fiber when you keep the skin on before mashing. The three-cheese combination provides calcium and protein for strong bones and muscles, while the garlic and butter add flavor compounds that support overall wellness. This recipe makes approximately 8 servings as a substantial side dish.
- ¼ teaspoon fresh black pepper (coarsely ground black pepper tastes dramatically better than pre-ground)
- 6 ounces cream cheese (softened to room temperature before mixing, which prevents lumpy texture)
- 8 ounces sharp white cheddar cheese (grated fresh, divided; about 2½ cups total with roughly ¾ cup reserved for topping)
- Nonstick cooking spray (for the casserole dish)
- 1 tablespoon kosher salt for the boiling water (enhances potato flavor from the inside out)
- 2 tablespoons fresh minced parsley or chives (optional garnish; adds color and a fresh note that brightens the richness)
- ½ cup unsalted butter (melted; real butter creates a luxurious mouthfeel that margarine simply cannot replicate)
- 8 medium russet potatoes (about 4 pounds total; russets have the best starch content for fluffy, not gluey mashed potatoes)
- ½ cup full-fat sour cream (adds tang and creaminess without needing excessive butter)
- 2 cloves fresh garlic (minced finely; the flavor is subtle but adds sophisticated depth that kids won’t consciously notice)
- 3 ounces Parmesan cheese (finely grated; adds a salty, umami punch that makes people ask “what’s in this?”)
- 1 teaspoon kosher salt to sprinkle on drained potatoes (creates flavor layers rather than uniform saltiness)
How to Make Cheesy Mashed Potato Recipe for the Whole Family
I’ve designed this recipe to work within a 30-minute active time frame if you’re baking immediately, which feels realistic for busy families. The beauty is that you can also prepare this entirely ahead and refrigerate it for up to 24 hours, making it perfect for meal prep Sundays or advance dinner party preparation. Let’s walk through each step together, and I’ll share the exact moments where different family members can jump in and help.
Step 1: Prepare Your Pot and Boiling Water
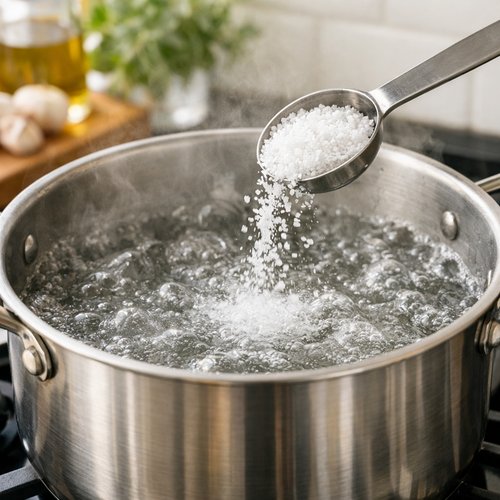
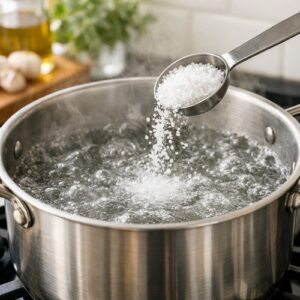
Fill a 5-quart pot with about 2 inches of water and bring it to a rolling boil over high heat. Once you see big, active bubbles, add 1 tablespoon of kosher salt to the water. The water should be seasoned almost like a light broth—this is how professional chefs ensure flavor penetrates the potatoes from the very beginning. If you have young children nearby, remind them this is a “hot pot zone” where they can watch from a safe distance, but not touch. This is a perfect teaching moment about kitchen safety.
Step 2: Prepare the Potatoes
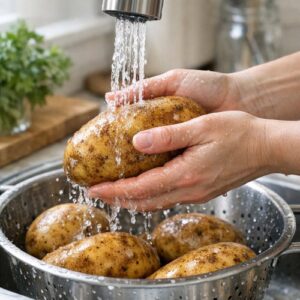
While the water heats, rinse your potatoes under cool running water and rub them gently with your hands to remove any dirt. I leave the skins on during cooking because they add nutrients and prevent the potatoes from absorbing excess water, which would make them watery. Peel them with a vegetable peeler or paring knife, then cut them into even chunks about the size of walnuts. Try to keep them uniform in size—this ensures they all cook at the same rate. Younger children can wash the potatoes and supervise the cutting from a safe distance, while older kids can handle the peeling and chunking with a supervised sharp knife.
Step 3: Cook the Potatoes Until Perfectly Tender
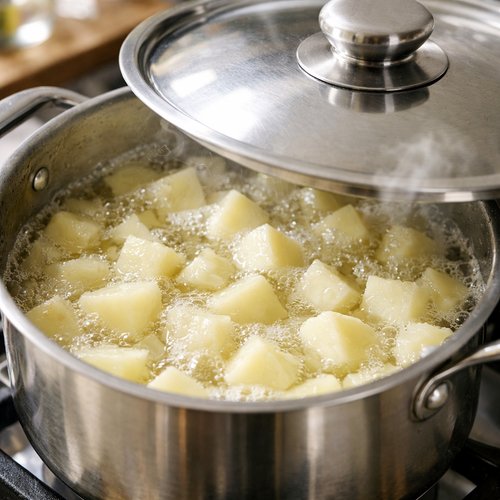
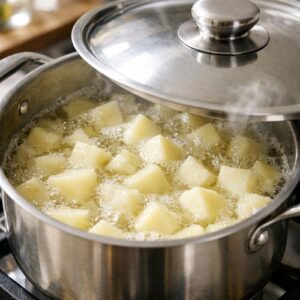
Carefully add your potato chunks to the boiling salted water. Cover the pot with a lid, but leave it slightly ajar to allow steam to escape and prevent boiling over. Reduce the heat to medium-low and cook for 20 to 25 minutes. You’re looking for potatoes that are completely fork-tender—meaning when you pierce one with a fork, it almost falls apart with zero resistance. This is the most critical step for achieving fluffy mashed potatoes instead of dense, gluey ones. Have a 10-year-old test the potatoes by carefully piercing one with a fork under your supervision—they’ll feel like a real cook!
Step 4: Drain and Season the Hot Potatoes
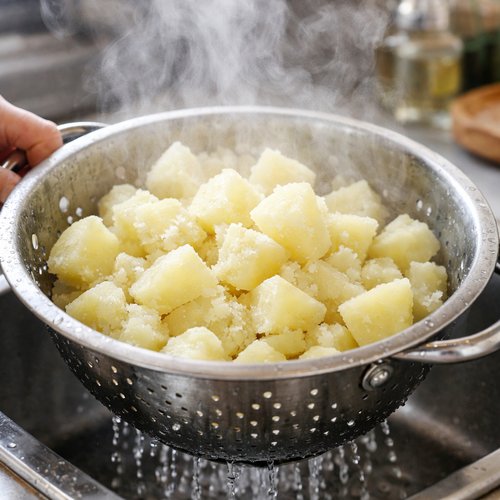
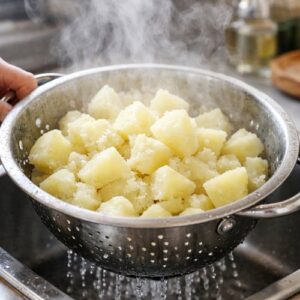
Using a colander, drain all the water from your potatoes completely. Be very careful with steam rising from the pot—keep children back and warn them about the hot vapor. Return the drained potatoes to the empty pot while they’re still hot. Sprinkle the additional 1 teaspoon of kosher salt evenly over them and let them sit for just 30 seconds. This is your chance to add an extra layer of flavor seasoning to the potatoes themselves, not just to the cheese mixture. This professional technique makes an enormous difference in the final taste.
Step 5: Mash with Butter for Initial Creaminess
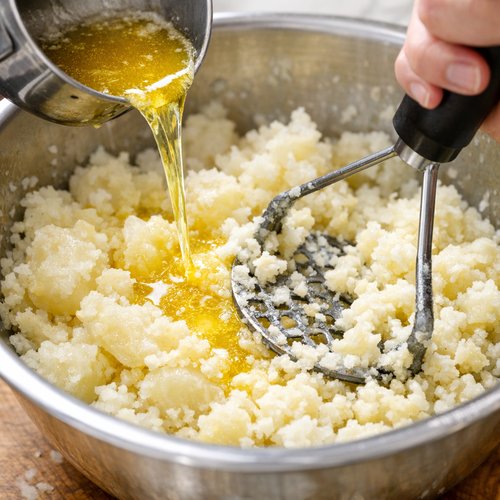
Pour your melted butter over the salted hot potatoes and begin mashing by hand with a sturdy potato masher or ricer. Mash until the potatoes are broken down into small pieces with a few tiny lumps remaining—you want rustic, chunky texture, not baby food consistency. This is where a confident 8-year-old can take the lead under your guidance, as hand mashing is safe and deeply satisfying. Press the masher straight down, twist slightly, and lift, repeating throughout the pot until most lumps are gone.
Step 6: Mix the Cheese Mixture Separately
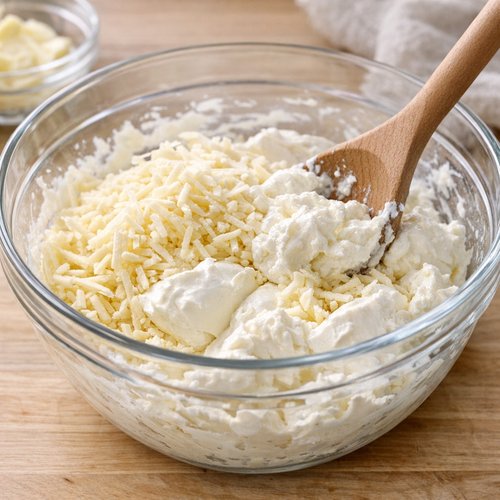
While the potatoes are still warm, combine your softened cream cheese, three-quarters of the white cheddar cheese (reserving ¾ cup for topping), and the Parmesan cheese in a separate large mixing bowl. Using a hand mixer on low speed or mixing by hand with a wooden spoon, beat these cheeses together until they’re smooth and well-combined. Then stir in the sour cream, minced fresh garlic, and black pepper until everything is evenly distributed. This separate mixing step prevents overmixing the potatoes, which is the enemy of fluffy texture.
Step 7: Combine with a Gentle Hand
Here’s where I ask you to channel your inner gentle chef. Fold the cheese mixture into the mashed potatoes using a large rubber spatula with just 10 to 12 slow, deliberate strokes. Mix only until you see no white streaks of unmixed cream cheese—stop immediately. Overmixing develops gluten in the potatoes, creating a gluey, unpleasant texture that everyone complains about. I know it’s tempting to keep mixing until everything looks perfectly uniform, but resist! A little visible variation in color and texture is the hallmark of excellent mashed potatoes.
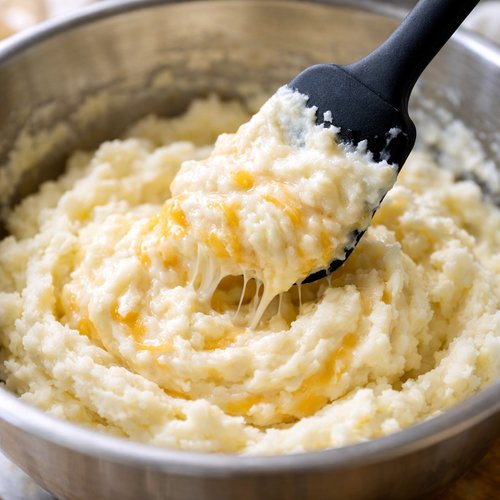
Step 8: Transfer to Your Casserole Dish
Spray a 2 or 3-quart casserole dish lightly with nonstick cooking spray (this prevents sticking and makes cleanup easier, which every parent appreciates). Spread your cheesy potato mixture evenly into the prepared dish. Use a spatula or the back of a spoon to create a smooth, level surface. Top evenly with that reserved ¾ cup of white cheddar cheese. If you’re serving immediately, skip straight to the baking instructions below. If you’re meal prepping or preparing ahead, cover with nonstick foil and refrigerate for up to 24 hours.
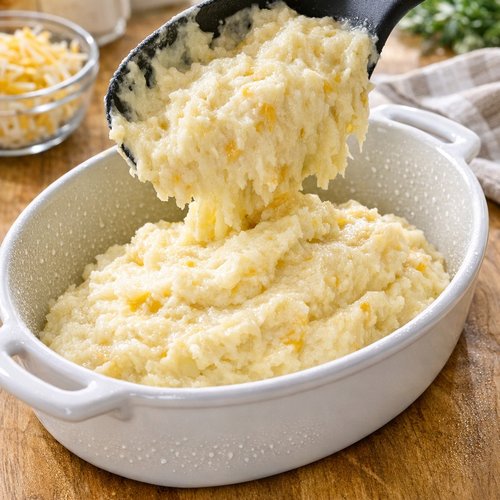
Step 9: Bake Until Cheesy Perfection
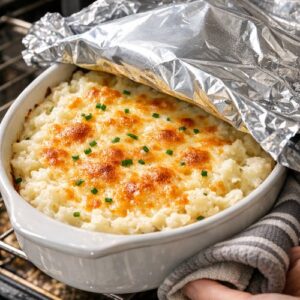
If your potatoes are still hot from cooking, cover the dish with nonstick foil and bake at 350 degrees Fahrenheit for only 5 minutes to warm through, then remove the foil and bake for an additional 10 to 15 minutes until the cheese is melted and bubbly. If your potatoes are at room temperature or cold from refrigeration, cover with nonstick foil and bake at 350 degrees Fahrenheit for 20 minutes, then remove the foil and bake for an additional 20 to 25 minutes until the cheese is melted and the potatoes are heated completely through. The potatoes are ready when a spoon pressed into the center comes away hot on the bottom of the spoon.
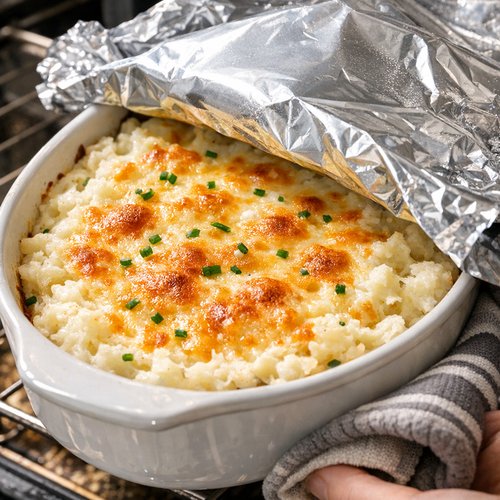
Step 10: Garnish and Serve with Joy
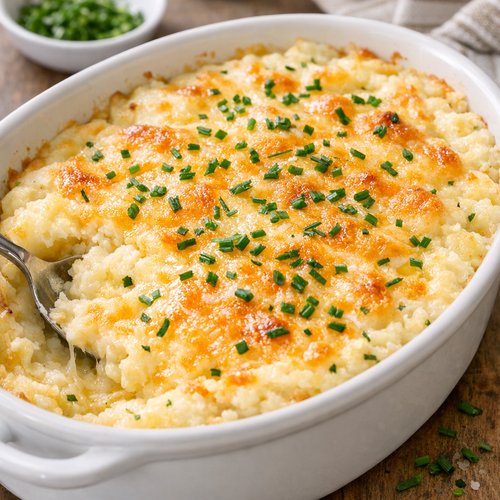
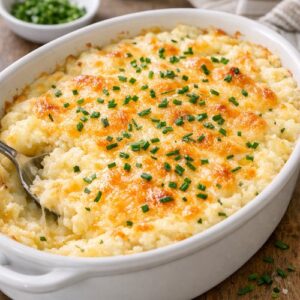
Remove from the oven and let cool for just 2 to 3 minutes so no one burns their mouth on the hot cheese. Sprinkle fresh minced parsley or chives over the top if desired—this adds color, a fresh herbal note, and signals to kids that this is restaurant-quality food they’re about to eat. Serve warm, and watch the smiles appear. I promise you.
Expert’s Nutritional Tip: Why This Recipe Works for Growing Bodies
As a registered dietitian, I’m always thinking about how to pack maximum nutrition into foods kids will actually eat. This recipe is a masterclass in nutrient density done right. Russet potatoes provide approximately 900 milligrams of potassium per medium potato—that’s crucial for muscle function, nerve transmission, and healthy blood pressure regulation in growing children. The combination of three cheeses delivers roughly 600 milligrams of calcium per serving, which is about 50% of a school-age child’s daily requirement, supporting developing bones and teeth. The butter and sour cream contain fat-soluble vitamins A, D, and E that help with vision development and nutrient absorption. This isn’t “empty comfort food”—this is nutritional strategy disguised as something kids actually want to eat.
Make-Ahead Guide: Meal Prep Like a Professional
I use this recipe constantly in my own meal planning because it’s one of the rare dishes that actually improves with advance preparation. The flavors meld together beautifully, and you eliminate the stress of cooking a hot potato dish while managing everything else on the table.
- Complete Prep (Up to 24 Hours Ahead) – Prepare the entire recipe through Step 8, cover tightly with nonstick foil (regular foil can stick to cheese), and refrigerate. When ready to serve, increase baking time by 15 minutes to account for the cold temperature. This is my favorite method for holiday dinners or busy weeknights.
- Partial Prep (Potatoes Only, Up to 2 Days Ahead) – Cook and drain the potatoes, then refrigerate them in an airtight container. When ready to finish, reheat gently in a pot over low heat with a splash of milk, then proceed with mashing and mixing the cheese. This saves serious time on busy evenings.
- Cheese Mixture Only (Up to 3 Days Ahead) – Mix your cream cheese, cheddar, and Parmesan together and refrigerate separately. Soften at room temperature for 20 minutes before combining with freshly mashed potatoes. This is perfect if you’re doing other prep work during the week.
- Portion Control Magic – Divide the baked, cooled casserole into individual portions in small oven-safe containers, top with reserved cheese, and freeze for up to 3 months. Reheat individual portions at 350 degrees Fahrenheit for 15 minutes from frozen, making weeknight dinners genuinely effortless.
Common Mistakes to Avoid
I’ve made every mistake imaginable while developing this recipe, so you don’t have to. Learn from my trials and tribulations:
- Mistake #1: Using Waxy Potatoes Instead of Russets – Red potatoes and Yukon golds are waxy and hold their shape stubbornly, creating dense, gluey mashed potatoes that feel heavy rather than fluffy. Russets have higher starch content and lower water content, creating that light, fluffy texture everyone craves. This single swap transforms the entire dish.
- Mistake #2: Overmixing the Cheese Into the Potatoes – I learned this the hard way after 10 minutes of enthusiastic mixing left me with a bowl of gluey sadness. The starch in potatoes develops gluten-like structure when overworked, which destroys the fluffy texture. Mix just until combined, then stop immediately. Your potatoes will thank you.
- Mistake #3: Using Cold Cream Cheese and Butter – Cold dairy products create lumps that never fully incorporate, leaving you with flecks of unmixed cheese throughout your dish. Soften cream cheese at room temperature for 30 minutes, and use melted (not cold) butter. This ensures silky texture every single time.
- Mistake #4: Skipping the Salt Layer on the Drained Potatoes – I used to think seasoning the cheese mixture was enough, but restaurant chefs taught me that salting potatoes directly after draining while they’re steaming hot allows that salt to penetrate deeply, creating better flavor throughout rather than just on the edges.
Seasonal Variations: Keeping This Recipe Fresh Year-Round
While I love the classic version, this recipe is beautifully flexible depending on what’s fresh and what your family is craving:
- Spring Version – Add ½ cup of fresh spring peas and 2 tablespoons of fresh tarragon or dill to the finished potatoes for brightness and freshness without overwhelming the dish
- Summer Version – Fold in ½ cup of crispy crumbled bacon and fresh corn kernels; serve alongside grilled chicken or fish
- Fall Version – Replace half the white cheddar with aged white sharp cheddar and add 1 teaspoon of smoked paprika for depth and a warming quality that feels appropriate as weather cools
- Winter Version – Add ¼ cup of crispy fried onions on top right before baking for texture contrast, and increase the cream cheese slightly for extra richness
Customization Station: Let Everyone Build Their Own
One of my favorite discoveries as a registered dietitian is that picky eaters suddenly become adventurous when they’re in control of what goes into their portion. Serve the base cheesy potatoes and set up a simple customization station where each family member can choose their own toppings. This psychology hack transforms kids from skeptical into enthusiastic about the very same dish.
- Protein Options – crispy bacon bits, diced ham, cooked ground beef, or shredded rotisserie chicken that they can mix in or keep separate
- Veggie Options – steamed broccoli florets, peas, corn, diced bell peppers, or sautéed mushrooms that they control the amount of
- Topping Options – extra cheese, fried onions, fresh chives, a dollop of sour cream, or hot sauce for older kids who enjoy spice
Scaling for Different Family Sizes
This recipe serves 8 people as a substantial side dish, but your family size might be different. Here’s how to adjust:
- Family of 2-3 – Use half the recipe (4 medium potatoes, ¼ cup butter, ¼ cup sour cream, 3 ounces cream cheese, 4 ounces white cheddar, 1.5 ounces Parmesan). Use a smaller 1-quart casserole dish. Reduce baking time by 5 minutes.
- Family of 4-5 – Use two-thirds of the recipe (5-6 medium potatoes and proportional adjustments to all other ingredients). Use a 2-quart casserole dish as written, but reduce total baking time by 3-5 minutes.
- Family of 6-8 – Use the full recipe as written with a 2-3 quart casserole dish.
- Family of 10+ or Holiday Crowd – Double the entire recipe using an 8-quart pot for cooking potatoes and two 3-quart casserole dishes for baking. Increase baking time by 5-10 minutes since you’re baking a larger volume.
Can I Store Cheesy Mashed Potato Recipe?
Absolutely, and this is where the recipe gets genuinely practical for real-world family schedules. Here’s exactly how I store and use leftovers in my own kitchen:
- Refrigerator Storage: Up to 4 Days – Store cooled leftovers in an airtight container. Reheat gently in a 350-degree Fahrenheit oven for 15 minutes covered with foil, or on the stovetop over low heat with a splash of milk stirred in to restore creaminess. Stir occasionally to ensure even heating.
- Freezer Storage: Up to 3 Months – Freeze in airtight containers or divided into individual portions in freezer bags. Thaw in the refrigerator overnight, then reheat using the method above. I freeze individual portions specifically for lunch additions on hectic days.
- Lunchbox Magic – Portion into a thermos or small container and pack with a protein and vegetable for a complete lunch. Add a splash of milk before heating if microwaving, as the potatoes can dry out slightly. Kids genuinely look forward to lunchbox days when cheesy potatoes are included.
- Soup Addition – Add a spoonful of leftovers to warm broth or cream-based soups for instant heartiness and creaminess without additional cooking. A spoonful in vegetable soup suddenly transforms it into a more substantial meal kids will actually finish.
Nutrition Information
Based on USDA nutrition database analysis, each serving (approximately 1 cup, assuming 8 servings per recipe) contains roughly 385 calories, 18 grams of protein, 28 grams of fat, 28 grams of carbohydrates, and 3 grams of dietary fiber. The protein content supports muscle growth and development critical during childhood and adolescence, while the carbohydrates provide sustained energy for active, growing bodies. One serving delivers approximately 50% of a school-age child’s daily calcium requirement through the three-cheese combination. The fiber from the potatoes supports healthy digestion and satiety, helping kids feel satisfied longer. The fat content includes both saturated fat from the dairy and beneficial monounsaturated fats from the butter, which are necessary for hormone production, nutrient absorption, and brain development in children.
What to Serve Alongside for a Complete Family Meal
Cheesy mashed potatoes are naturally a starch side dish, so I always pair them with a protein and a fresh vegetable to create a nutritionally balanced plate that checks every nutrition box. Here are my favorite combinations that kids actually eat:
- Grilled Chicken Breast with Roasted Broccoli – the simplicity lets the cheesy potatoes shine as the star, and broccoli’s slight bitterness balances the richness of the potatoes beautifully
- Baked Boneless Pork Chops with Roasted Carrots – pork’s subtle sweetness complements the cheesy potatoes, and you can find my Boneless Pork Ribeye Recipe for similar preparations
- Homemade Beef and Vegetable Soup with Crusty Bread – a large bowl of hearty soup with these potatoes on the side creates a complete, warming meal that satisfies even hungry teenagers
- Roasted Tomato Soup with a Simple Green Salad – you can find my this cozy soup for a preparation that pairs beautifully with creamy potatoes
- Baked Salmon with Steamed Green Beans – if you’re looking to boost omega-3 intake, salmon paired with these potatoes delivers both indulgence and serious nutrition

Cheesy Mashed Potato Recipe
Ingredients
Method
- Fill a 5-quart pot with about 2 inches of water and bring it to a rolling boil over high heat. Once you see big, active bubbles, add 1 tablespoon of kosher salt to the water. The water should be seasoned almost like a light broth—this is how professional chefs ensure flavor penetrates the potatoes from the very beginning. If you have young children nearby, remind them this is a "hot pot zone" where they can watch from a safe distance, but not touch. This is a perfect teaching moment about kitchen safety.
- While the water heats, rinse your potatoes under cool running water and rub them gently with your hands to remove any dirt. I leave the skins on during cooking because they add nutrients and prevent the potatoes from absorbing excess water, which would make them watery. Peel them with a vegetable peeler or paring knife, then cut them into even chunks about the size of walnuts. Try to keep them uniform in size—this ensures they all cook at the same rate. Younger children can wash the potatoes and supervise the cutting from a safe distance, while older kids can handle the peeling and chunking with a supervised sharp knife.
- Carefully add your potato chunks to the boiling salted water. Cover the pot with a lid, but leave it slightly ajar to allow steam to escape and prevent boiling over. Reduce the heat to medium-low and cook for 20 to 25 minutes. You're looking for potatoes that are completely fork-tender—meaning when you pierce one with a fork, it almost falls apart with zero resistance. This is the most critical step for achieving fluffy mashed potatoes instead of dense, gluey ones. Have a 10-year-old test the potatoes by carefully piercing one with a fork under your supervision—they'll feel like a real cook!
- Using a colander, drain all the water from your potatoes completely. Be very careful with steam rising from the pot—keep children back and warn them about the hot vapor. Return the drained potatoes to the empty pot while they're still hot. Sprinkle the additional 1 teaspoon of kosher salt evenly over them and let them sit for just 30 seconds. This is your chance to add an extra layer of flavor seasoning to the potatoes themselves, not just to the cheese mixture. This professional technique makes an enormous difference in the final taste.
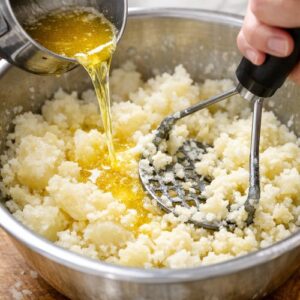
- Pour your melted butter over the salted hot potatoes and begin mashing by hand with a sturdy potato masher or ricer. Mash until the potatoes are broken down into small pieces with a few tiny lumps remaining—you want rustic, chunky texture, not baby food consistency. This is where a confident 8-year-old can take the lead under your guidance, as hand mashing is safe and deeply satisfying. Press the masher straight down, twist slightly, and lift, repeating throughout the pot until most lumps are gone.
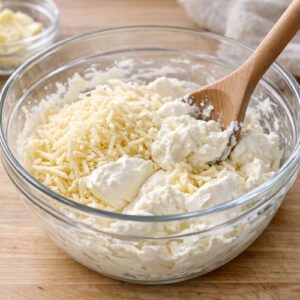
- While the potatoes are still warm, combine your softened cream cheese, three-quarters of the white cheddar cheese (reserving ¾ cup for topping), and the Parmesan cheese in a separate large mixing bowl. Using a hand mixer on low speed or mixing by hand with a wooden spoon, beat these cheeses together until they're smooth and well-combined. Then stir in the sour cream, minced fresh garlic, and black pepper until everything is evenly distributed. This separate mixing step prevents overmixing the potatoes, which is the enemy of fluffy texture.
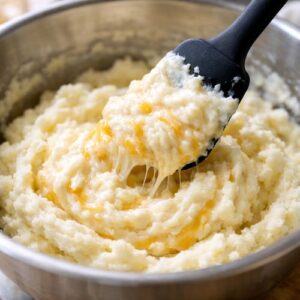
- Here's where I ask you to channel your inner gentle chef. Fold the cheese mixture into the mashed potatoes using a large rubber spatula with just 10 to 12 slow, deliberate strokes. Mix only until you see no white streaks of unmixed cream cheese—stop immediately. Overmixing develops gluten in the potatoes, creating a gluey, unpleasant texture that everyone complains about. I know it's tempting to keep mixing until everything looks perfectly uniform, but resist! A little visible variation in color and texture is the hallmark of excellent mashed potatoes.
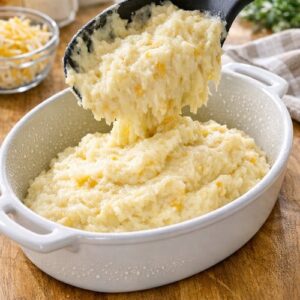
- Spray a 2 or 3-quart casserole dish lightly with nonstick cooking spray (this prevents sticking and makes cleanup easier, which every parent appreciates). Spread your cheesy potato mixture evenly into the prepared dish. Use a spatula or the back of a spoon to create a smooth, level surface. Top evenly with that reserved ¾ cup of white cheddar cheese. If you're serving immediately, skip straight to the baking instructions below. If you're meal prepping or preparing ahead, cover with nonstick foil and refrigerate for up to 24 hours.
- If your potatoes are still hot from cooking, cover the dish with nonstick foil and bake at 350 degrees Fahrenheit for only 5 minutes to warm through, then remove the foil and bake for an additional 10 to 15 minutes until the cheese is melted and bubbly. If your potatoes are at room temperature or cold from refrigeration, cover with nonstick foil and bake at 350 degrees Fahrenheit for 20 minutes, then remove the foil and bake for an additional 20 to 25 minutes until the cheese is melted and the potatoes are heated completely through. The potatoes are ready when a spoon pressed into the center comes away hot on the bottom of the spoon.
- Remove from the oven and let cool for just 2 to 3 minutes so no one burns their mouth on the hot cheese. Sprinkle fresh minced parsley or chives over the top if desired—this adds color, a fresh herbal note, and signals to kids that this is restaurant-quality food they're about to eat. Serve warm, and watch the smiles appear. I promise you.
Notes
FAQs
My mashed potatoes came out gluey instead of fluffy. What went wrong?
This is the number one complaint I hear, and it’s almost always one of two issues: either you used waxy potatoes like reds or Yukon golds instead of starchy russets, or you overworked the potatoes during mashing. Each time the potatoes are mashed or stirred, the starch releases and binds together, creating that gluey texture. To fix it next time, use russets exclusively and stop mixing as soon as you see no white streaks from the cream cheese. If this happens, you can partially salvage the dish by stirring in ¼ cup of warm milk at a time until you reach a better texture, though it won’t be quite as fluffy as it should be.
Can I make this completely ahead and freeze it unbaked?
Yes, absolutely! This is actually my preferred method for holiday entertaining. Prepare the entire recipe through Step 8 and freeze the covered casserole dish for up to 3 months. You can bake it directly from frozen without thawing—just add 10 minutes to the total baking time. Thaw overnight in the refrigerator and bake as directed if you prefer not to add the extra time. This flexibility is one of my favorite aspects of this recipe for meal planning purposes.
What if my kids refuse to eat potatoes with visible bits of garlic?
Mince the garlic extremely finely so it breaks down and becomes invisible in the cheese mixture, or consider omitting it entirely and adding ¼ teaspoon of garlic powder instead. The garlic powder distributes evenly and you get the flavor without any visible pieces that might trigger a picky eater. Alternatively, you could sauté the minced garlic in the melted butter for 30 seconds before adding it to the potatoes—this mellows the garlic flavor and makes it less identifiable to sensitive eaters.
Is there a dairy-free version I can make for allergic friends or family members?
Yes, though I’ll be honest—it requires some substitution. Replace the butter with dairy-free butter (like Earth Balance), use dairy-free cream cheese (Kite Hill or Miyoko’s brands work beautifully), replace the sour cream with dairy-free sour cream, and use dairy-free cheddar and Parmesan alternatives. The texture will be slightly different and less rich, but many families report good results. Add an extra tablespoon of dairy-free butter and a pinch of salt to compensate for the flavor reduction from removing real dairy. I’d recommend testing this version before serving it at a gathering so you can make adjustments to your preference.
Can I add vegetables directly to the potatoes instead of serving them on the side?
Absolutely, and this is actually one of my favorite ways to sneak extra nutrition into picky eaters’ meals. Fold in ½ cup of finely diced cooked broccoli, ½ cup of corn kernels, ¼ cup of diced roasted bell peppers, or ⅓ cup of steamed peas in the final step after combining with the cheese mixture. Keep the pieces small so they blend in visually—kids are much more likely to eat vegetables they can’t immediately identify. This adds roughly 30-40 calories and 2-3 grams of additional fiber per serving, plus micronutrients from the vegetables.
More Family-Friendly Recipes
- 4 Cheese Macaroni And Cheese Recipe Baked – if your family loves cheese as much as mine does, this creamy baked pasta dish delivers that same indulgent comfort in a different format
- Boneless Chicken Breast Recipe – the perfect protein to serve alongside these potatoes for a complete, restaurant-quality family dinner
- Best Beef And Ale Pie Recipe – a hearty, warming main dish that’s elevated when served with these creamy cheesy potatoes on the side
I come back to this recipe again and again, not just because it’s delicious, but because of what it represents: simple food made with intention, shared around a table with people you love. When my kids help me peel potatoes or grate cheese, they’re not just learning cooking skills—they’re learning that food prepared with care tastes better, that their contributions matter, and that the kitchen is a place where magic happens. Those Sunday afternoons cooking with my own mother and grandmother shaped who I became as a dietitian and as a person. My deepest hope is that when you make this recipe with your family, you’re creating those same lasting memories. Hope you find joy in every recipe!