
Butter Chicken Curry Recipe
 By
By This post contains affiliate links. As an Amazon Associate I earn from qualifying purchases.
I’m going to be honest with you—when life gets chaotic, dinner is usually the first thing to crumble. You’re exhausted, the kids are hungry, and suddenly you’re ordering takeout for the third time this week. But here’s what changed everything for me: making this butter chicken curry recipe once on Sunday and eating beautifully all week. One batch of this creamy, aromatic Indian classic transforms into five completely different meals without any of that “leftover” boredom. Serve it over rice on Monday, wrap it in naan on Wednesday, toss it with pasta on Friday—this is the meal prep recipe that actually keeps you excited about what’s in your container. If you’re looking for other versatile make-ahead recipes, my Cauliflower Korma Recipe works the same magic for vegetarian nights.
Butter Chicken Curry Recipe Meal Prep: Cook Once, Eat All Week
I discovered meal prepping completely by accident. It was a Tuesday night—I was working late at the clinic, the kids had soccer practice, and my partner texted asking what was for dinner. My heart sank. I had nothing planned, nothing thawed, nothing ready. That night, we ordered pizza for the fourth time that month, and I felt that familiar guilt wash over me. I knew better. I’m a registered dietitian, for crying out loud. I understand nutrition, I love cooking, and yet here I was defaulting to convenience foods because I hadn’t planned ahead.
The next Sunday, something clicked. Instead of cooking individual meals throughout the week, I decided to make one massive batch of my grandmother’s butter chicken curry—the same recipe she taught me to make in her kitchen when I was eight years old. I made enough for the entire week, stored it in glass containers, and suddenly my whole week transformed. Monday’s dinner was ready in five minutes. Wednesday’s lunch came together without stress. By Friday, I wasn’t scrambling—I was confidently serving a home-cooked meal my family actually wanted to eat.
That single decision changed how I approach busy seasons. And now, after years of refining this system and using my clinical nutrition background to understand food stability and nutrient retention, I’m sharing exactly how to make this work for your family too.

Why This Recipe Is Perfect for Meal Prep
- Saves 25 minutes of active cooking time per day — Instead of chopping, sautéing, and simmering every evening, you’re simply reheating. That’s roughly two hours of your week reclaimed for what actually matters.
- Holds beautifully for five days in the refrigerator — Unlike delicate proteins that dry out, the cream-based sauce actually keeps the chicken incredibly tender and moist throughout the week. The spices continue developing flavor, so day three tastes even better than day one.
- Works with literally any carbohydrate or vegetable — Rice, naan, pasta, quinoa, cauliflower rice, roasted potatoes—this curry adapts to whatever you’re craving or what you have on hand. No single-use meal prep boredom here.
- Freezes for future weeks — Make a double batch and freeze half for a future busy week. You’re essentially banking time and nutrition for your future self.
- Affordable protein source for the whole family — Chicken is budget-friendly, and making it once in bulk drops your per-serving cost significantly compared to restaurant versions.
Your Weekly Meal Plan With This Recipe
Here’s exactly how one batch becomes five completely different dinners and lunches. I’m showing you my actual system—the one I use when my schedule is packed and my energy is low.
- Monday Dinner: Traditional Butter Chicken Over Basmati Rice — Serve the curry warm over fluffy basmati rice with a dollop of yogurt and fresh cilantro. Pair with a simple salad or roasted vegetables for balance.
- Tuesday Lunch: Butter Chicken Naan Wraps — Warm the curry gently, wrap it in store-bought naan or flatbread with cucumber slices and fresh mint. These are perfect for packed lunches and taste even better at room temperature.
- Wednesday Dinner: Creamy Butter Chicken Pasta — Toss the curry with cooked penne or rigatoni for an Indian-fusion pasta night. The sauce clings beautifully to the pasta, and kids actually eat their vegetables when they’re hidden in curry sauce.
- Thursday Lunch: Butter Chicken Grain Bowl — Layer quinoa or farro with the curry, roasted vegetables, fresh greens, and a squeeze of lime juice. Suddenly it’s a completely different meal that feels restaurant-quality.
- Friday Dinner: Butter Chicken Stuffed Sweet Potatoes — Bake sweet potatoes and fill them with warmed curry, a sprinkle of cheese, and fresh herbs. It’s comfort food that feels like you spent hours in the kitchen—but you didn’t.
The Ingredients – Scaled for a Full Week
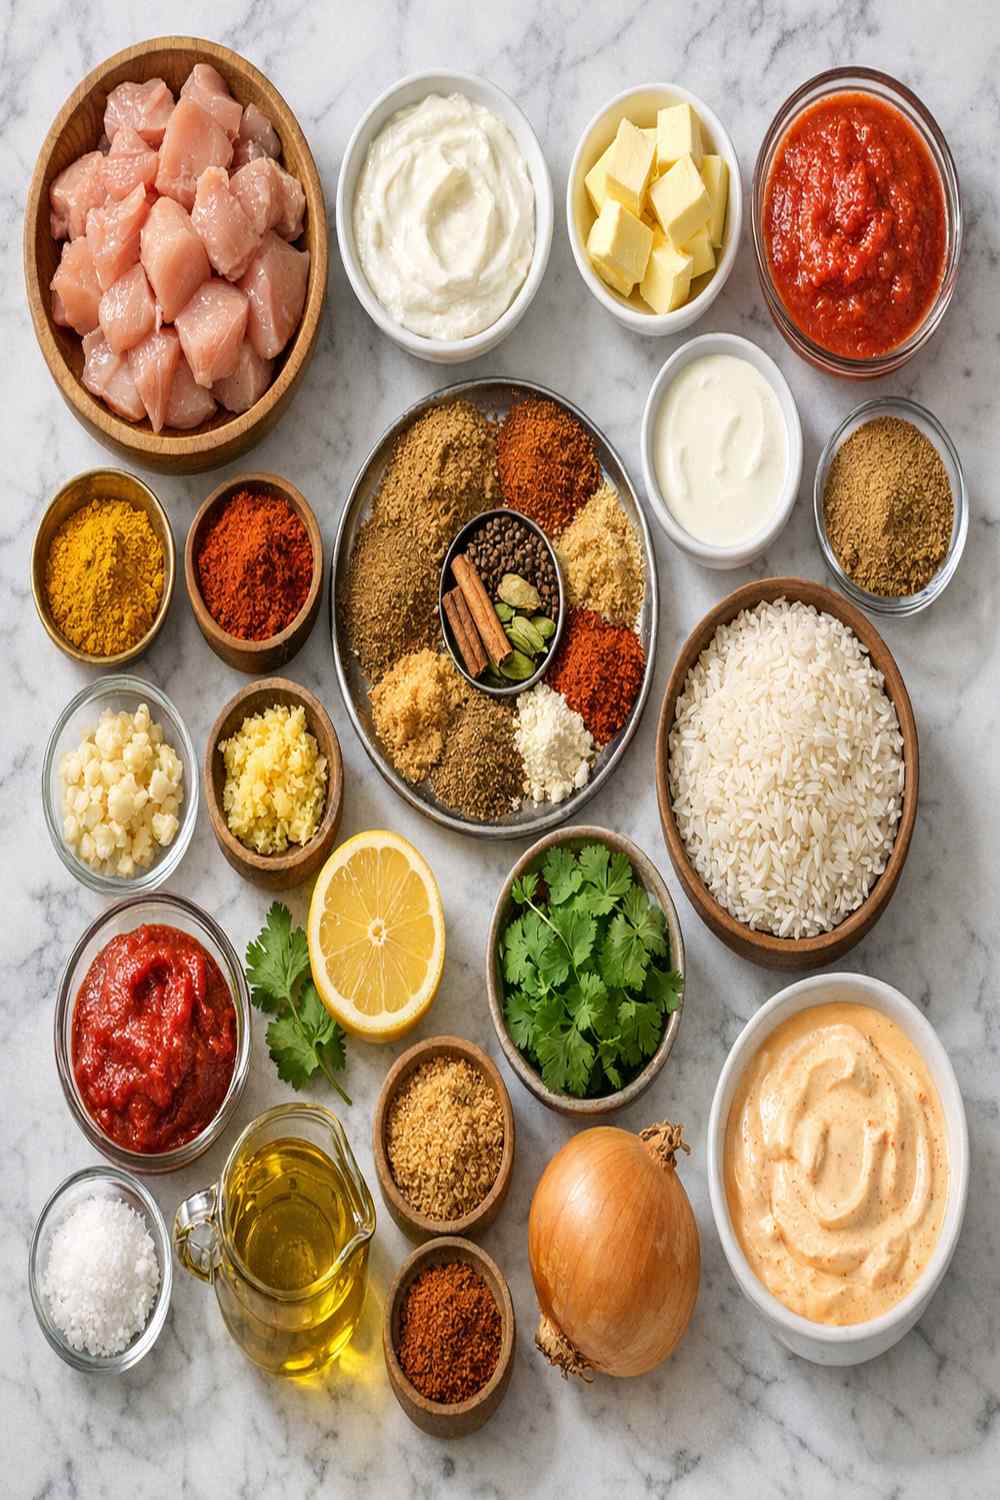
I’m giving you ingredients for six generous servings—enough for a family of four with lunches included, or perfect for a couple who love leftovers. All measurements are exact, and I’ve included storage tips because how you store these ingredients matters as much as how you cook them.
For the Chicken Marinade
- 1 pound boneless chicken breast (cut into 1-inch pieces for even cooking and faster marinating)
- 1 teaspoon lemon juice (fresh squeezed, not bottled—the acidity tenderizes the chicken)
- ½ teaspoon Kashmiri red chili powder (or high-quality paprika if you prefer less heat; adjust based on your family’s preference)
- ⅓ cup Greek yogurt (thick and full-fat creates the most tender chicken; hung curd works beautifully too)
- 1 teaspoon dried fenugreek leaves or kasuri methi (this is the secret ingredient—store in an airtight container away from light)
- ¾ teaspoon garam masala (adjust to your spice comfort level)
- ¼ teaspoon fine sea salt (adjust to taste throughout cooking)
- ¾ tablespoon fresh ginger-garlic paste (or combine ½ tablespoon freshly grated ginger with ½ tablespoon minced garlic)
- ½ teaspoon ground cumin (optional; adds warmth without heat)
- 1 teaspoon ground coriander (brings brightness and freshness)
- ⅛ teaspoon ground turmeric (optional but traditional; adds earthy depth and anti-inflammatory benefits)
For the Sauce Base
- 1 cinnamon stick about 2 inches long (optional but transforms the flavor; remove before serving)
- 1.3 pounds fresh tomatoes, roughly chopped (or substitute 1 cup tomato passata or ⅓ cup concentrated tomato paste; fresh tomatoes create the best flavor, but canned works when necessary)
- 4 whole cloves (optional; a little goes a long way)
- 1½ cups thinly sliced yellow onions (about 2 medium onions; sauté separately to reduce acidity from tomatoes)
- 4 green cardamom pods (optional; adds complexity and warmth)
- 2 tablespoons neutral oil (like avocado or vegetable oil for high-heat cooking)
- 3 tablespoons unsalted butter or ghee, divided (the butter creates that rich, nourishing flavor profile)
For the Creamy Finish
- 2 tablespoons fresh cilantro leaves, finely chopped (for garnish; store separately until serving)
- 1 teaspoon organic cane sugar (balances the acidity from tomatoes and adds subtle sweetness—trust this step)
- 1½ cups hot water (to build your gravy to the perfect consistency)
- ½ cup water (for blending the cashew cream)
- 1½ teaspoons garam masala (divided; add half during cooking, half for garnish and final flavor)
- ¾ teaspoon fine sea salt (adjust based on your ingredients and preference)
- 1 cup raw cashews (about 140 grams; soaked in hot water for 10 minutes to soften—this creates the silkiest sauce imaginable)
- ½ teaspoon ground cumin powder (optional but recommended)
- ½ tablespoon dried fenugreek leaves (that magic ingredient again)
- 2 teaspoons Kashmiri chili powder (reduce for families with young children or sensitive palates)
- 1½ teaspoons ground coriander powder (optional; adds subtle sweetness)
- ¾ tablespoon fresh ginger-garlic paste (same ratio as above—fresh is essential here)
- ⅓ cup heavy whipping cream, divided (full-fat is essential; this is where the richness comes from)
- 2 green chili peppers (optional; deseed if you want less heat, or leave whole for flavor without burning spice)
- 2 teaspoons garam masala (reserved for final seasoning and garnish)
The Meal Prep Process: How to Make Butter Chicken Curry Recipe in Bulk
I’m going to walk you through my exact system—the one I’ve refined over hundreds of meals. This isn’t just a recipe; it’s an efficient cooking strategy that saves time without sacrificing flavor or nutrition. Block out about 50 minutes on Sunday, and you’re done for the week.
Step 1: Prep and Marinate Your Chicken (10 minutes active, 30 minutes passive)
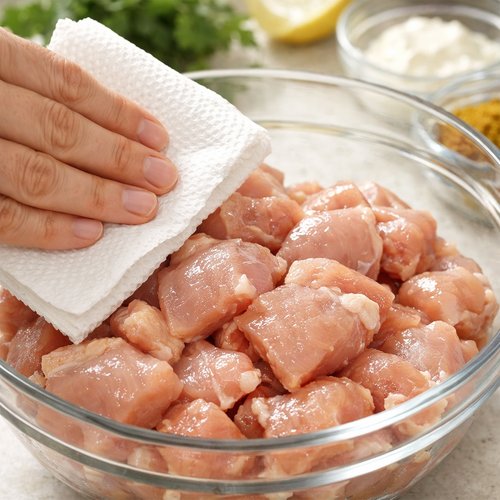
Pat your chicken pieces completely dry with paper towels—this is crucial because moisture prevents proper marinating. Place the dried chicken in a large mixing bowl and immediately add the lemon juice, Kashmiri chili powder, and salt. Toss thoroughly for about one minute—you’re breaking down the protein structure and allowing the salt to start tenderizing the meat.
Now add your yogurt, kasuri methi, oil, turmeric, ginger-garlic paste, coriander powder, cumin powder, and garam masala. Mix with your hands for maximum contact between marinade and chicken—this is faster than a spoon and helps every piece get evenly coated. Cover the bowl with plastic wrap and set it aside for at least 30 minutes. I typically prep this first thing on Sunday morning, let it sit while I drink my coffee, then move to the next step.
Step 2: Sauté Your Onions Separately (7 minutes)
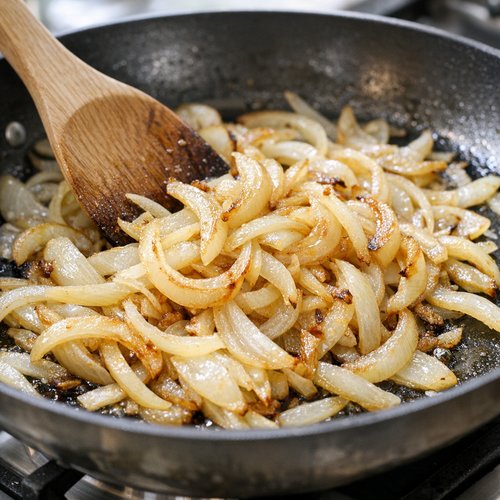
While your chicken marinates, heat 1 tablespoon of oil in a large skillet over medium-high heat. Add your sliced onions and sauté for 7-8 minutes until they’re deeply golden and caramelized. This step is often skipped in quick recipes, but I include it because it reduces the acidity that raw onions add to tomatoes—your curry will taste more balanced and less sharp, especially by day four when you’re reheating it.
Transfer your caramelized onions to a small bowl and let them cool completely. This takes about 5 minutes and you can use this time to prep your cashews.
Step 3: Create Your Cashew Cream (5 minutes)
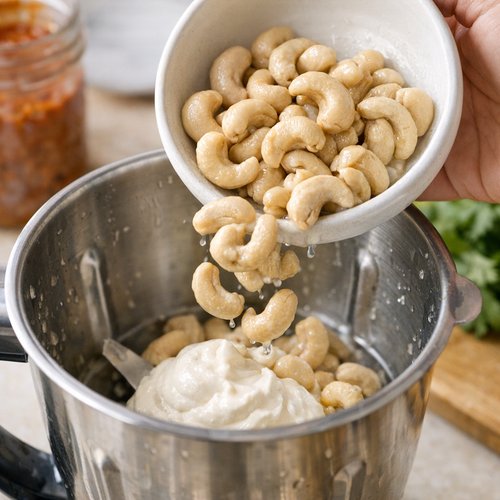
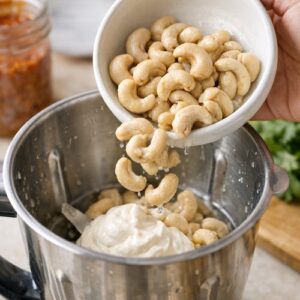
While your onions cool, pour hot water over your raw cashews in a small bowl and let them soak. After exactly 10 minutes, drain them completely and add them to your blender with the fresh tomatoes, cooled caramelized onions, fresh ginger-garlic paste, and green chilies if using. Blend on high until completely smooth—this should take about 90 seconds. If your blender is struggling, add a bit more water, one tablespoon at a time.
The resulting sauce should be silky and pourable, like heavy cream. Pour it through a fine-mesh strainer if you prefer an ultra-smooth texture, though this step is optional. This sauce base is the foundation of everything, so take your time here—a smooth base creates a silky final curry.
Step 4: Build Your Flavor Foundation (8 minutes)
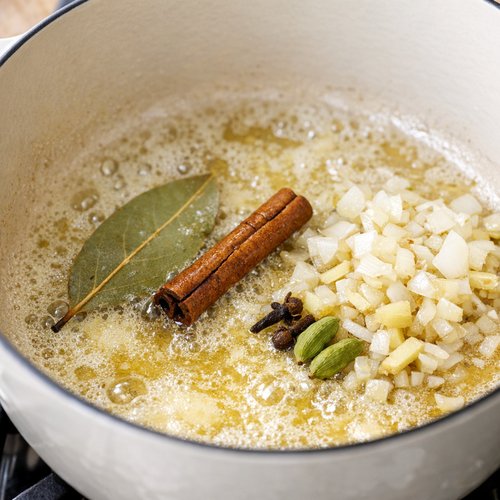
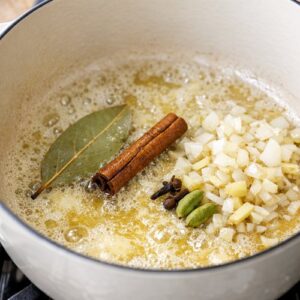
Heat 1½ tablespoons of butter in your largest Dutch oven or heavy-bottomed pot over medium heat. Once melted and foaming, add your cinnamon stick, green cardamom pods, and whole cloves if using. Toast these whole spices for exactly 60 seconds—you’ll smell the transformation immediately. This is when the aromatics wake up and release their essential oils.
Now add your marinated chicken directly to the pot, working in batches if needed to avoid crowding. Let the chicken sit undisturbed for 2-3 minutes on each side before stirring—this creates a light sear that locks in flavor. You’re not trying to cook the chicken through; you just want a light golden exterior. This should take about 5-6 minutes total.
Step 5: Combine and Simmer (15 minutes)
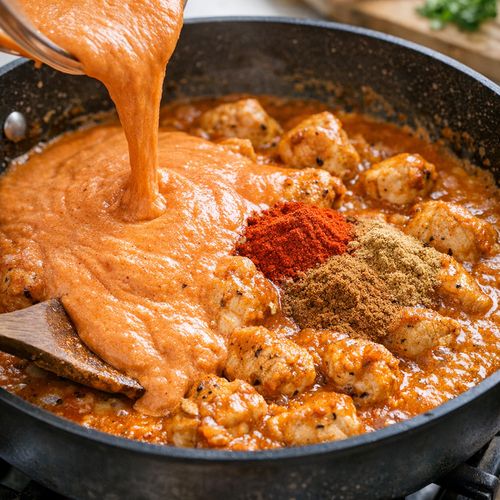
Pour your smooth cashew-tomato sauce directly over the chicken and stir gently to combine. Add the Kashmiri chili powder, garam masala, coriander powder, cumin powder, salt, sugar, and dried fenugreek leaves. Stir thoroughly to distribute all spices evenly—uneven seasoning is the enemy of good meal prep.
Add your hot water and bring the mixture to a gentle simmer over medium heat. Simmer uncovered for 12-15 minutes, stirring occasionally. The curry should reduce slightly and the flavors should meld together. You’ll notice the oil beginning to separate slightly on top—this is exactly what you want. It means the cream is emulsifying beautifully with the tomato base.
Taste and adjust your seasonings at this point. Is it salty enough? Spicy enough? This is your chance to customize before you portion for the week. Remember, the curry will concentrate slightly as it cools and sits throughout the week, so season conservatively here.
Step 6: Finish With Cream and Final Touches (2 minutes)
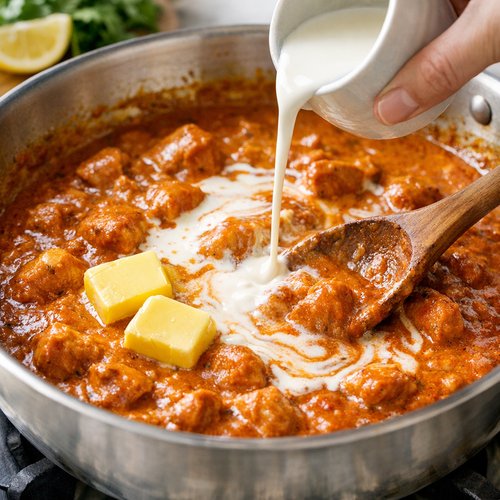
Remove your pot from the heat and stir in ⅓ cup of heavy cream. Add the remaining 1½ tablespoons of butter and stir until it’s completely melted and incorporated. The curry should look silky and luxurious at this point—that’s your signal that it’s done.
Remove the cinnamon stick, cardamom pods, and cloves if you used them. Pour the curry into a shallow pan or large bowl to cool to room temperature—this takes about 15-20 minutes. Do not skip the cooling step; hot curry will create condensation in your storage containers, which accelerates bacterial growth and reduces shelf life.
Storage and Organization System
- Borosilicate Glass Containers — I use glass over plastic because it doesn’t retain spice odors, doesn’t stain, and allows me to see exactly what’s inside at a glance. Divide your cooled curry into five containers with tight-fitting lids. Glass containers keep everything fresh for five full days and you can go straight from fridge to stovetop or microwave without transferring.
- Portioning Strategy for Maximum Freshness — Divide your curry into meal-sized portions (about 1.5 cups each) rather than one large container. Smaller containers mean you’re opening the fridge less frequently and exposing your entire batch to temperature fluctuations. Each time you open a container, condensation forms, which can introduce bacteria. Keep one container in the front of your fridge for immediate use and stack the others in the back, where temperatures stay most consistent.
- Clear Labeling System — Use a waterproof marker to label each container with the date you made it and the “eat by” date (day five). This takes 30 seconds but prevents that moment of standing at your fridge wondering how long something’s been there. I also note on mine “Serve over rice” or “Use for naan wraps” so different family members know exactly what to do with it.
How to Reheat Without Losing Quality
Stovetop Method (My Recommendation): This is how I reheat 90% of my curry because it distributes heat most evenly. Transfer your portion to a skillet or small saucepan and heat over medium heat, stirring occasionally, for 4-5 minutes until it’s warmed through and steaming. If it’s gotten thick, add 2-3 tablespoons of water or cream to loosen it back to the right consistency. Taste and adjust seasonings—sometimes a squeeze of fresh lemon juice or a pinch more garam masala brings everything back to life.
Microwave Method (For Rushed Mornings): Transfer your portion to a microwave-safe container, cover loosely (not tightly), and microwave on 50% power for 3-4 minutes, stirring halfway through. Lower power prevents the edges from overcooking while the center is still cold. If you only have 2 minutes, stir every 45 seconds for more even heating. The curry will stay creamy and the chicken will stay tender.
Oven Method (For Large Portions): If you’re reheating multiple portions for a family dinner, preheat your oven to 325°F, transfer your curry to an oven-safe dish, cover tightly with foil, and heat for 15-20 minutes until completely warmed through. This method is gentler on the cream base and allows the flavors to open back up as they warm gradually.
Can I Freeze Butter Chicken Curry Recipe?
Yes, absolutely—and this is my secret weapon for weeks when life gets even more chaotic than usual. Your curry freezes beautifully and stays fresh for up to three months, though I typically use mine within six weeks because the spice flavors begin to flatten slightly over longer periods.
How to Freeze: Let your curry cool completely to room temperature, then transfer it to freezer-safe containers or high-quality freezer bags. I prefer containers because they take up less space and allow me to see what I have, but bags work and take up minimal freezer real estate. Label with the date and “Butter Chicken Curry” so you’re not playing freezer mystery later.
Thawing and Reheating: Move your frozen curry from the freezer to the refrigerator the morning you want to use it—it will thaw overnight. Then reheat using the stovetop method above, which brings back all the creaminess and freshness. In a pinch, you can reheat directly from frozen using the microwave method (increasing time to 8-10 minutes, stirring every 2 minutes), though I don’t recommend this because the cream separates slightly. The stovetop thaw-and-reheat method takes 15 minutes total and gives you restaurant-quality curry.
Important Note: Do not freeze the curry with all the cream already mixed in if you plan to freeze for longer than two weeks. The cream can separate slightly during long-term freezing. Instead, freeze the curry base (everything except the final cream addition) and stir in ⅓ cup fresh heavy cream when you reheat. Your curry will be indistinguishable from the original.
Nutrition Information
Per serving (one portion of curry over rice): 385 calories, 24g protein, 18g fat, 8g carbohydrates, 2g fiber, 6g sugar, 520mg sodium, 380mg potassium. These numbers are based on USDA food composition data and account for the full recipe divided into six servings.
Here’s what I love about this curry from a nutritional standpoint: The chicken provides lean, complete protein that keeps you satisfied throughout your day. The cashew cream contributes heart-healthy monounsaturated fats and magnesium, which supports energy and muscle recovery. The spices—particularly the turmeric and ginger—contain polyphenols and gingerols, compounds with documented anti-inflammatory benefits. When you eat this meal on Tuesday, the nutritional value is exactly the same as Monday, which means you’re getting consistent, nourishing meals all week without the stress of daily cooking.
The beauty of meal prepping this curry is that you’re not tempted by takeout versions loaded with extra sugar and sodium. One homemade batch contains about 520mg sodium per serving; many restaurant versions contain double that. That’s a significant difference across a week of eating.
What to Pair With Butter Chicken Curry Recipe Throughout the Week
The curry itself is complete, but pairing it with different sides keeps your palate engaged and adds nutritional variety. Here’s how I rotate sides throughout the week to prevent that meal-prep fatigue.
- Monday: Fluffy Basmati Rice — The classic pairing that lets the curry shine. Cook 1 cup basmati rice in 1¾ cups water with a pinch of salt. It’s simple, it’s perfect, and it soaks up the sauce beautifully.
- Tuesday: Warm Naan or Flatbread — Wrap your curry in store-bought naan (or make your own if you’re feeling ambitious). Add cucumber slices, fresh mint leaves, and a dollop of cooling yogurt. Completely different eating experience, same curry.
- Wednesday: Penne Pasta or Rigatoni — Toss 8 ounces cooked pasta with your curry. Finish with fresh parmesan cheese and fresh basil for an Indian-fusion situation. It works better than it has any right to.
- Thursday: Grain Bowl with Roasted Vegetables — Layer quinoa or farro with roasted broccoli (toss with lemon and garlic), roasted sweet potato chunks, fresh greens, and your curry. Top with toasted cashews and fresh cilantro. This turns dinner into a restaurant-style bowl.
- Friday: Stuffed Sweet Potatoes — Bake large sweet potatoes and fill them with your warmed curry. Top with shredded cheese, fresh herbs, and a squeeze of lime. It’s comfort food that feels special. If you’re looking for another creative sweet potato application, try my Butternut Squash Spinach Recipe for a different flavor profile.
Expert’s Nutritional Tip: The Magic of Spices
As a registered dietitian, I want to highlight something that often gets overlooked: the spices in this curry aren’t just about flavor—they’re delivering real nutritional benefits. Turmeric contains curcumin, a polyphenol with significant anti-inflammatory properties documented in peer-reviewed nutrition research. Fresh ginger provides gingerols, which support digestive health and reduce inflammatory markers. Fenugreek (kasuri methi) contains compounds that support stable blood sugar.
Here’s what matters for meal prep specifically: these compounds remain stable during refrigeration and reheating. Unlike vitamin C, which can degrade over time, the anti-inflammatory polyphenols in these spices actually increase slightly as the curry sits for a day or two. That means your day-four curry is nutritionally just as beneficial as day-one curry, making this the perfect investment of your Sunday cooking time.
Make-Ahead Guide: Building Your Sunday System
I’ve taught this system to clients who feel overwhelmed by “meal prep,” and here’s what makes it work: you’re not trying to meal prep 21 meals. You’re making one dish really well, once. Here’s my exact Sunday workflow:
2:00 PM: Chop all your ingredients while listening to a podcast. Have everything prepped and ready on your counter. This takes about 12 minutes. Immediately put your chicken in its marinade and set a timer for 30 minutes.
2:12 PM: While the chicken marinates, sauté your onions and prep your cashew cream. You’re using downtime between steps efficiently.
2:45 PM: Start cooking your curry. From this point, it’s about 30 minutes of active cooking (with lots of passive simmering time).
3:15 PM: Your curry is done. Pour it into a shallow pan to cool while you prep your containers and clean your kitchen. Everything is cleaned up by 3:45 PM.
4:00 PM: Curry is cooled. Portion it into containers. Label everything. You’re done.
That’s it. One hour of your Sunday gives you five dinners. Compare that to 25 minutes × 5 nights = 125 minutes of cooking throughout the week, plus shopping time, plus mental energy. Suddenly that Sunday hour feels like the best investment of your entire week.
Common Mistakes to Avoid
Mistake #1: Overcrowding the Pan When Searing Chicken — I see this constantly. People add all the marinated chicken at once, which causes it to steam instead of sear. Work in batches. Your first batch takes 6 minutes total; your second batch takes 4 minutes because the pan is already hot. Total time saved: maybe 2 minutes. Flavor gained: everything. Patience here creates a curry that tastes 100% better.
Mistake #2: Skipping the Caramelized Onion Step — Raw onions introduce acidity and don’t integrate as smoothly into the sauce. Caramelized onions taste sweeter and meld into the sauce seamlessly. That 7-minute step changes everything. Don’t skip it.
Mistake #3: Not Cooling the Curry Before Storing — Hot food introduces steam into your containers, which creates condensation and accelerates spoilage. Let it cool completely to room temperature (about 20 minutes in a shallow pan) before sealing. Those 20 minutes extend your curry’s shelf life by a full day.
Mistake #4: Making Individual Portions When Cooking — Cook the whole batch together. The curry develops flavor better in a larger volume, and everything integrates better when you’re not dividing and sectioning. Make it all at once, then portion once it’s cooled.
Seasonal Variations: How to Adapt This Recipe Year-Round
Spring Version (March-May): Add fresh peas (½ cup) during the final 5 minutes of cooking and fresh mint leaves at the end. The brightness of spring peas and mint prevents the curry from feeling heavy when the weather is warming up. Serve over lighter grains like farro or barley.
Summer Version (June-August): Reduce the cream to ¼ cup and add an extra squeeze of fresh lime juice at the end. Serve cold or at room temperature over a grain salad with fresh vegetables. The lighter version works beautifully when you don’t want a heavy, warming curry.
Fall Version (September-November): Add 1 teaspoon of smoked paprika and ½ cup roasted butternut squash cubes during the simmer. The earthiness of fall squash complements the spices beautifully. Serve over roasted root vegetables or wild rice for a grounded, warming meal.
Winter Version (December-February): This is the time for the full-richness version exactly as written. Consider adding ⅓ cup of coconut cream in addition to the heavy cream for an ultra-luxurious texture. Serve over creamy polenta or hearty brown rice. Winter is when you want that nourishing, warming richness.

Butter Chicken Curry Recipe
Ingredients
Method
- Pat your chicken pieces completely dry with paper towels—this is crucial because moisture prevents proper marinating. Place the dried chicken in a large mixing bowl and immediately add the lemon juice, Kashmiri chili powder, and salt. Toss thoroughly for about one minute—you're breaking down the protein structure and allowing the salt to start tenderizing the meat. Now add your yogurt, kasuri methi, oil, turmeric, ginger-garlic paste, coriander powder, cumin powder, and garam masala. Mix with your hands for maximum contact between marinade and chicken—this is faster than a spoon and helps every piece get evenly coated. Cover the bowl with plastic wrap and set it aside for at least 30 minutes. I typically prep this first thing on Sunday morning, let it sit while I drink my coffee, then move to the next step.

- While your chicken marinates, heat 1 tablespoon of oil in a large skillet over medium-high heat. Add your sliced onions and sauté for 7-8 minutes until they're deeply golden and caramelized. This step is often skipped in quick recipes, but I include it because it reduces the acidity that raw onions add to tomatoes—your curry will taste more balanced and less sharp, especially by day four when you're reheating it. Transfer your caramelized onions to a small bowl and let them cool completely. This takes about 5 minutes and you can use this time to prep your cashews.

- While your onions cool, pour hot water over your raw cashews in a small bowl and let them soak. After exactly 10 minutes, drain them completely and add them to your blender with the fresh tomatoes, cooled caramelized onions, fresh ginger-garlic paste, and green chilies if using. Blend on high until completely smooth—this should take about 90 seconds. If your blender is struggling, add a bit more water, one tablespoon at a time. The resulting sauce should be silky and pourable, like heavy cream. Pour it through a fine-mesh strainer if you prefer an ultra-smooth texture, though this step is optional. This sauce base is the foundation of everything, so take your time here—a smooth base creates a silky final curry.
- Heat 1½ tablespoons of butter in your largest Dutch oven or heavy-bottomed pot over medium heat. Once melted and foaming, add your cinnamon stick, green cardamom pods, and whole cloves if using. Toast these whole spices for exactly 60 seconds—you'll smell the transformation immediately. This is when the aromatics wake up and release their essential oils. Now add your marinated chicken directly to the pot, working in batches if needed to avoid crowding. Let the chicken sit undisturbed for 2-3 minutes on each side before stirring—this creates a light sear that locks in flavor. You're not trying to cook the chicken through; you just want a light golden exterior. This should take about 5-6 minutes total.
- Pour your smooth cashew-tomato sauce directly over the chicken and stir gently to combine. Add the Kashmiri chili powder, garam masala, coriander powder, cumin powder, salt, sugar, and dried fenugreek leaves. Stir thoroughly to distribute all spices evenly—uneven seasoning is the enemy of good meal prep. Add your hot water and bring the mixture to a gentle simmer over medium heat. Simmer uncovered for 12-15 minutes, stirring occasionally. The curry should reduce slightly and the flavors should meld together. You'll notice the oil beginning to separate slightly on top—this is exactly what you want. It means the cream is emulsifying beautifully with the tomato base. Taste and adjust your seasonings at this point. Is it salty enough? Spicy enough? This is your chance to customize before you portion for the week. Remember, the curry will concentrate slightly as it cools and sits throughout the week, so season conservatively here.

- Remove your pot from the heat and stir in ⅓ cup of heavy cream. Add the remaining 1½ tablespoons of butter and stir until it's completely melted and incorporated. The curry should look silky and luxurious at this point—that's your signal that it's done. Remove the cinnamon stick, cardamom pods, and cloves if you used them. Pour the curry into a shallow pan or large bowl to cool to room temperature—this takes about 15-20 minutes. Do not skip the cooling step; hot curry will create condensation in your storage containers, which accelerates bacterial growth and reduces shelf life.

FAQs
Can I Use Bone-In Chicken Thighs Instead of Breast?
Absolutely, and honestly, thighs might be even better for meal prep. They stay more tender throughout the week and have more flavor. Remove the skin and bones, cut the meat into 1-inch pieces, and follow the exact same recipe. The cooking time remains identical. Thighs are also usually cheaper than chicken breast, making this meal prep even more budget-friendly. This is what I do when I’m feeding a larger family.
What If I Don’t Eat Dairy or Need a Vegan Version?
Replace the yogurt in the marinade with 2 tablespoons of fresh lemon juice plus 2 tablespoons of water. For the sauce, blend the cashew cream as directed (cashews are vegan), then replace the heavy cream with full-fat coconut milk and use vegan butter instead of regular butter. The curry will be slightly less silky but still absolutely delicious. The cooking method remains exactly the same.
How Long Does This Actually Take From Start to Finish?
Active cooking time is about 30-35 minutes. Passive time (marinating, cooling) adds another 50 minutes. Total time from start to having sealed, labeled containers in your fridge: about 90 minutes. But you’re only actually cooking for about 35 of those minutes. The rest is waiting and letting things do their thing while you drink coffee or prep your containers.
Can I Make This in a Slow Cooker or Instant Pot?
Yes, though you’ll need to adjust the technique. For Instant Pot: Sauté the marinated chicken on the sauté setting (30 seconds per side), add your sauce ingredients, pressure cook on high for 8 minutes, then quick release. Finish with cream as directed. For slow cooker: Sear the chicken on stovetop first, add all ingredients to the slow cooker, and cook on low for 4 hours or high for 2 hours. The flavor won’t be quite as developed, but it works for busy weeks.
What If My Curry Separates or Looks Oily?
This is totally normal and fixable. The cream can separate from the tomato base, especially by day three or four. Simply reheat gently over low heat while stirring constantly, and the sauce will recombine. If it looks too oily, pour off some of the excess before reheating. This is cosmetic and doesn’t affect taste at all. If you want to prevent this from the start, make sure you’re not overcooking the curry during the initial simmer—simmer gently for 12-15 minutes, not 25.
More Meal Prep Recipes
- Cauliflower Korma Recipe — A vegetarian Indian classic that meal preps beautifully and tastes even better on day two when the spices have melded.
- Lemon Broccolini Recipe — A bright, simple side dish that pairs perfectly with your curry throughout the week and adds